
With all the hype about AI, LLMs, and the other trendy stuff, Newsletters are still the way to go for a lot of people to learn and even get entertained.
Take Substack, for example, millions scroll through its newsletters every month.
If you create content there, you may be familiar with this scenario: You hit “Publish,” grab the link, hop between Twitter, LinkedIn, and everywhere else, paste, tweak, and post. For one goal: Attracting more readers from social media to your Newsletter.
It spreads your content while eating your hours.
But we can automate it!!
By the way, we drop quick growth tips in our own Substack. Take a look here: https://nuelink.substack.com/
What Substack Social Media Automation Really Means
It’s a one-click system workflow that monitors your Substack feed 24/7, detects each new article the moment it goes live, auto-pulls the headline, cover image, and URL, write unique social media captions for it and instantly publishes the finished social media to every connected social account, Twitter, LinkedIn, Facebook, Instagram, and every platform you selected.
Picture this:
- You post a new issue on Substack.
- An automation tool spots it within minutes.
- It builds a social media caption, adds your link, adds hashtags, and publishes to every social media channel you picked. No copy-and-paste.
Why bother?
- Saves hours each week.
- Keeps feeds active even when you’re heads-down writing.
- Grows reach without remembering five different log-ins.
Best Ways to Share Substack Posts on Social Media
🛠️ Build-It-Yourself Automation
| Tool | What it does | Try it here |
|---|---|---|
| Make.com | Easy drag-and-drop flow: Substack ➜ formatter ➜ social sites | Boost Your Substack Reach |
| Zapier | Click to set a “zap”: new Substack post ➜ make social post | Automatically Post Substack Articles |
📣 Social Media Automation Tools
| Tool | Quick Take |
|---|---|
| Dlvr.it | Feeds in, posts out. Good for simple RSS Automation |
| Nuelink | Pulls your Substack URL directly, writes AI captions, schedules to 12 + social media platforms. |
Why Automations Workflows Aren’t Always Beneficial
Price Creeps Up Fast
Make and Zapier charge per task. A busy newsletter can burn through quotas in days.
Too Many Moving Parts
You juggle webhooks, API keys, and “iterator” steps. If you miss one simple thing, the entire workflow will break.
No Analytics
Neither tool shows how each social media performs. No built-in social analytics.
Mini Tech-Skill Needed
You still need to map fields, format variables, and debug errors. Not real coding, but not really easy either.
Nuelink vs Dlvr.it: Which Fits Substack Creators Best?
| Dlvr.it | Nuelink | |
|---|---|---|
| Starting price / month | $9.99 | $15 |
| Connects without RSS copy-paste | ❌ needs feed | ✅ paste Substack URL |
| AI captions | ❌ | ✅ |
| Smart filters / keywords | ❌ | ✅ Include / Exclude |
| Import past posts | No | Up to 100 |
| Social platforms | ~8 | 12 + |
| Follow-up comments / auto-retweet | ✅ | ✅ |
| Built-in analytics | Basic clicks only | Detailed post-level stats |
| Ideal for | Simple reposting | Creators who want “set it and forget it” depth |
For more technical details on how Nuelink automates Substack social media, visit the following page: Substack Social Media Automation feature page
How to Automatically Share Substack Newsletters to Social Media Using Nuelink
Step 1: Open a Nuelink Account
Sign up for Nuelink’s 14-day free trial to start automating your Substack newsletters to social media. Instantly share and promote your issues across 12+ platforms!
👉 Claim your 14-day free trial now
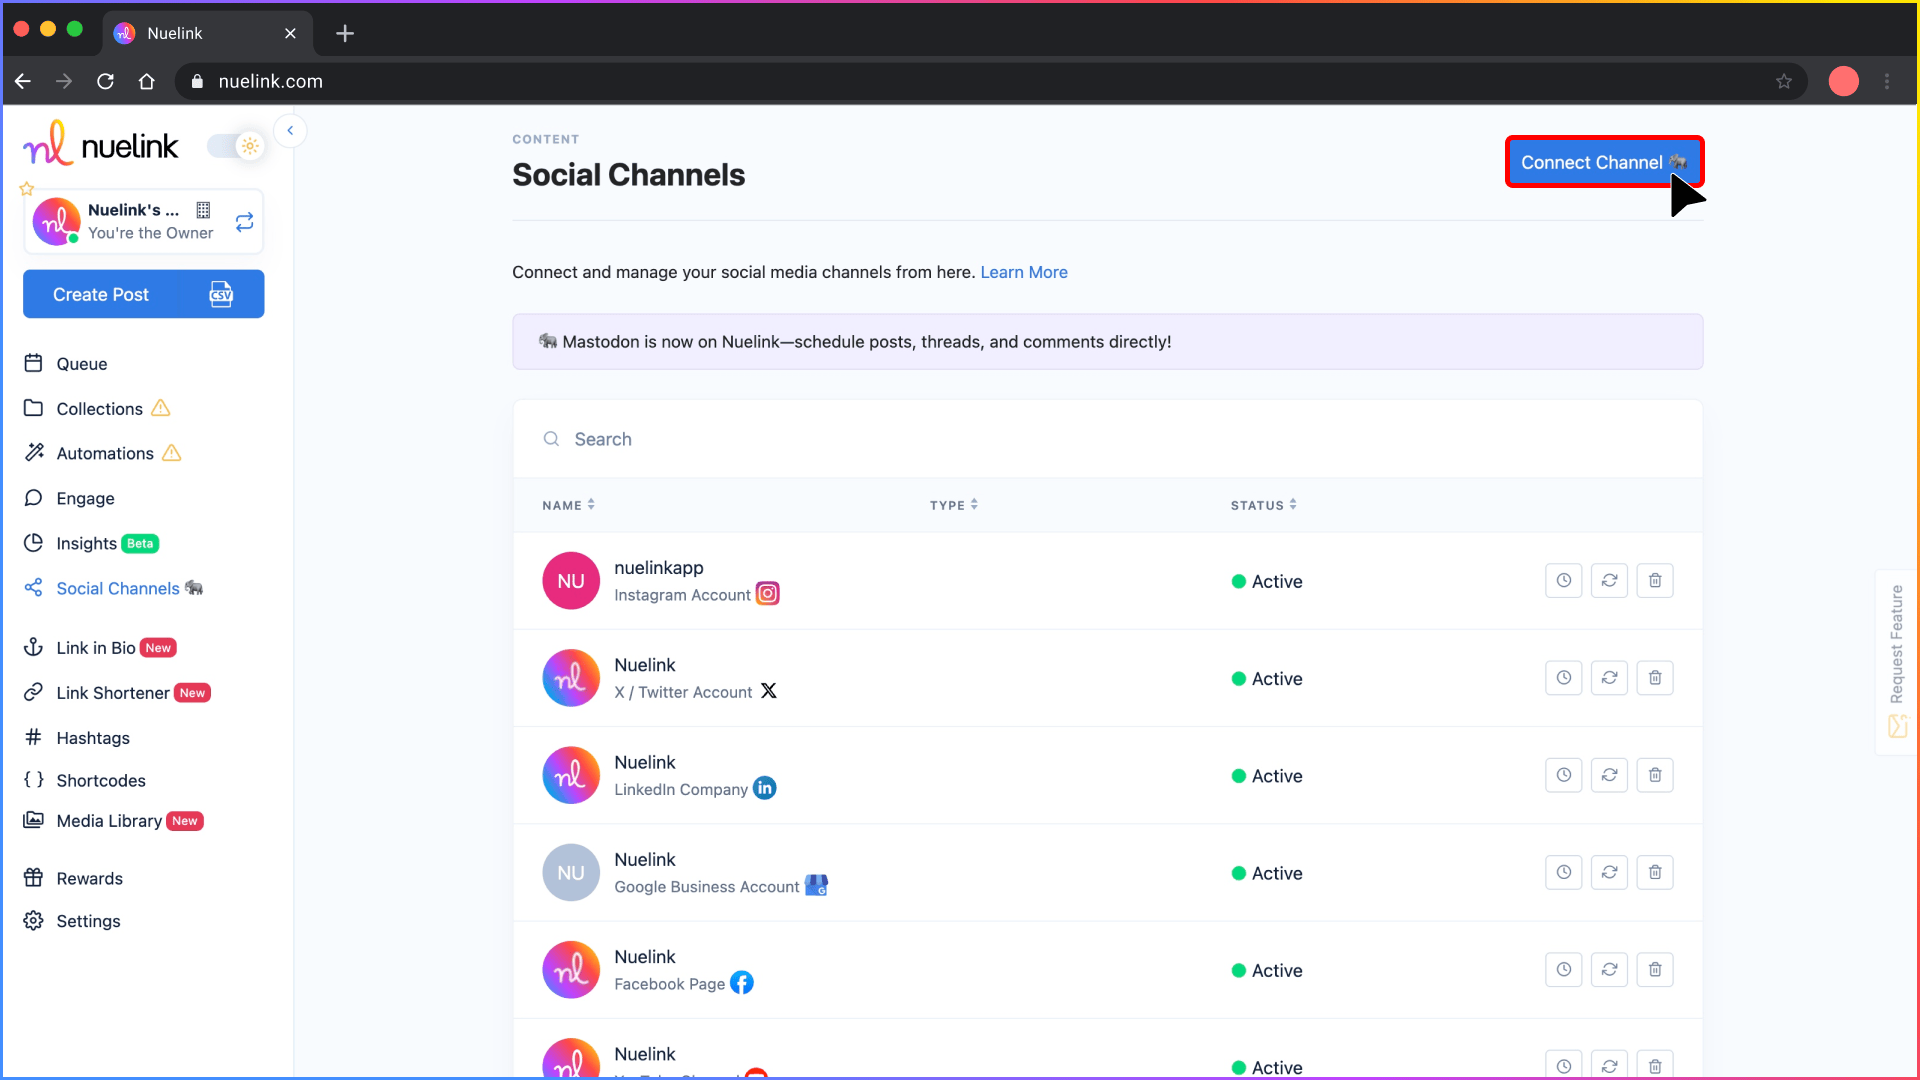
Step 2: Connect Your Social Media Channels
Once you're in, connect the social media platforms where you want to share and promote your Substack newsletters.
💡 Nuelink supports Instagram, X, LinkedIn, Bluesky, and many others.
Helpful resources:
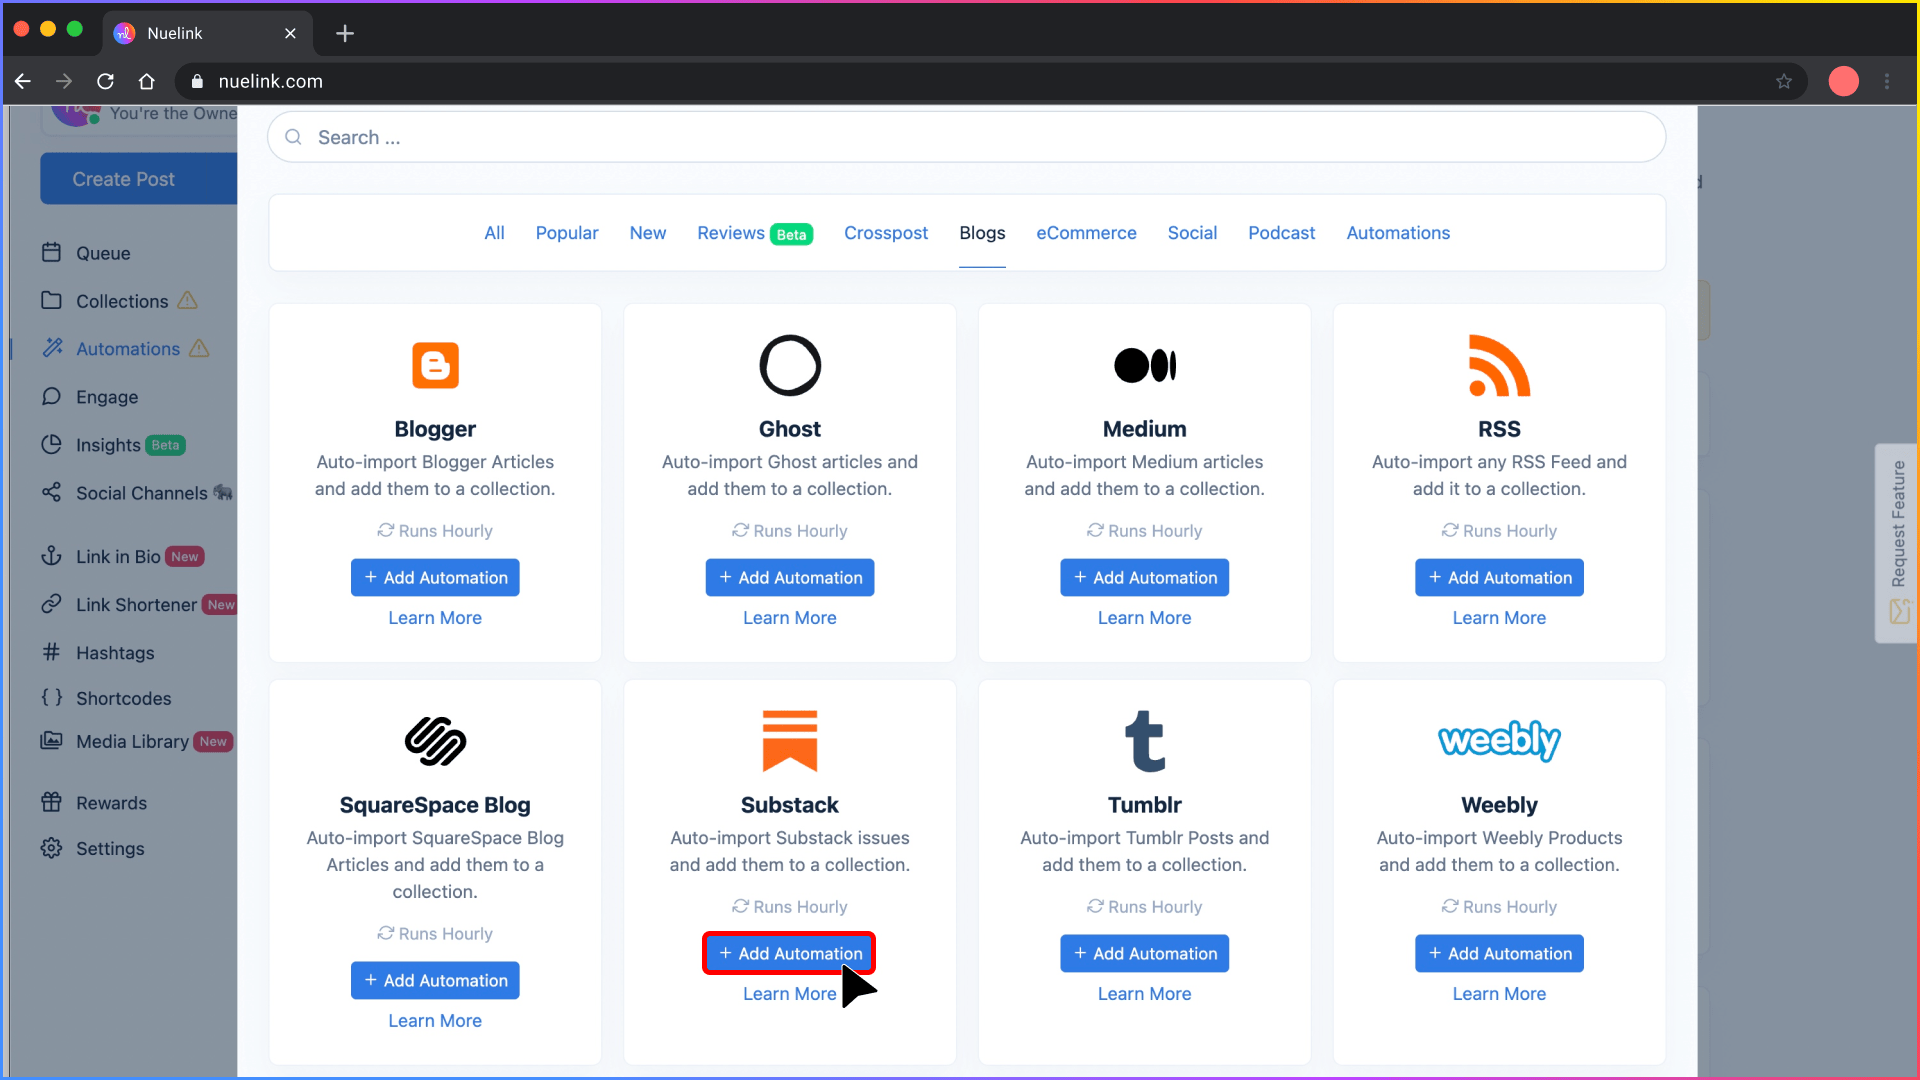
Step 3: Create a Substack Automation
1️⃣ In the left-hand menu, click 'Automations', then click 'Add Automation'.
2️⃣ Click on 'Blogs', then select Substack.
Step 4: Add Your Substack URL
Paste the link to your Substack newsletter.
💡 You can link either your main newsletter page or a specific section; both options work perfectly.
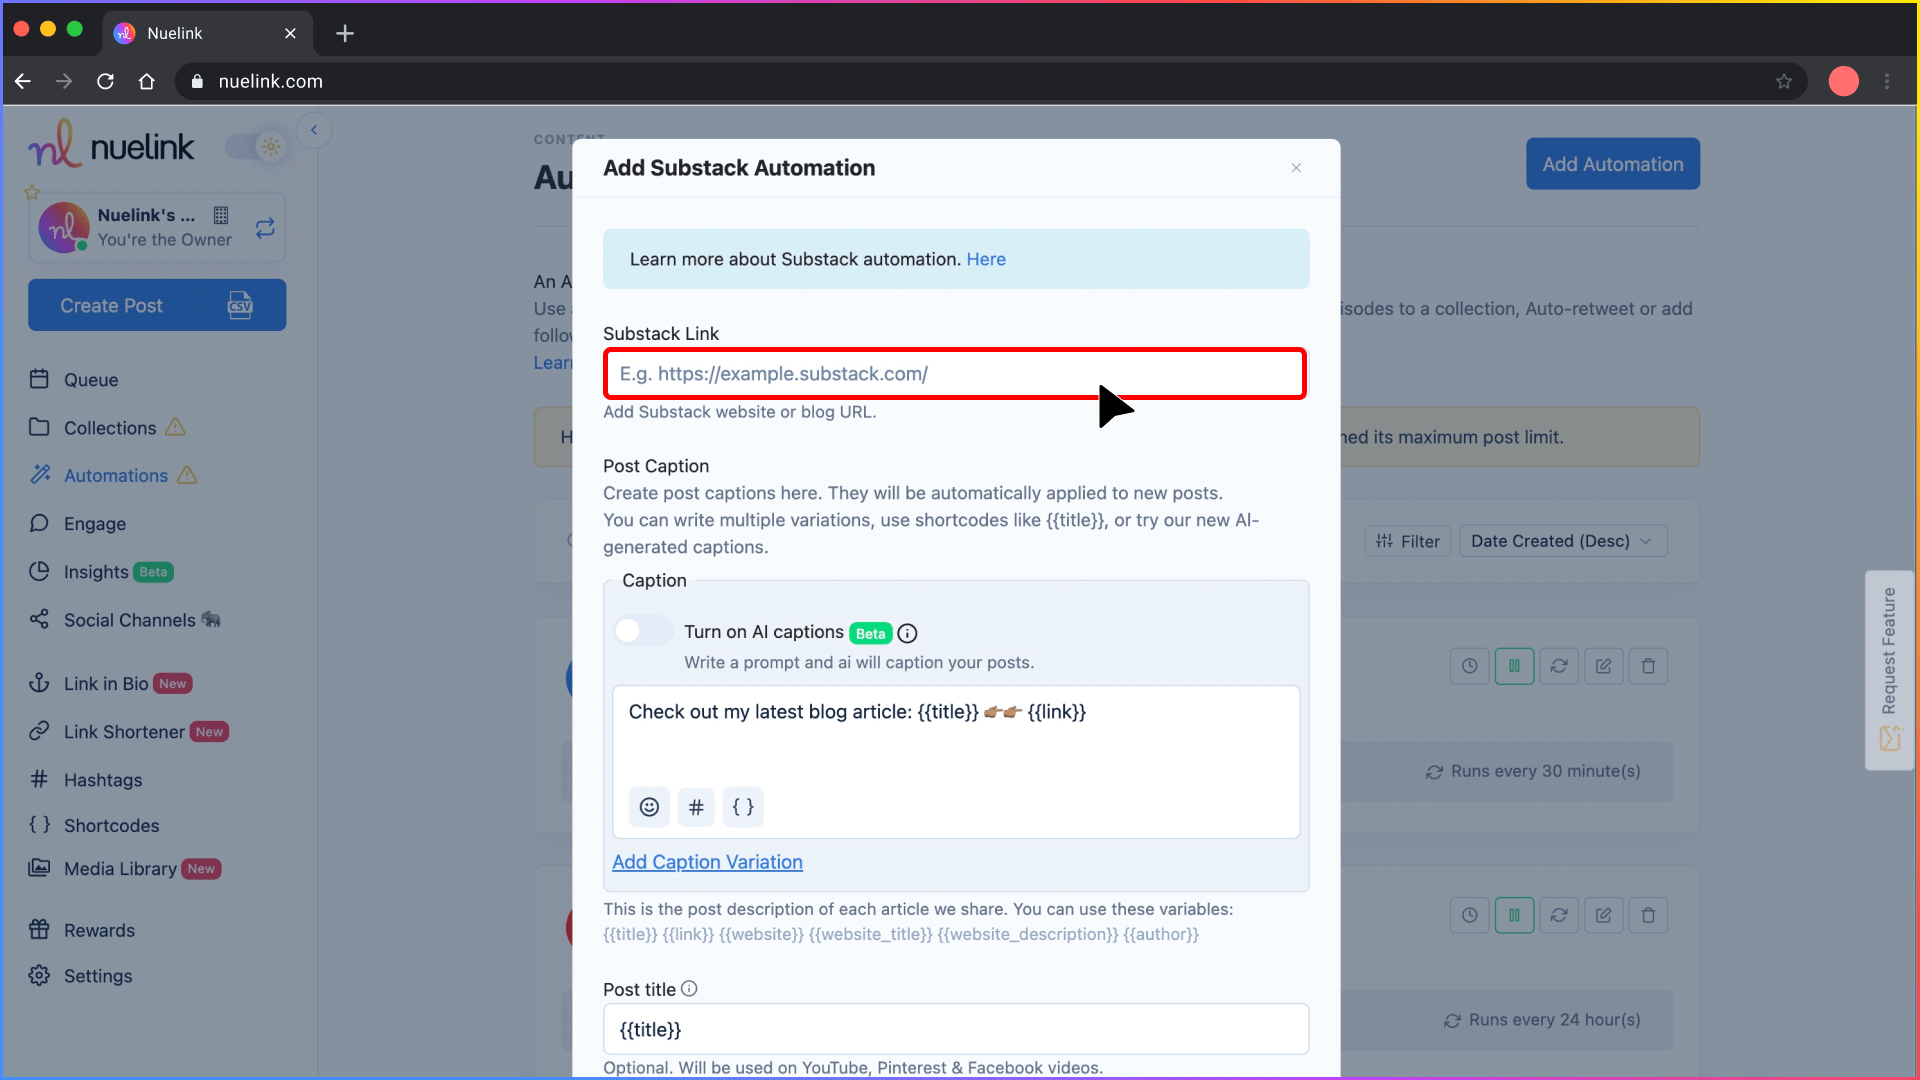
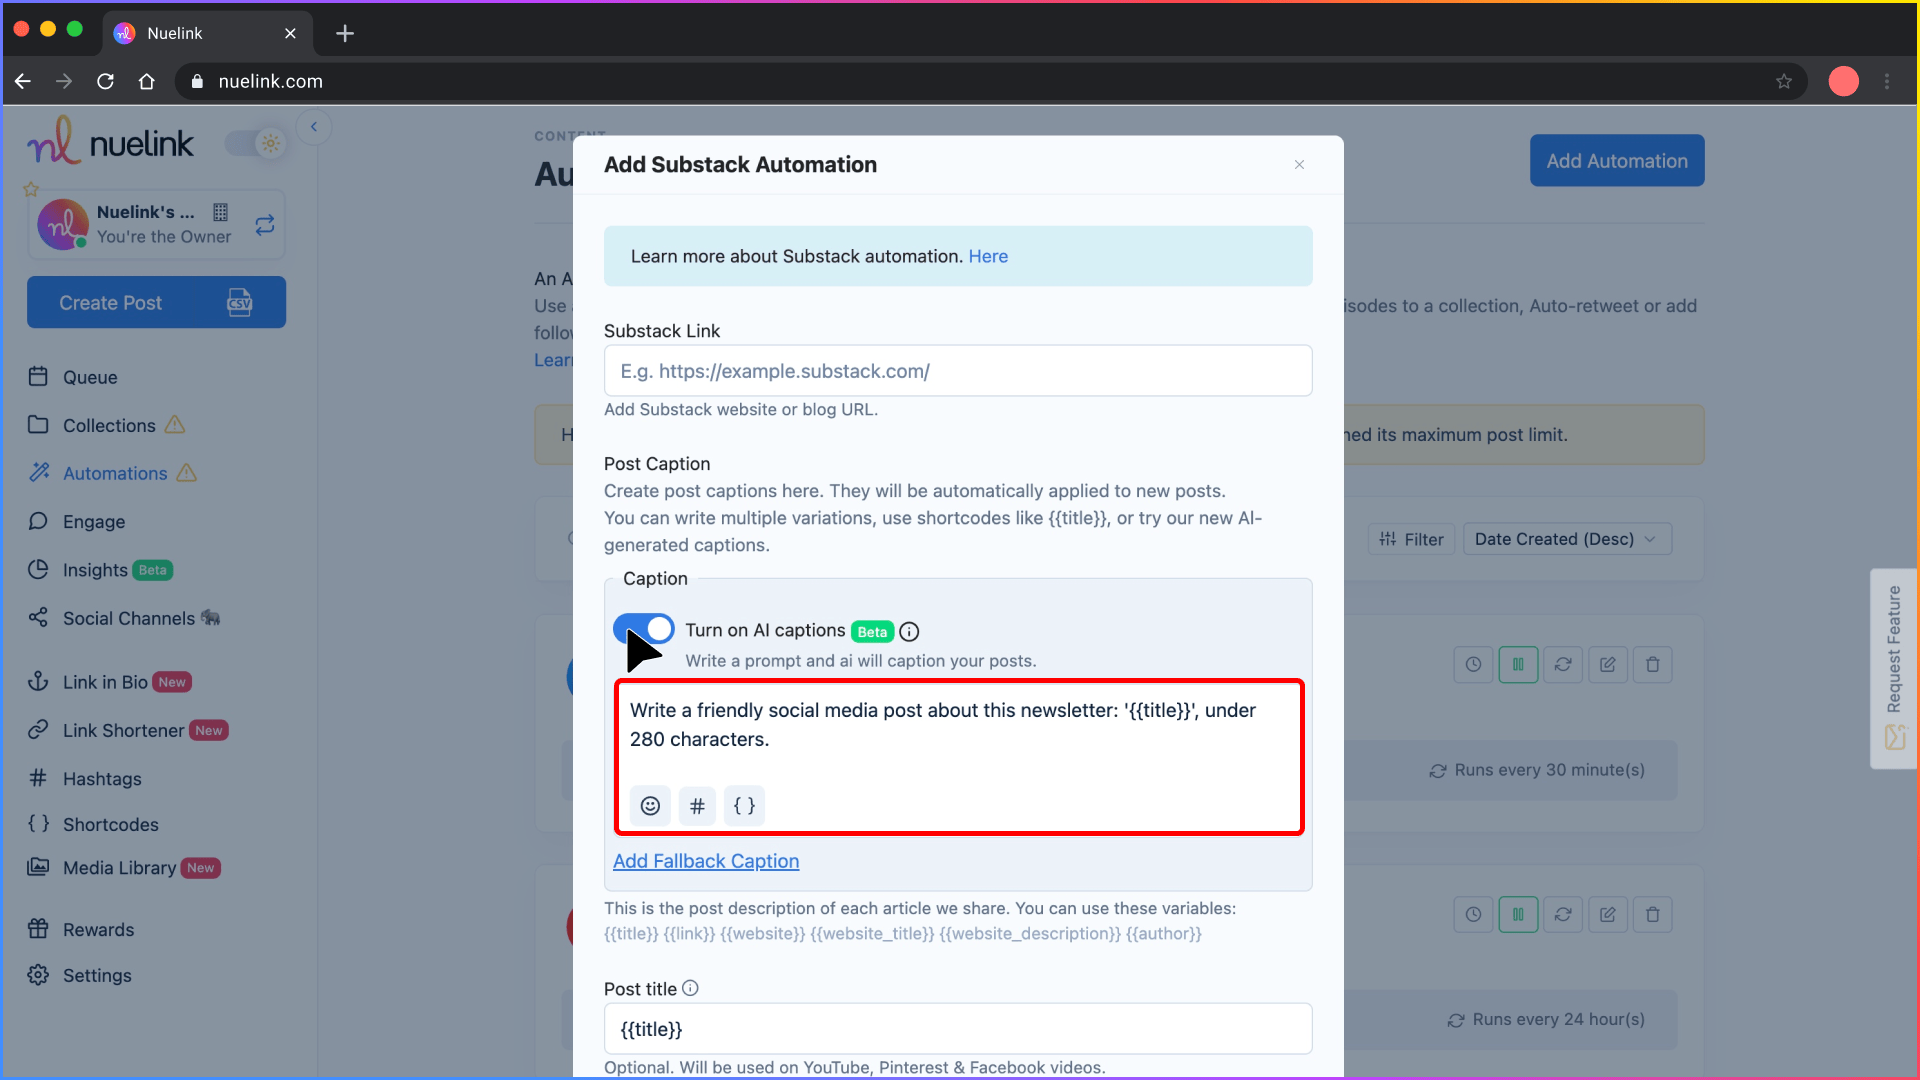
Step 5: Select How You Want Captions to Be Generated
You have two options:
1️⃣ Enable AI-Generated Captions
- Turn on the "AI captions" toggle.
- Write a simple prompt, and Nuelink’s AI will create engaging captions based on your newsletters.
Example prompt: "Write a friendly social media post about this newsletter: '{{title}}', under 280 characters."
2️⃣ Use Predefined Variables for Captions
- Create your own caption templates using variables like:
{{title}}→ Newsletter title{{link}}→ Newsletter URL{{description}}→ Excerpt{{date}}→ Published date
Example:
"New issue just dropped! 🚀 {{title}} Check it out here: {{link}}"
💡 You can create multiple variations for more dynamic posting!
Step 6: Create a New Collection
Keep the "Create a new collection for this automation" setting enabled.
This organizes your newsletters neatly into a dedicated Collection where you can:
- Choose platforms to post on
- Set posting times
- Manage additional settings
Find it under the Collections tab on your dashboard, it’s usually named after your Substack.
Learn more about Nuelink’s Collections
Step 7: Choose Whether to Import Existing Newsletters
You’ll have the option to import your past Substack issues too.
✅ Toggle it ON if you want to repost older content on social media.
✅ Choose how many old issues to import (1 to 100).
💡 If you prefer to only share new newsletters moving forward, simply uncheck this option.
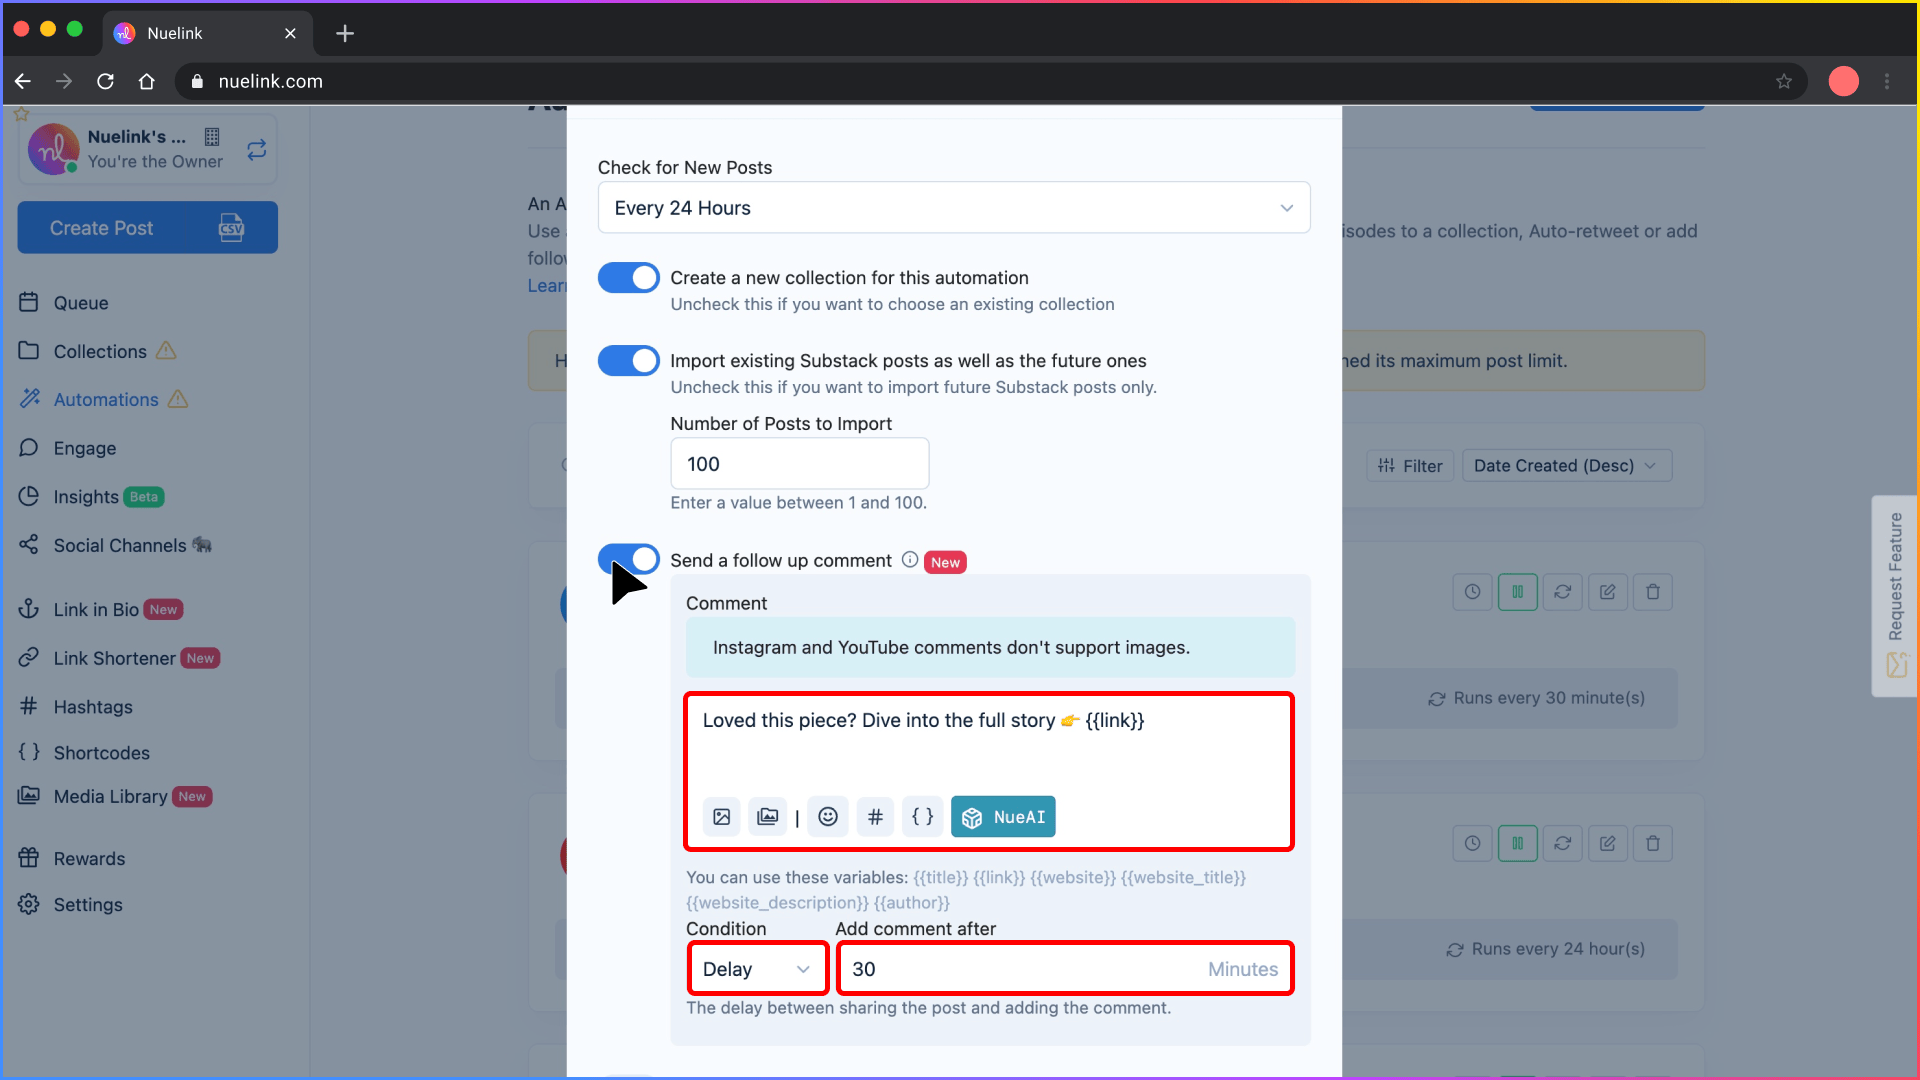
Step 8: Set the Posting Frequency
Decide how often Nuelink should check for new newsletters.
Example: Set it to Every 24 Hours if you share a newsletter daily.
Step 9: Set Up Automatic Follow-Up Comments
Enable "Send a follow-up comment" to post a comment under your shared social media posts.
Use dynamic variables like:
{{title}}{{link}}{{description}}
Example follow-up after 30 minutes:
"Loved this piece? Dive into the full story 👉 {{link}}"
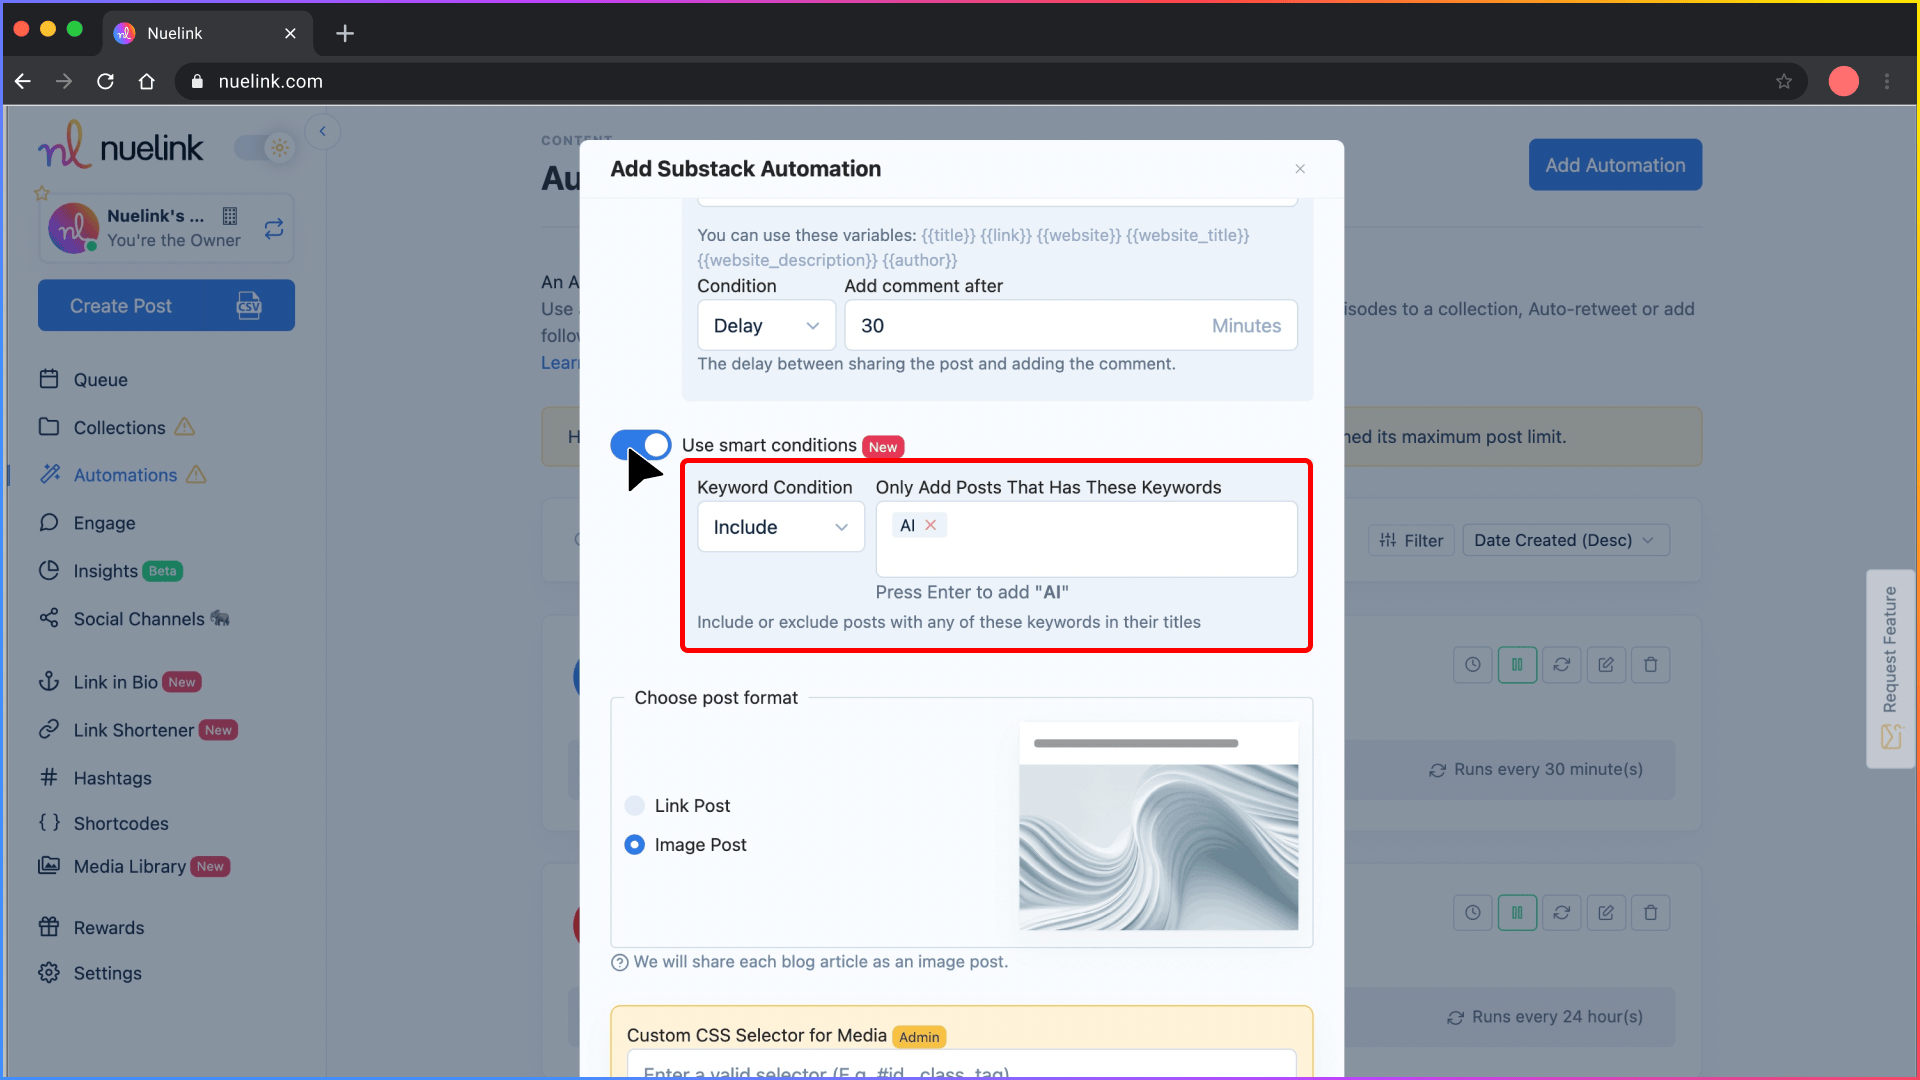
Step 10: Filter Your Newsletters with Smart Conditions
Use Smart Conditions to control what gets posted automatically.
Example: If you only want to share newsletters mentioning "AI", add "AI" as a keyword under Include.
Nuelink will then only post issues related to "AI".
That’s it! Your Substack automation is almost ready.
Just visit your Collection (named after your Substack Newsletter), pick your social channels, finalize your posting schedule, and adjust a few other settings.
The final results will be something like this:
Prefer a step-by-step video guide?
🎥 Watch the tutorial below! 👇


