
WordPress is the second most popular blogging platform, hosting over 60 million blogs.
If your blog is one of those 60 million, you’re probably familiar with this scenario:
You publish one or two articles a day or week, and you're eager to share them on social media to reach more readers.
But let’s be honest, while sharing your articles does help grow your audience, the process is long and time-consuming.
Does this sound like you?
If so, then you may be interested in the topic of this article, which is WordPress social media automation.
What Is WordPress Social Media Automation
WordPress social media automation means sharing your new blog posts automatically on social media to promote them.
When you publish a new article, the system picks it up, creates a caption, and posts it for you on your selected social media platforms.
The goal is to get more readers for your blog without doing extra work.
It works with platforms like LinkedIn, Twitter, Facebook, Pinterest, and more.
Ways to Automate Social Media Posting from Your WordPress Blog
Here are three common ways to automate the sharing of your WordPress blog content:
1️⃣ Plugins for Social Media Automation
Several plugins make it easy to auto-share blog articles, but each comes with its own limitations. Some only work with specific platforms or require manual tweaks for every post.
Popular WordPress plugins for social media automation include:
✅ Jetpack Social: Automatically shares new blog posts to select platforms.
✅ Blog2Social: Offers scheduling and platform-specific customization but can require hands-on adjustments.
✅ Social Auto Poster: Helps with automation but involves a more technical setup.
2️⃣ Automation Tools (Zapier, Make, IFTTT, etc.)
With these tools, you can build workflows to share your WordPress posts, but the setup often requires a bit of technical skill.
For example, with Zapier:
Trigger: A new blog post is published on WordPress.
Action: Share a post on LinkedIn or Twitter.
While flexible, these automations may need regular updates and don't always offer deep content customization.
3️⃣ Social Media Automation Tools
These platforms are often the most efficient solution, offering ease of use, built-in post formatting, and broader platform support than plugins or Zapier.
However, only a few automation platforms support WordPress blog article automation.
Nuelink is one of the few that does, allowing you to auto-publish blog posts with AI captions, carousels, or image posts, all organized inside a content collection.
Comparison Table Between Nuelink, WordPress Plugins, and Automation Tools
| Option | Ease of Use | Customization | Platforms Supported | Best For |
|---|---|---|---|---|
| WordPress Plugins | Easy | Low | Few platforms | Basic article sharing |
| Zapier/Make | Complex | Medium | Many platforms | Technical users |
| Nuelink | Easy | High | 12+ major platforms | Non-technical users |
Why Nuelink Stands Out for WordPress Automation
From the table above, it’s clear that Nuelink is your best option.
But to make it even clearer, here are a few benefits you’ll get when you use Nuelink.
1️⃣ Set It and Forget It
No coding, no complicated setups, just a few clicks, and your WordPress blog will promote itself on social media automatically 24/7.
2️⃣ Reach More Readers
Share your articles everywhere with a few clicks.
Get your articles seen on LinkedIn, Twitter, Pinterest, Facebook, and all other social media platforms. Without posting manually to each platform.
3️⃣ Organized Content, Zero Chaos
Easily manage where and when your blog posts get published. Smart Collections group your posts together, so you control schedules, platforms, and settings without a mess.
4️⃣Captions Without the Stress
Nuelink’s AI instantly creates catchy, engaging, and unique captions tailored to each blog article, so it promotes the best way possible to bring your social media followers to read your articles.
5️⃣ Make Old Articles Work Harder
Automatically share your older articles alongside new ones to keep driving traffic from content you’ve already created.
For more technical details on how Nuelink automates WordPress social media, visit the following page: WordPress Social Media Automation feature page
How to Automatically Share WordPress Articles to Social Media Using Nuelink
Step 1: Open a Nuelink Account
Sign up for Nuelink’s 14-day free trial to start automating your WordPress blog articles to social media. Instantly share and promote them as social media posts across 12+ platforms!
👉 Claim your 14-day free trial now!
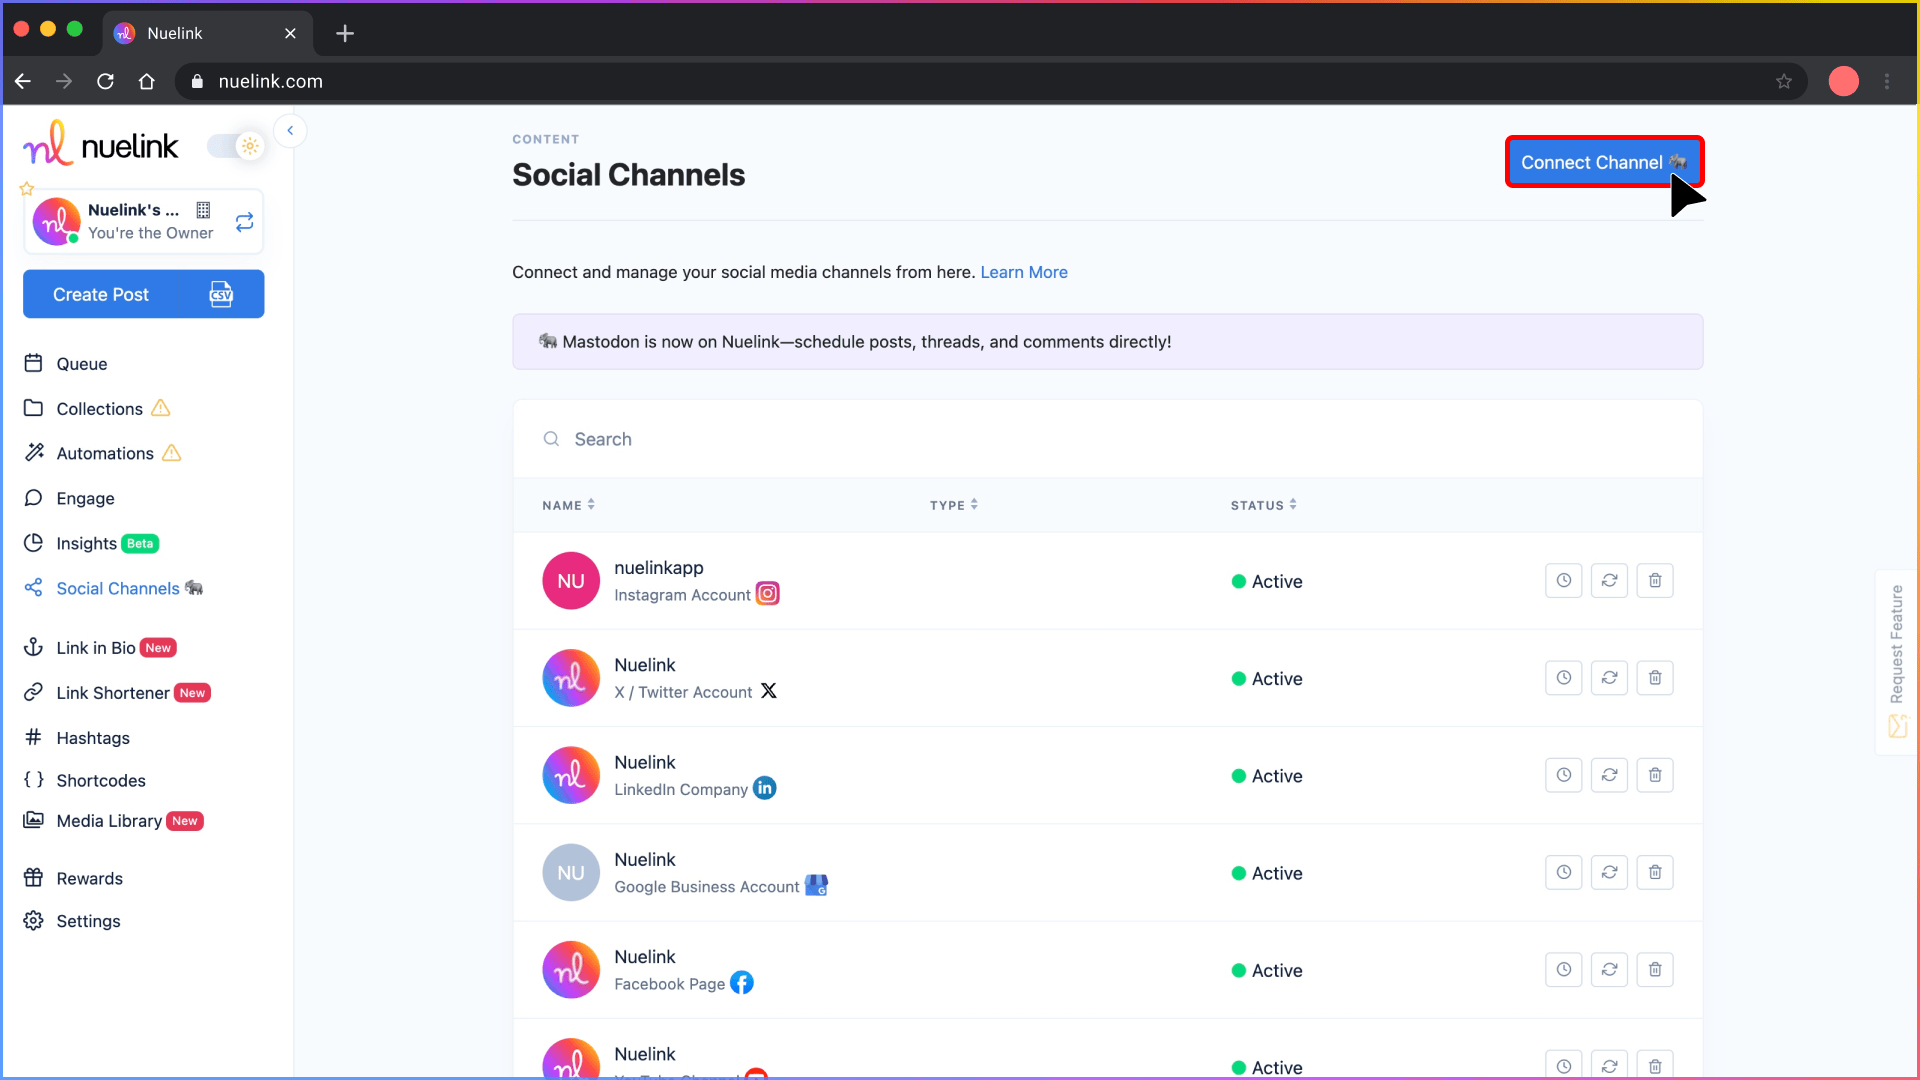
Step 2: Connect Your Social Media Channels
Once you're in, connect the social media platforms where you want to share your WordPress articles.
💡 Nuelink supports all major social platforms like Instagram, Pinterest, LinkedIn, TikTok, and many others.
Helpful resources:
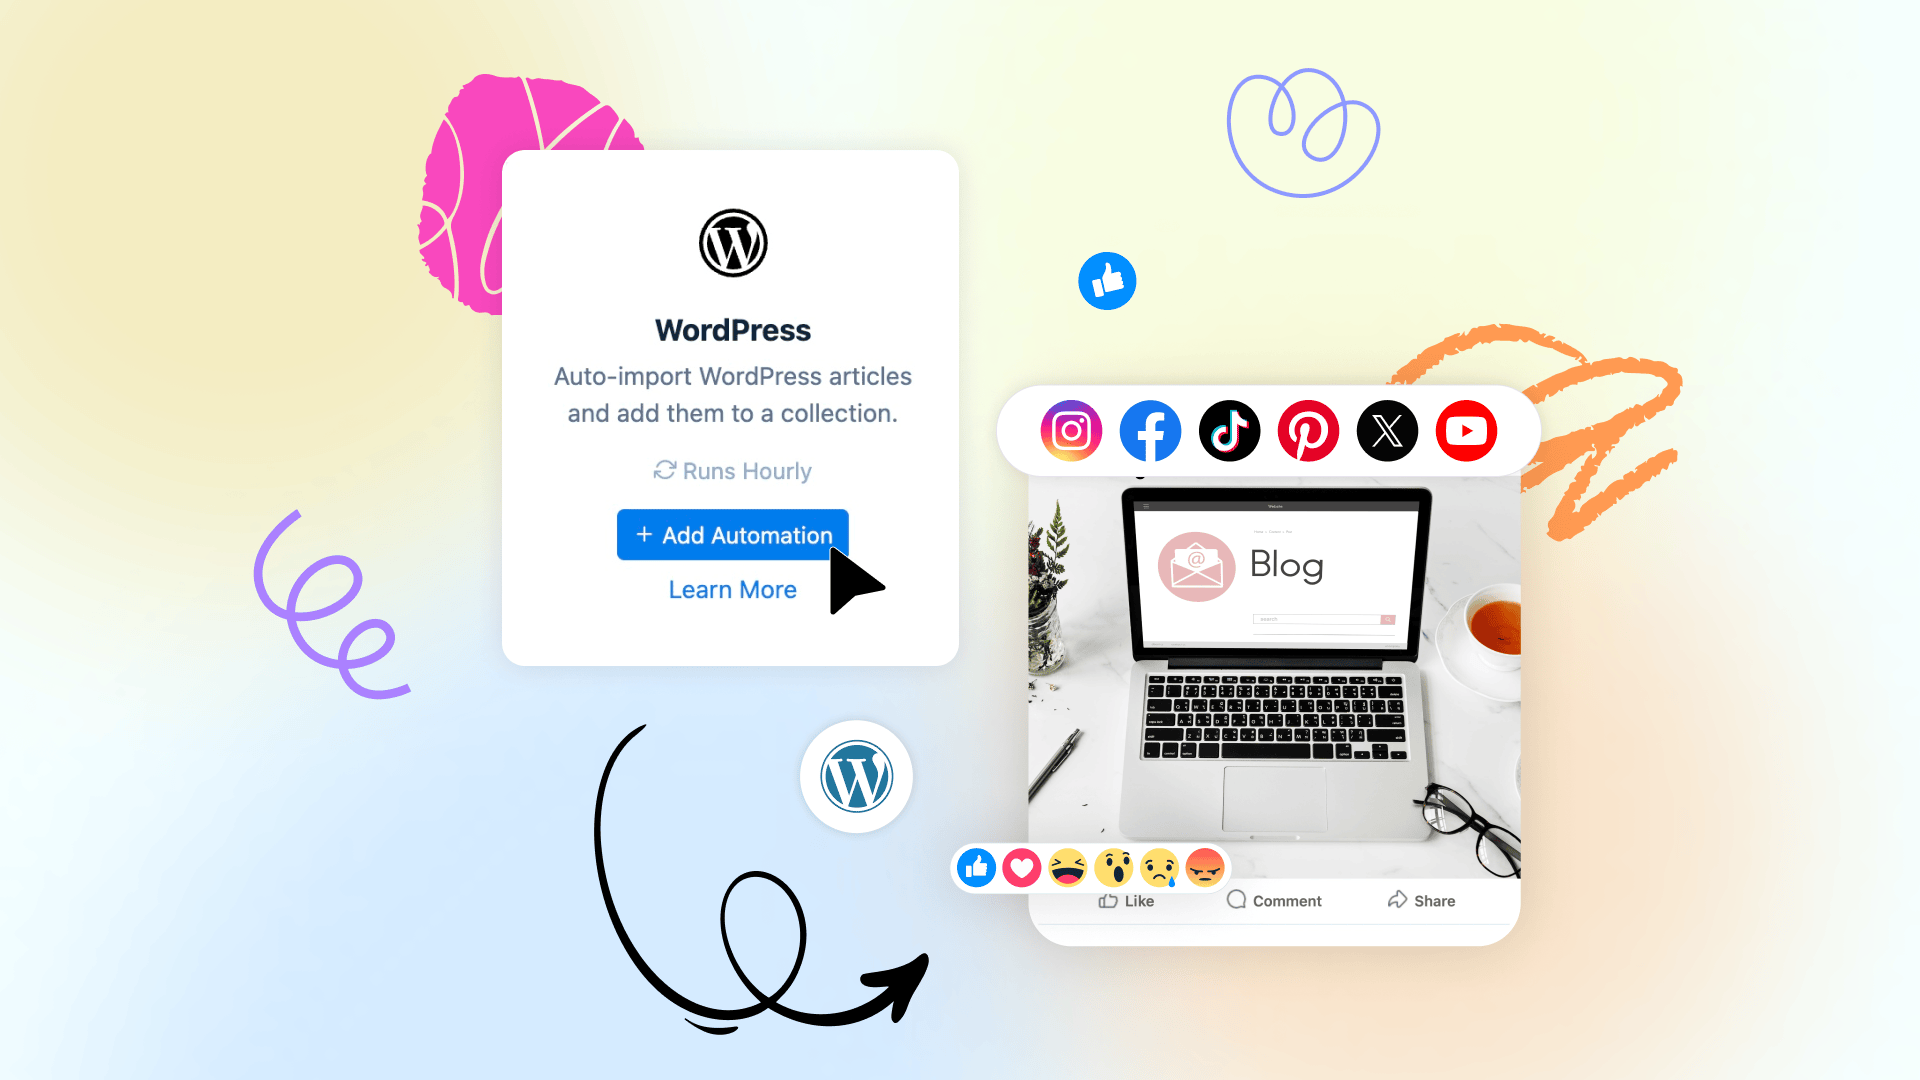
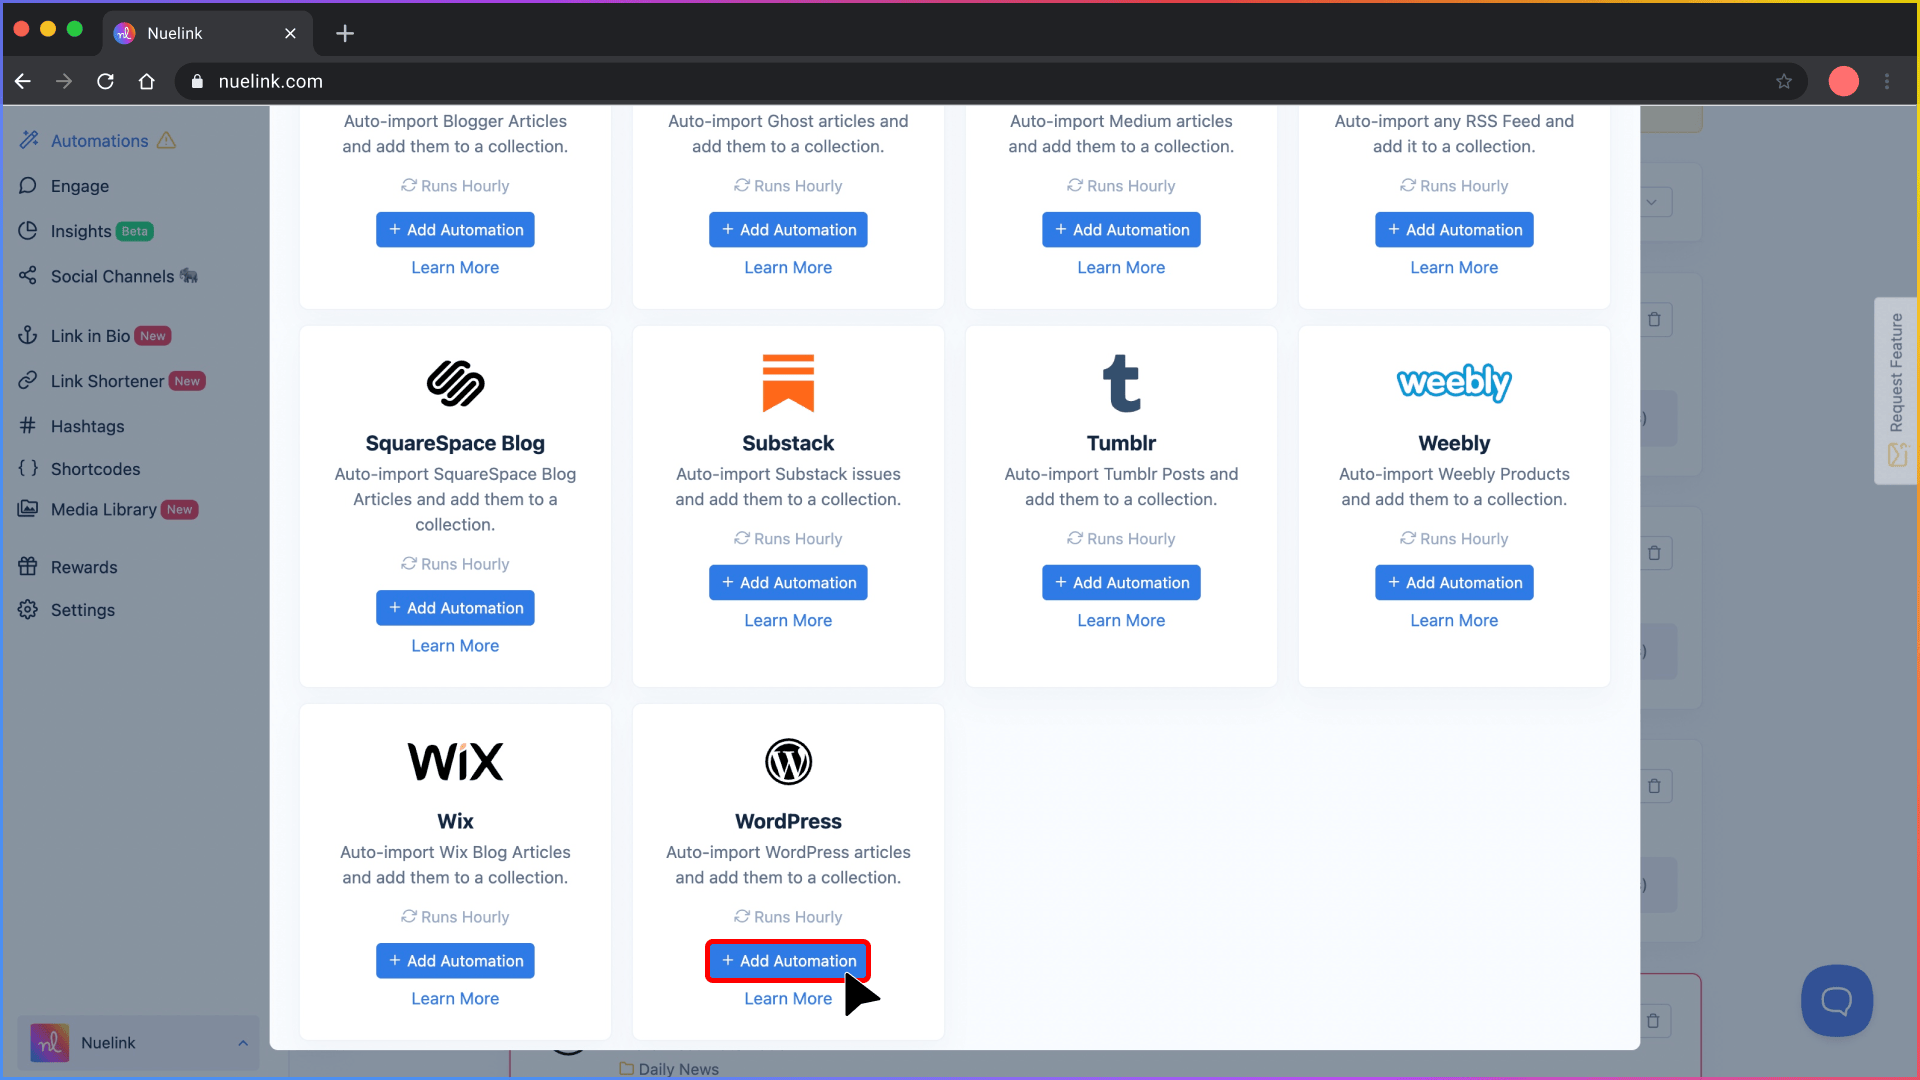
Step 3: Create a WordPress Automation
1️⃣ In the left-hand menu, click 'Automations', then click 'Add Automation'.
2️⃣ Click on 'Blogs', select WordPress.
Step 4: Add Your WordPress Blog Link
Paste the link to your WordPress blog.
💡 Note: You can either share the URL of your entire website or just your blog. Both work perfectly.
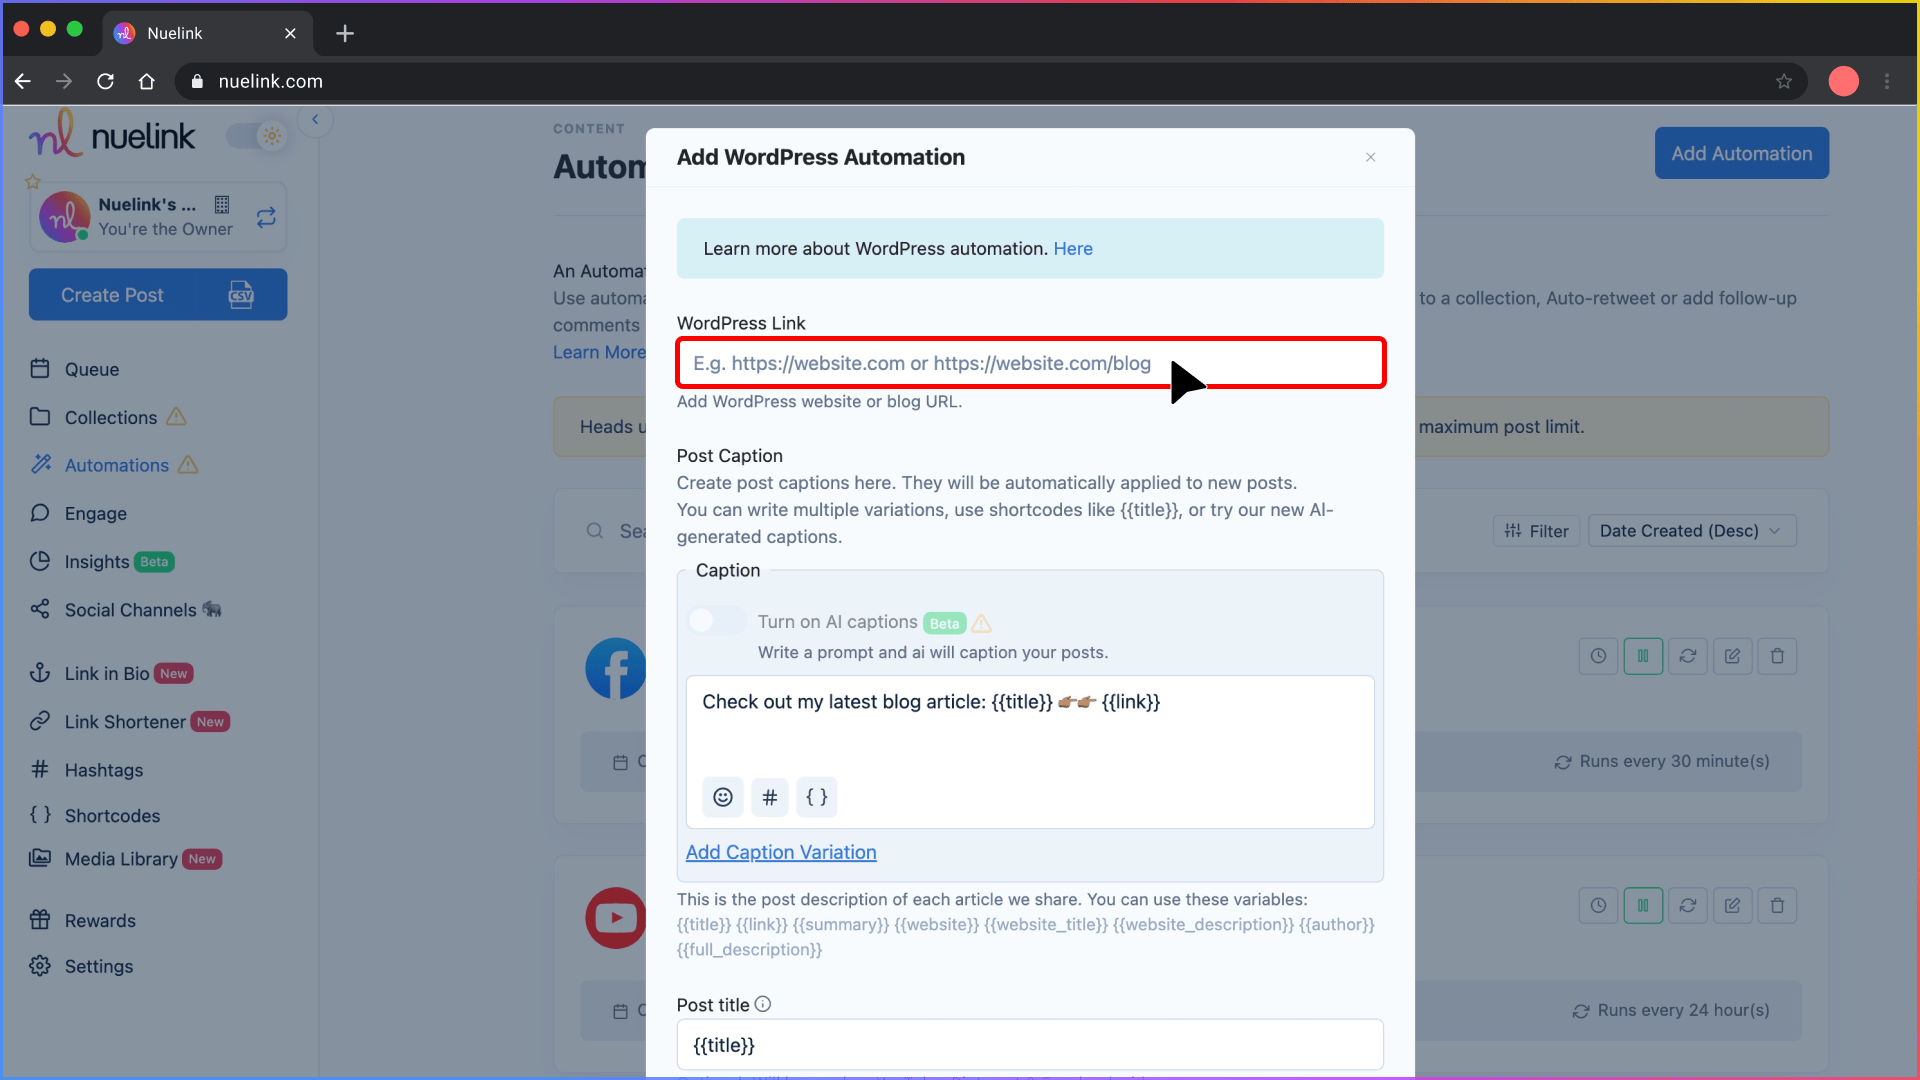
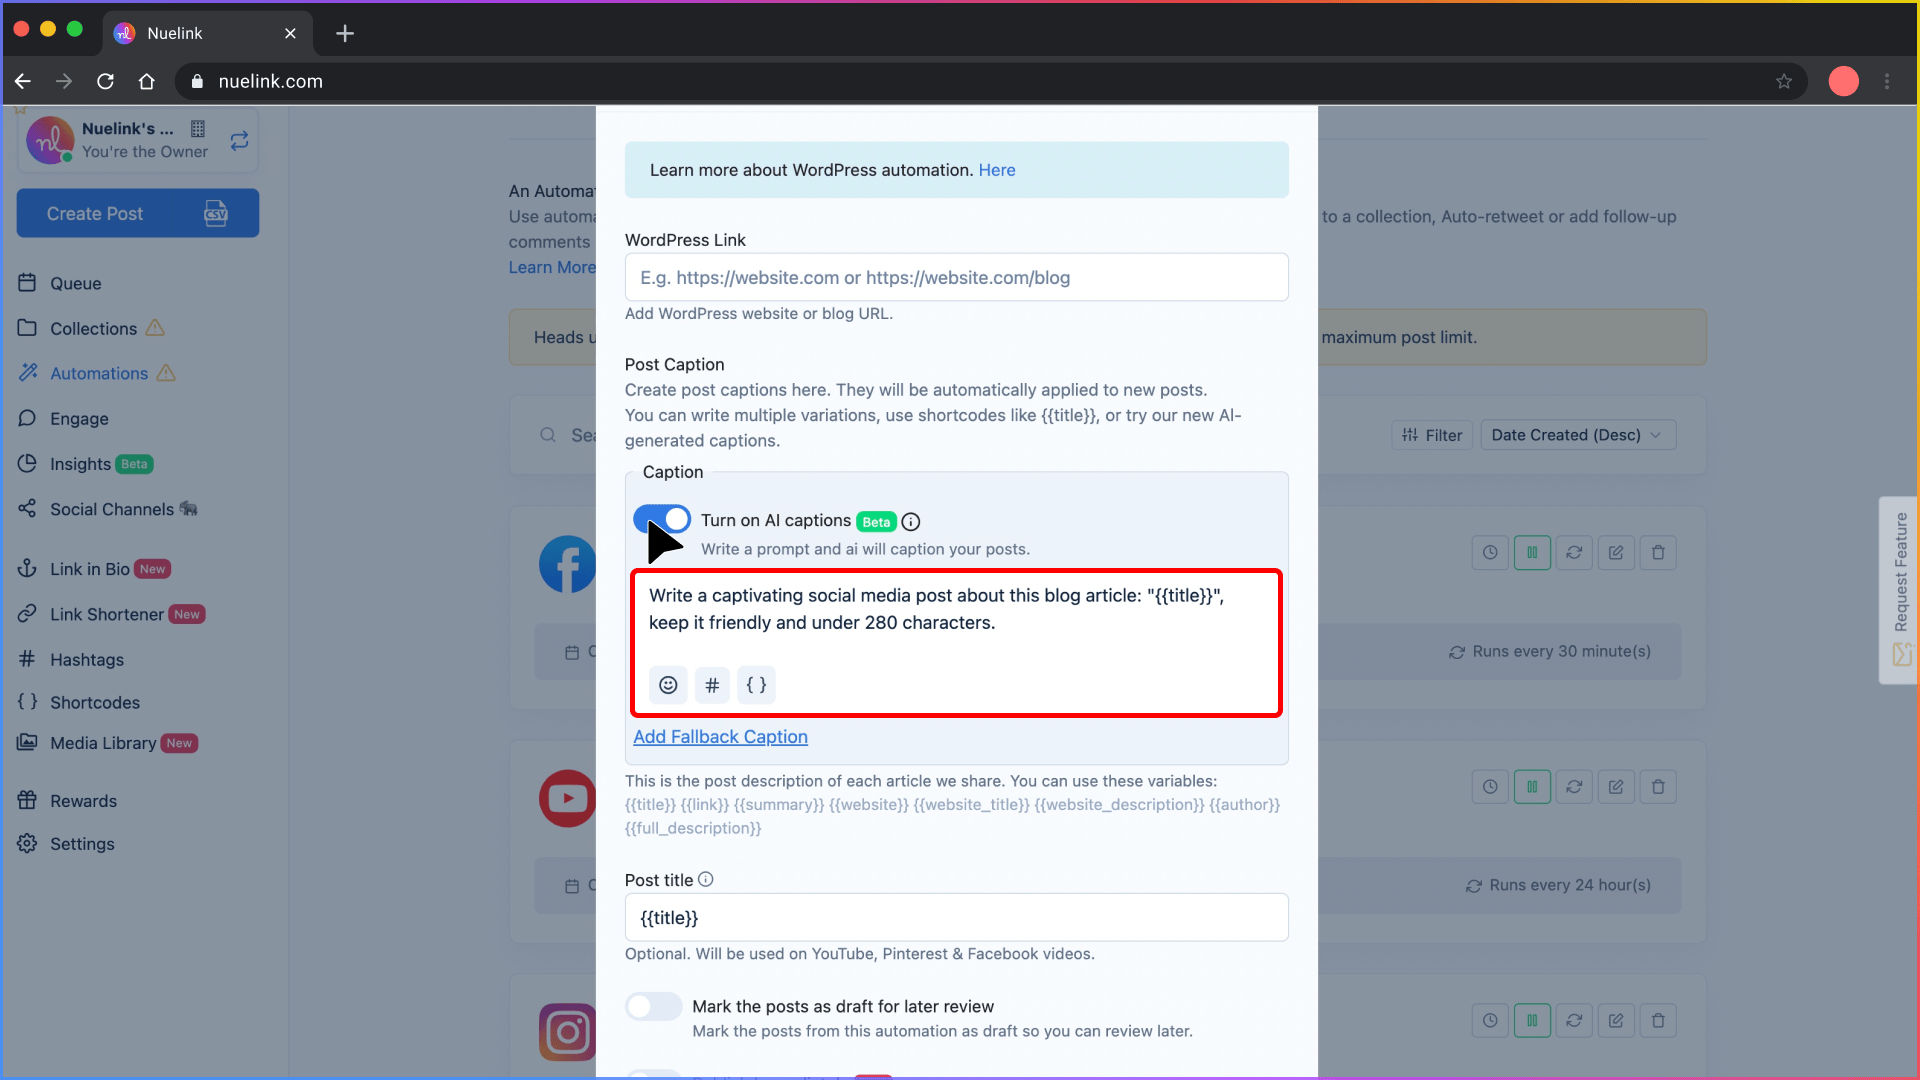
Step 5: Select How You Want Captions to Be Generated
You have two options:
1️⃣ Enable AI-Generated Captions
- Turn on the "AI captions" toggle.
- Write a simple prompt, and Nuelink's AI will generate engaging captions for each blog post. Example prompt: Write a captivating social media post about this blog article: "{{title}}", keep it friendly and under 280 characters.
2️⃣ Use Predefined Variables for Captions
Create your own caption templates using variables:
- {{title}} → Blog article title
- {{link}} → Blog article URL
- {{website}} → Your blog's homepage
- {{description}} → Article excerpt
- {{date}} → Published date
Example:
New article out now! 🚀 {{title}} Read here: {{link}}
💡 You can create multiple caption variations for more dynamic posting.
Step 6: Create a New Collection
Keep the "Create a new collection for this automation" setting enabled.
Your blog posts will be neatly organized into a dedicated collection where you can:
- Adjust which social media platforms will post the articles.
- Set specific posting times.
- Manage additional settings.
Find your collection under the Collections tab on your dashboard—it’s usually named after your blog.
Learn more about Nuelink’s Collections.
Step 7: Choose Whether to Import Existing Blog Posts
You’ll see the option to import your existing WordPress posts along with future ones. This means the articles published on your WordPress blog before using Nuelink can also be shared on social media.
- Keep the toggle ON if you want to bring in old posts too.
- You can also set how many past posts to import. Between 1 to 100 old posts.
💡 If you only want to automate newly published blog posts moving forward, simply uncheck the option.
Step 8: Set the Posting Frequency
Choose how often Nuelink should check for new WordPress articles.
Example: Select "Every 6 Hours" to quickly post your newest articles throughout the day.
Set the frequency depending on your publishing schedule.
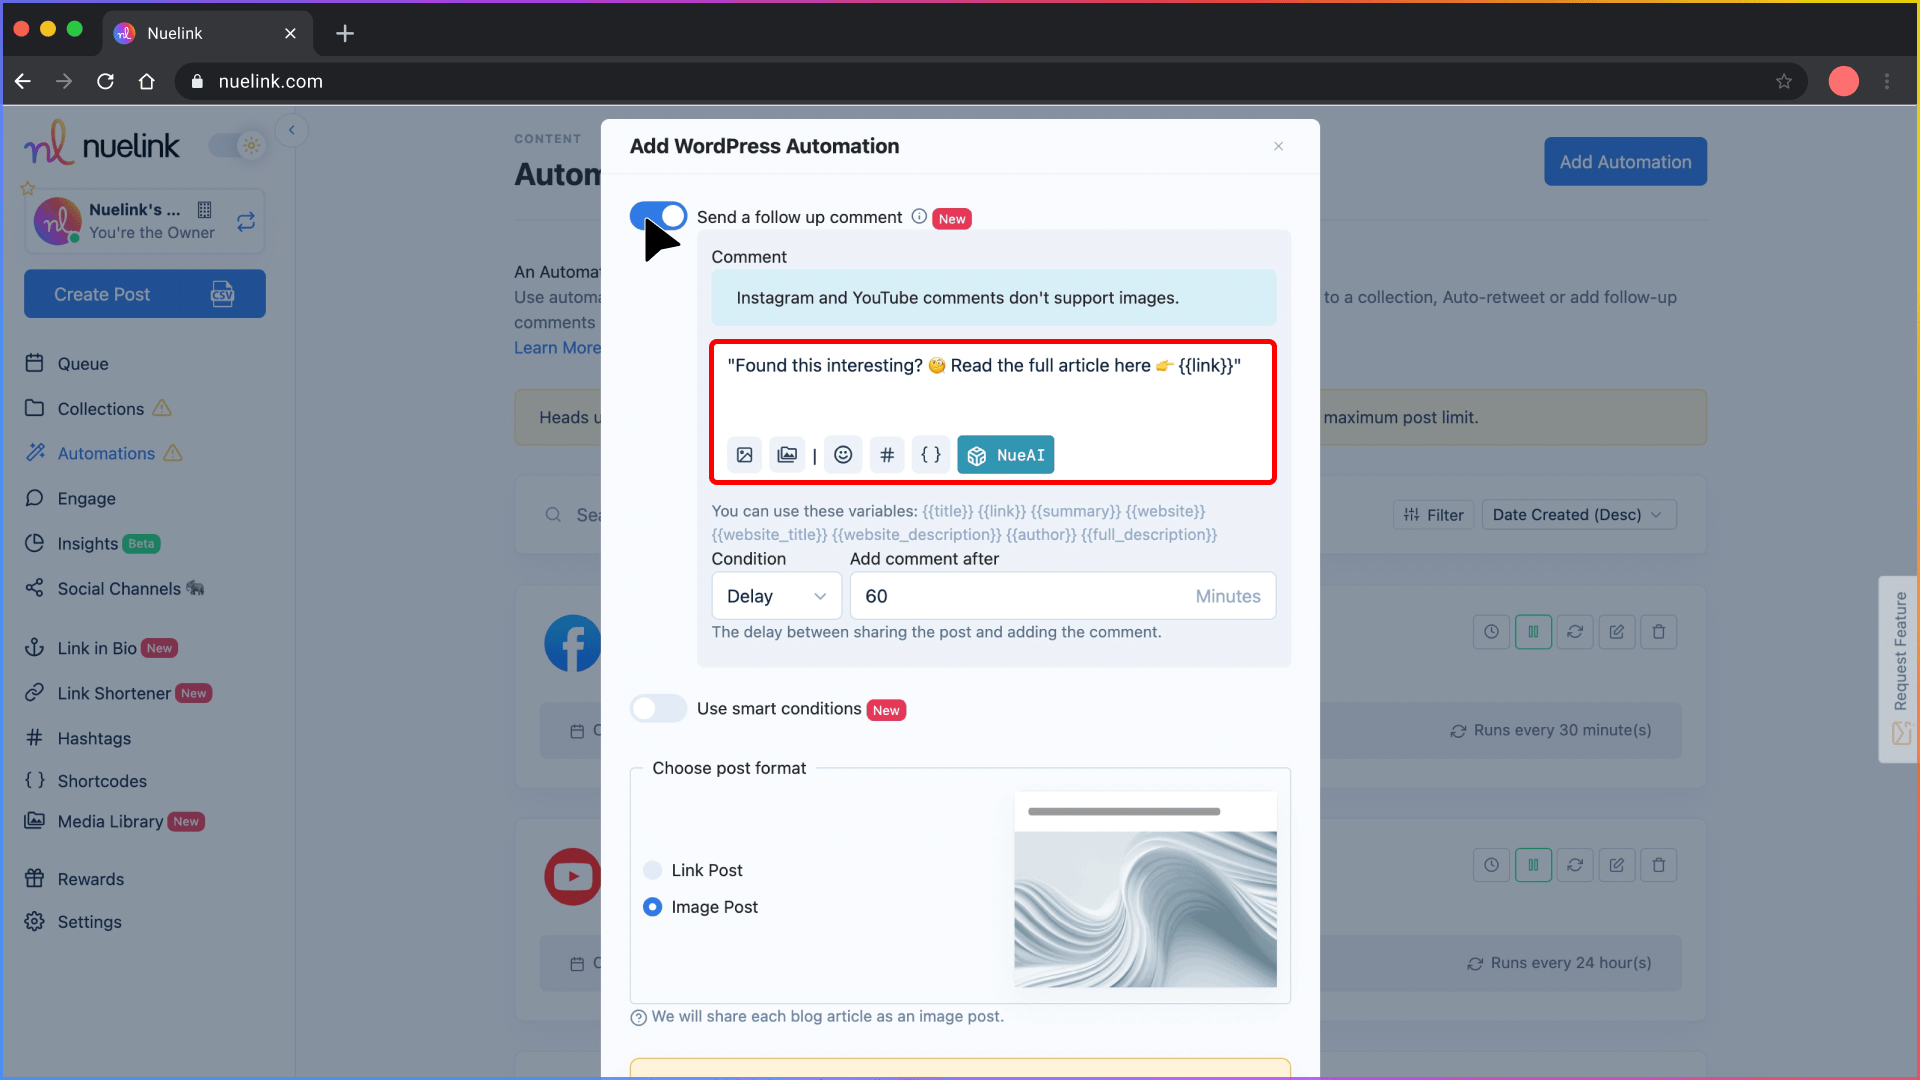
Step 9: Set Up Automatic Follow-Up Comments
Enable "Send a follow-up comment" to post a comment under your shared social media posts.
You can personalize the comment using dynamic variables like:
- {{title}}
- {{link}}
- {{description}}
Example follow-up after 30 minutes:
"Found this interesting? 🧐 Read the full article here 👉 {{link}}"
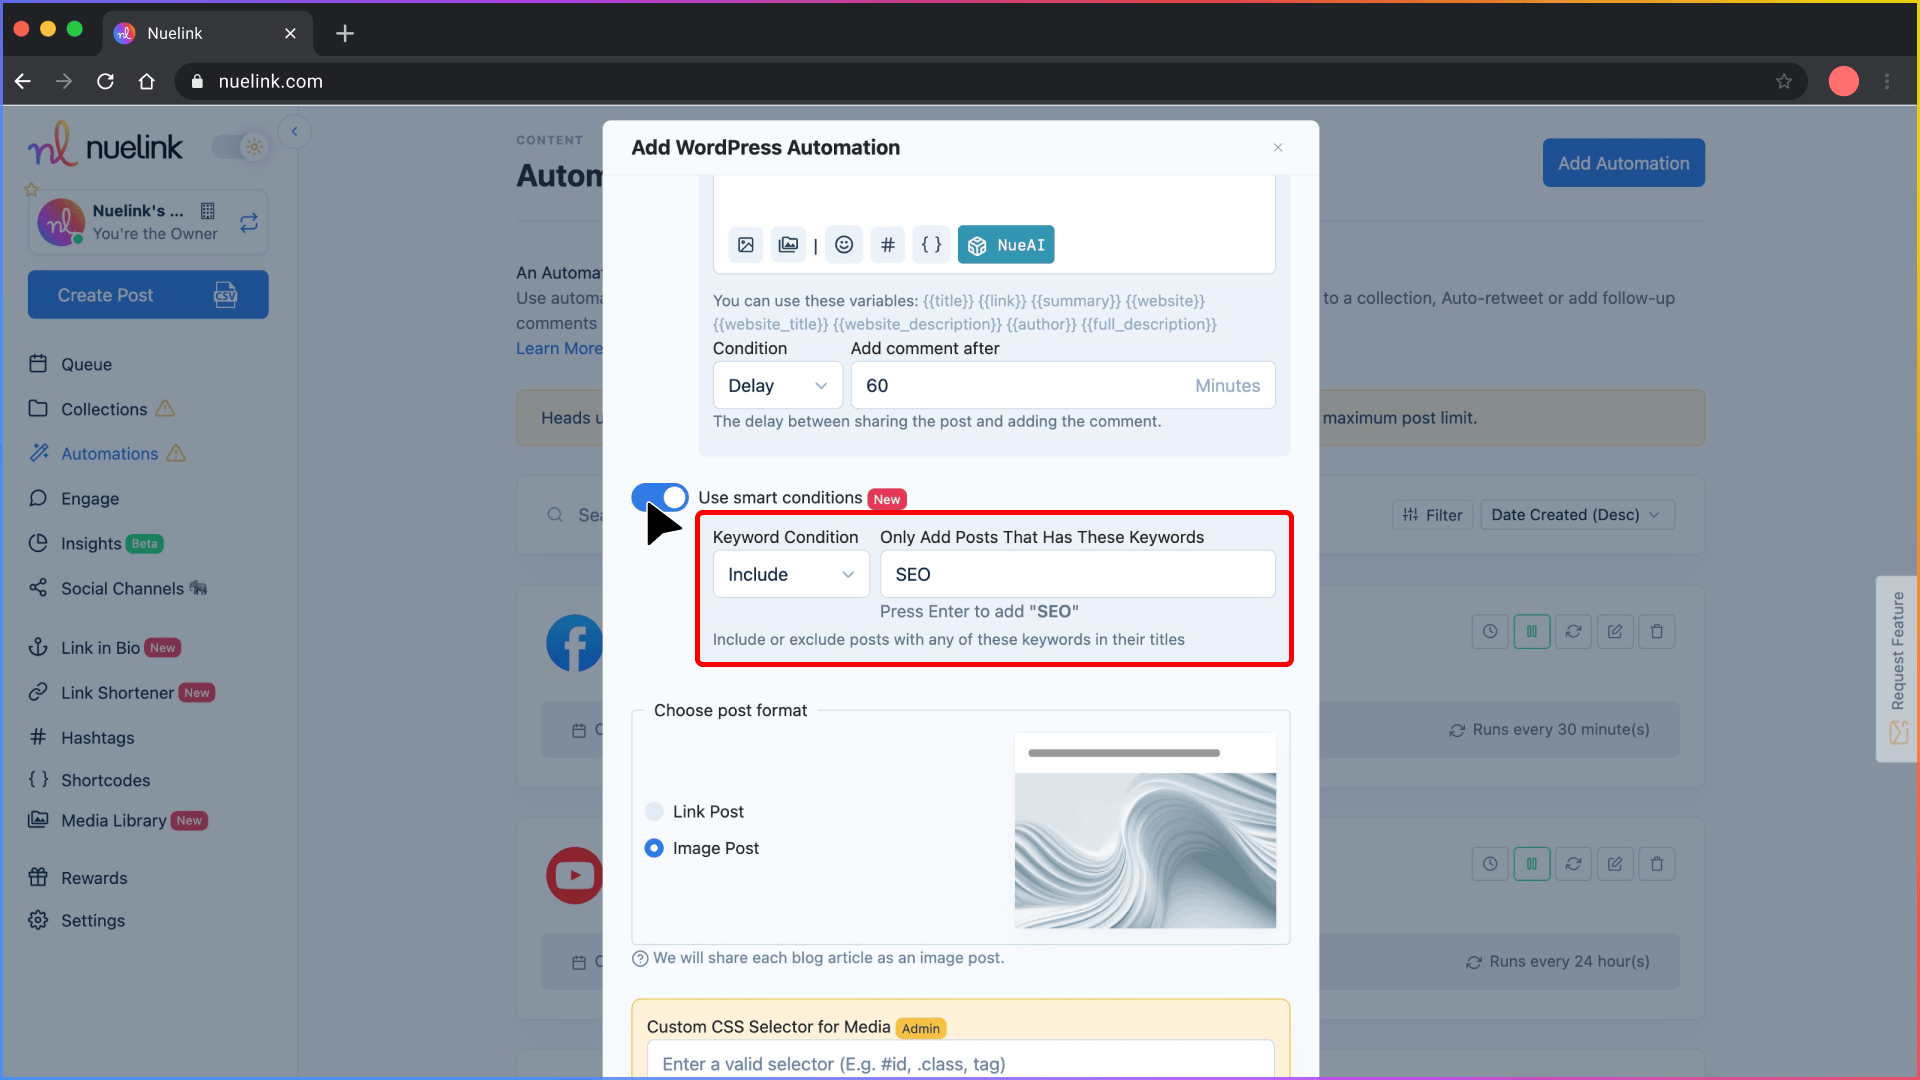
Step 10: Filter Your WordPress Articles with Smart Conditions
Use "Smart Conditions" to control what gets posted automatically and what's not.
Example:
If you only want to share articles about "SEO", add "SEO" as a keyword under Include.
Nuelink will then only post articles that have "SEO" in their titles.
That’s it! Your WordPress automation is almost ready.
Now, head over to your collection (named after your blog), choose your social channels, set your posting schedule, and tweak a few settings to finalize everything.
Prefer a step-by-step video guide? Watch the tutorial below! 👇


