How to Auto-Post Shopify Products on Social Media in 2025
Social media isn’t just for scrolling—it’s where people discover and buy products.
If you’re running a Shopify store but not promoting on social media, you’re leaving sales on the table.
The good news? You can automate it
Nuelink and Shopify can be linked together and automate the process of sharing your products to +12 social media platforms including Pinterest, Instagram, and TikTok at once by setting up automation in 5 minutes.
Interested to know how?
Benefits of Automating Shopify Products to Social Media Using Nuelink
Here is a brief list of Nuelink's features that helps you automate your Shopify social media marketing strategy:
Share Specific Collections
🔹 How it works: Instead of linking your entire Shopify store, you can add a specific collection URL to share only selected products.
🔹 Why it’s important: It gives you more control over what gets posted, allowing you to highlight seasonal items, bestsellers, or curated product groups.
AI-Powered Captions
🔹 How it works: Automatically generates engaging social media captions for your Shopify products. You can customize the prompt and use variables like {{title}} and {{link}} for dynamic content.
🔹 Why it’s important: Saves time while ensuring each post has a compelling caption that attracts clicks and conversions—all while maintaining an authentic touch.
Smart Posting Filters
🔹 How it works: Automatically includes or excludes posts based on specific keywords in the product title. You can customize which products get shared by setting keyword conditions.
🔹 Why it’s important: Gives you better control over which Shopify products are posted, ensuring that only relevant or high-priority listings get shared on social media.
Flexible Post Formats
🔹 How it works: Choose how your Shopify products are shared—link posts, image posts, or carousels.
🔹 Why it’s important: Lets you tailor your posts to fit your overall social media marketing strategy while keeping the process fully automated.
Automated Follow-Up Comments
🔹 How it works: Automatically adds a comment to your social media post after a set time delay or when a post hits a certain number of clicks. You can customize the comment and include variables like {{title}} and {{price}} for dynamic engagement.
🔹 Why it’s important: Boosts engagement by keeping your post active and adding key details that may convince your audience to buy your Shopify products.
How to Automatically Share Shopify Products to Social Media
Step 1: Open a Nuelink Account
Sign up for Nuelink's 14-day free trial to start automating your Shopify products. Share them instantly as social media posts across 12+ platforms!
Claim your 14-day free trial now
Step 2: Connect Your Social Media Channels
Once you're in, connect the social media channels where you want to share your Shopify products.
💡 Nuelink supports all major platforms, including Instagram, Pinterest, and TikTok.
To learn more about connecting your channels, check out these resources:

Step 3: Create an Automation
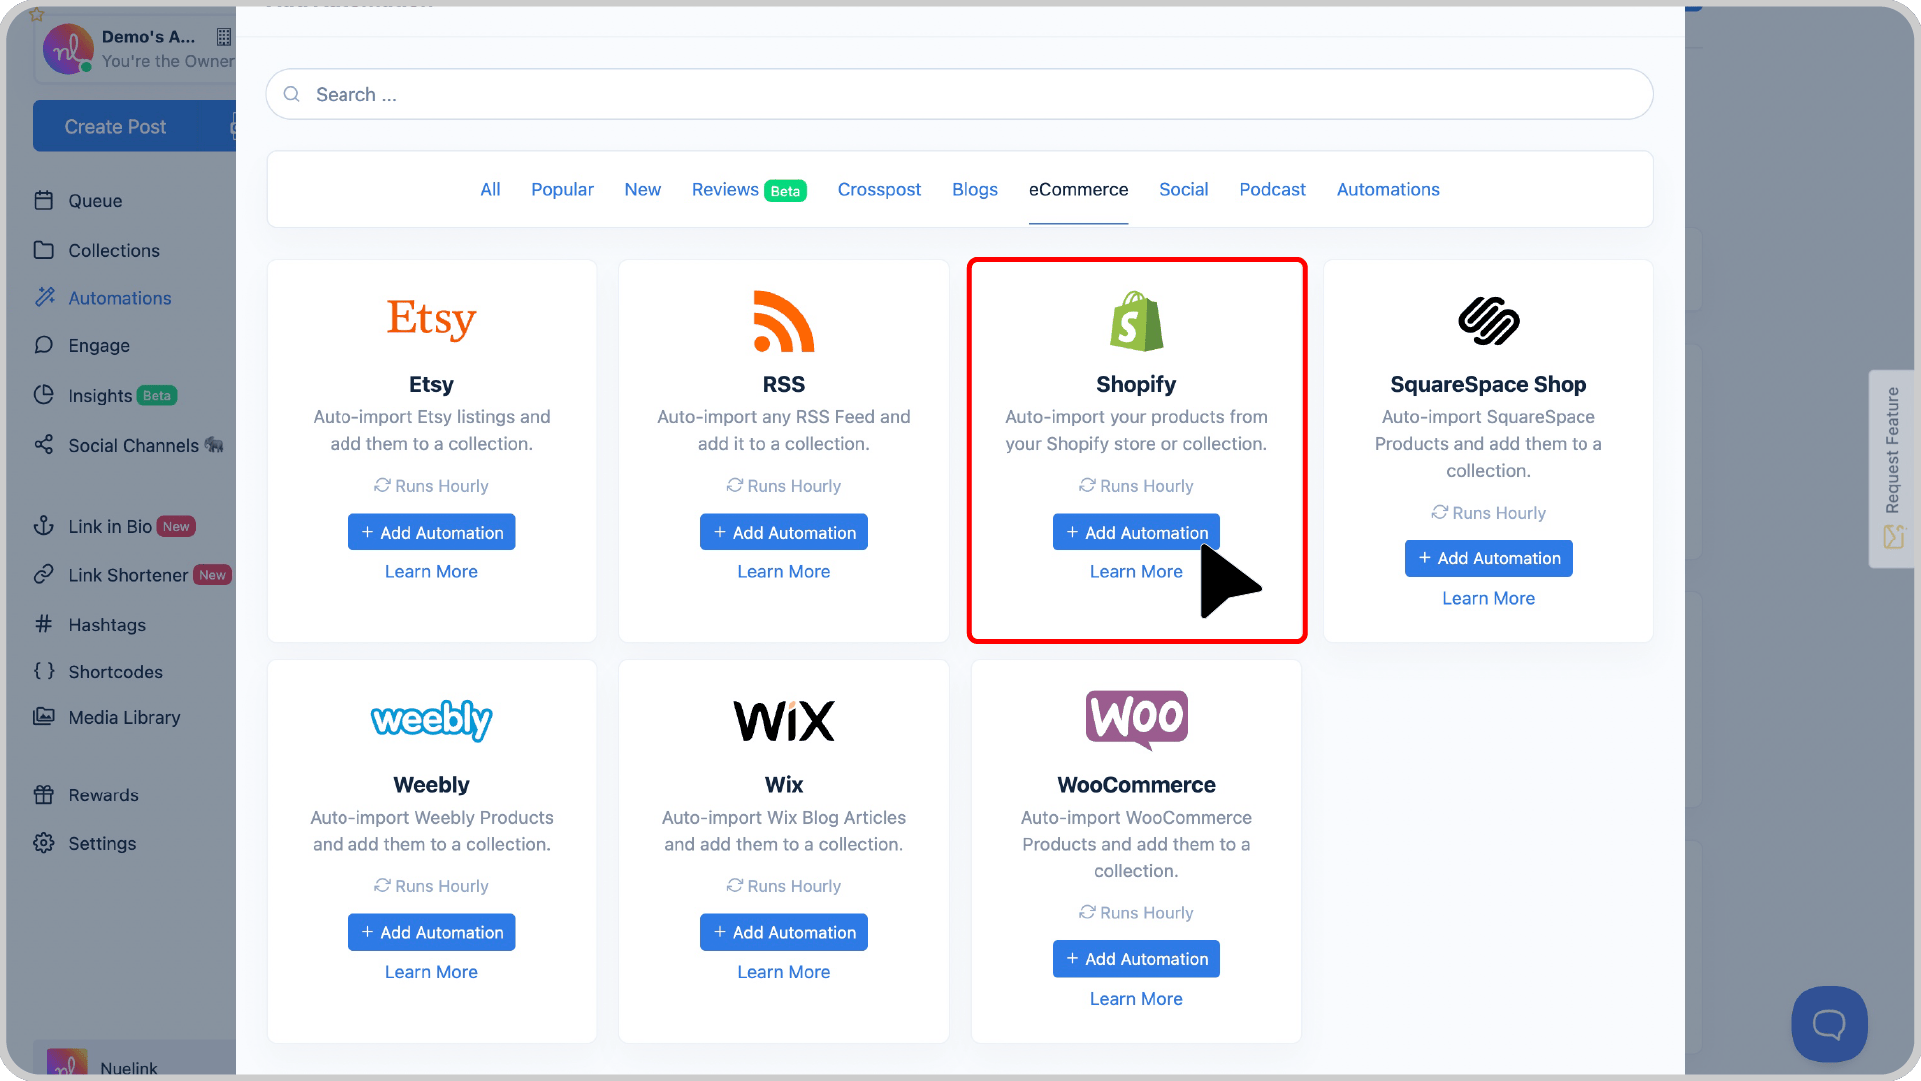
1️⃣ On the left bar, find and click on ‘Automations’, then click on ‘Add Automation’.
2️⃣ Go to ‘eCommerce’ and select ‘Shopify’.
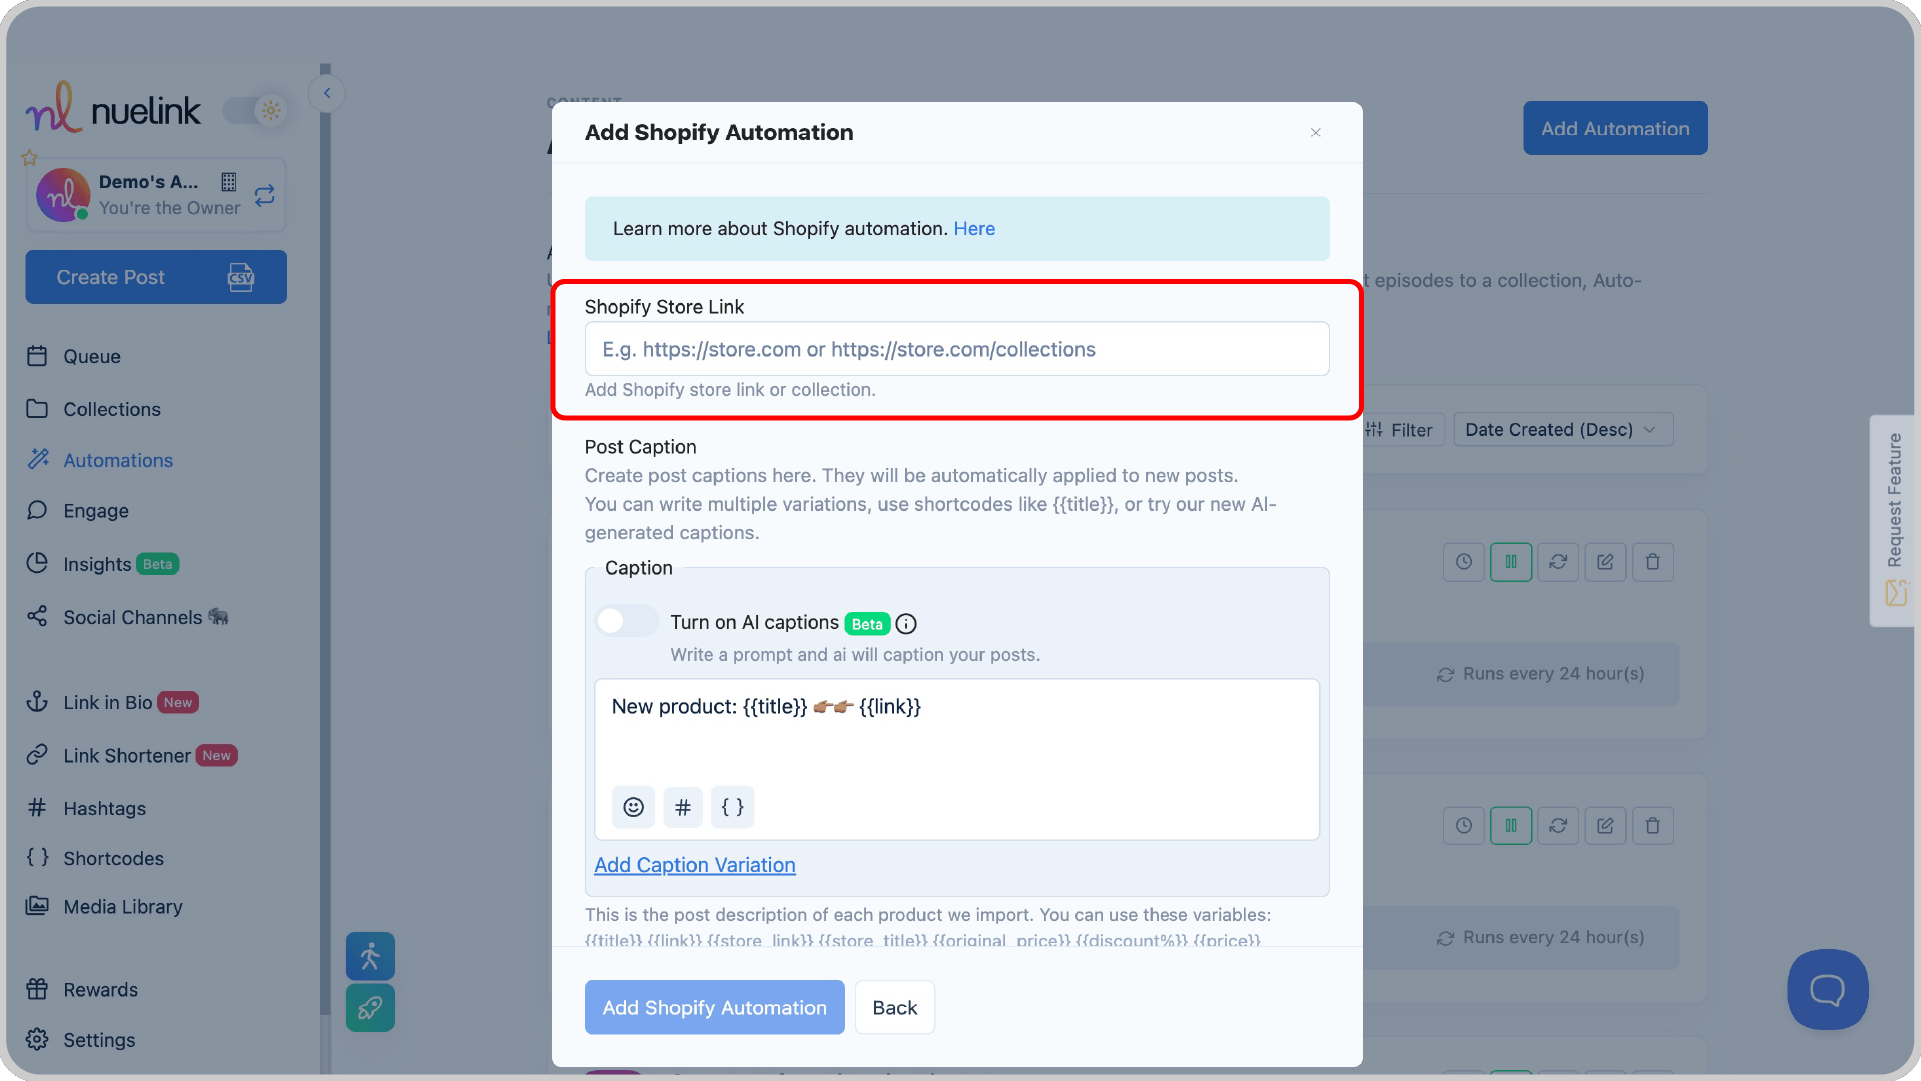
Step 4: Add Your Store Link
Enter your official Shopify store URL.
💡 Tip: Want to automate posting from a specific collection instead of your entire store? Just paste the URL of that collection!
Step 5: Select How You Want Captions to Be Generated
You have two options for automating captions:
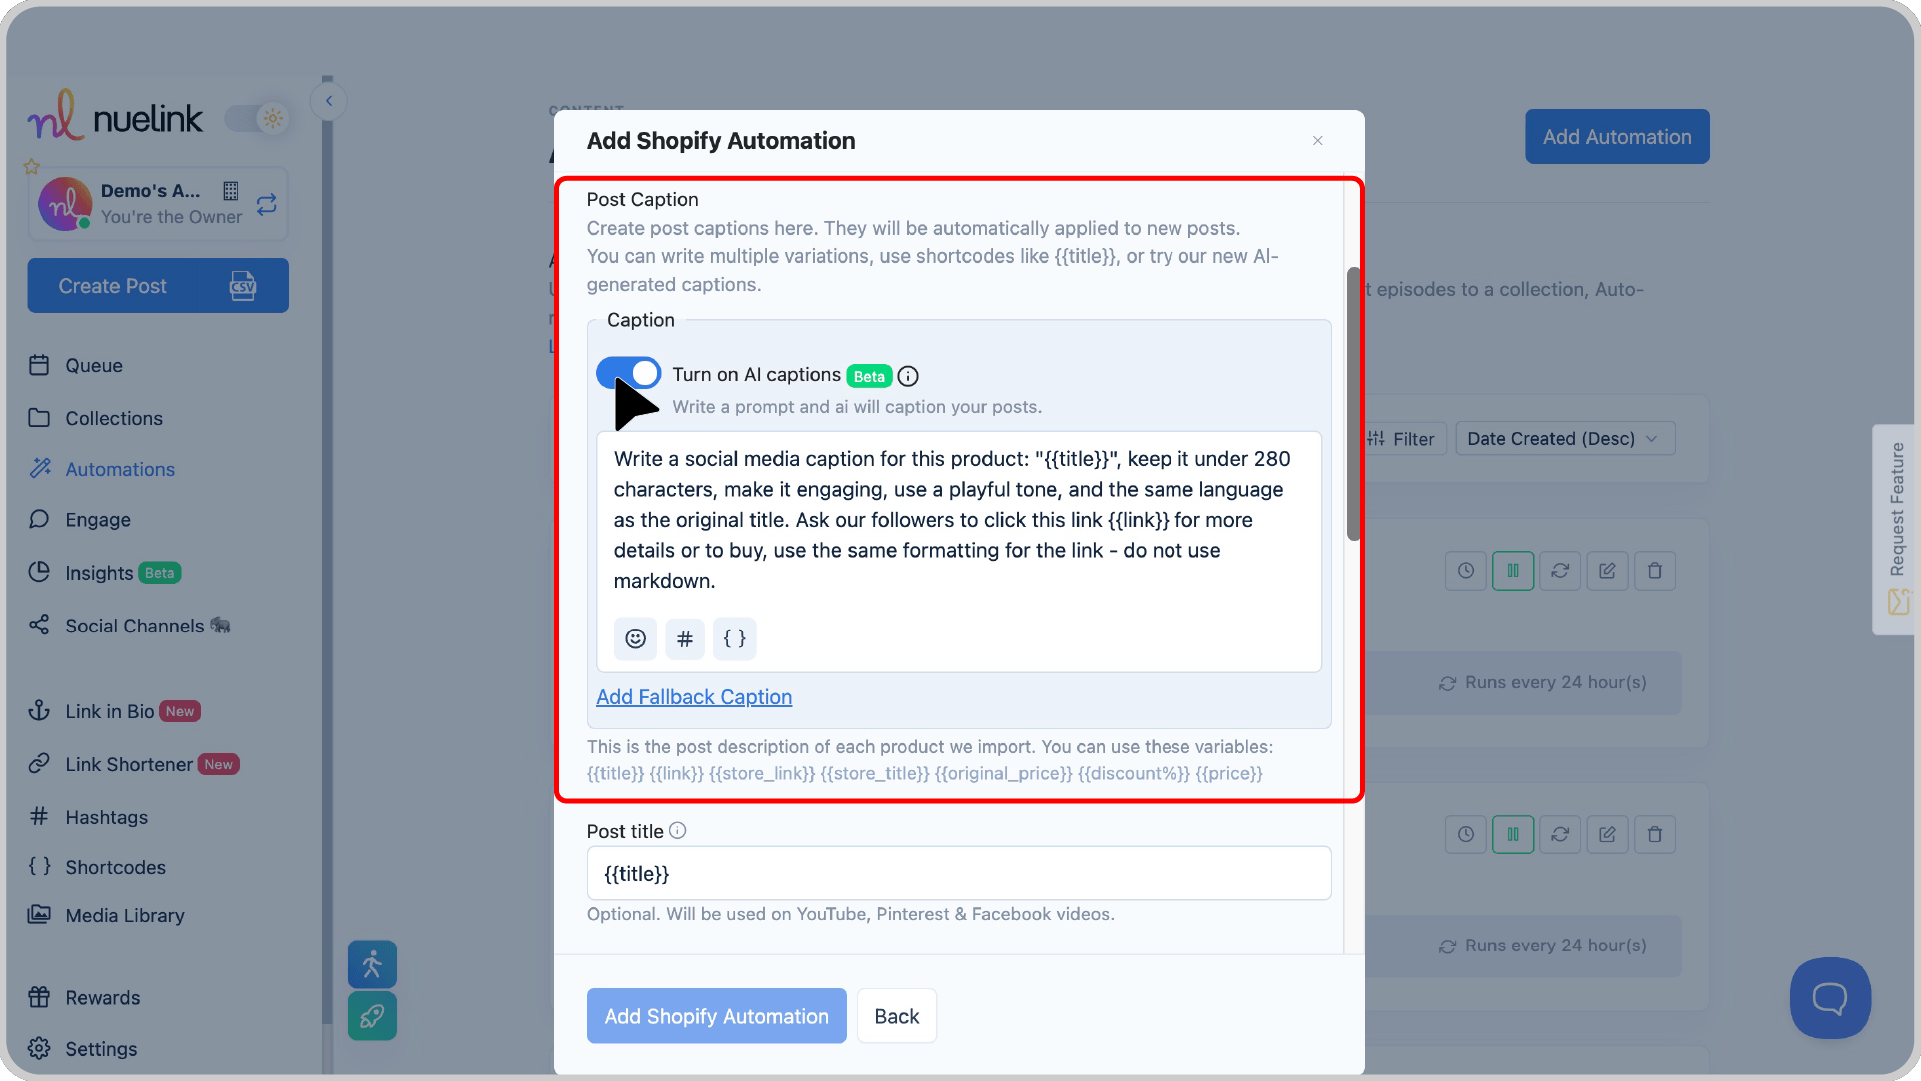
1️⃣ Enable AI-Generated Captions
- Turn on the "AI Captions" switch.
- Write a prompt, and AI will generate unique captions for each product post.
💡 Example Prompt: Write a social media caption for this product: {{title}}, keep it under 280 characters, make it engaging, and use a playful tone.
2️⃣ Use Predefined Variables for Captions
- Manually create caption templates using variables like:
- {{title}} → Product title
- {{link}} → Product URL
- {{website}} → Your store’s link
💡 Example: New product drop: {{title}} 🔥 Grab yours now 👉 {{link}}
You can add multiple variations for variety!
Step 6: Create a New Collection
It’s recommended to keep the “Create a new collection for this automation” option enabled.
This will allow Nuelink to automatically organize your Shopify posts into a collection where you can:
✅ Adjust social media channels for publishing
✅ Set posting schedules
✅ Configure additional settings
You’ll find the collection under Collections in the dashboard—it’s usually named after your store.
Learn more about Nuelink's collections
Step 7: Set the Posting Frequency
Choose how often Nuelink should check for new Shopify products from your store and apply the automation process to them.
For example, set it to "Every 24 Hours" if you add new products daily.
Step 8: Choose Whether to Import Past Products
Want to share past Shopify listings?
- Turn it ON to post both old and new products.
- Turn it OFF to share only new products moving forward.
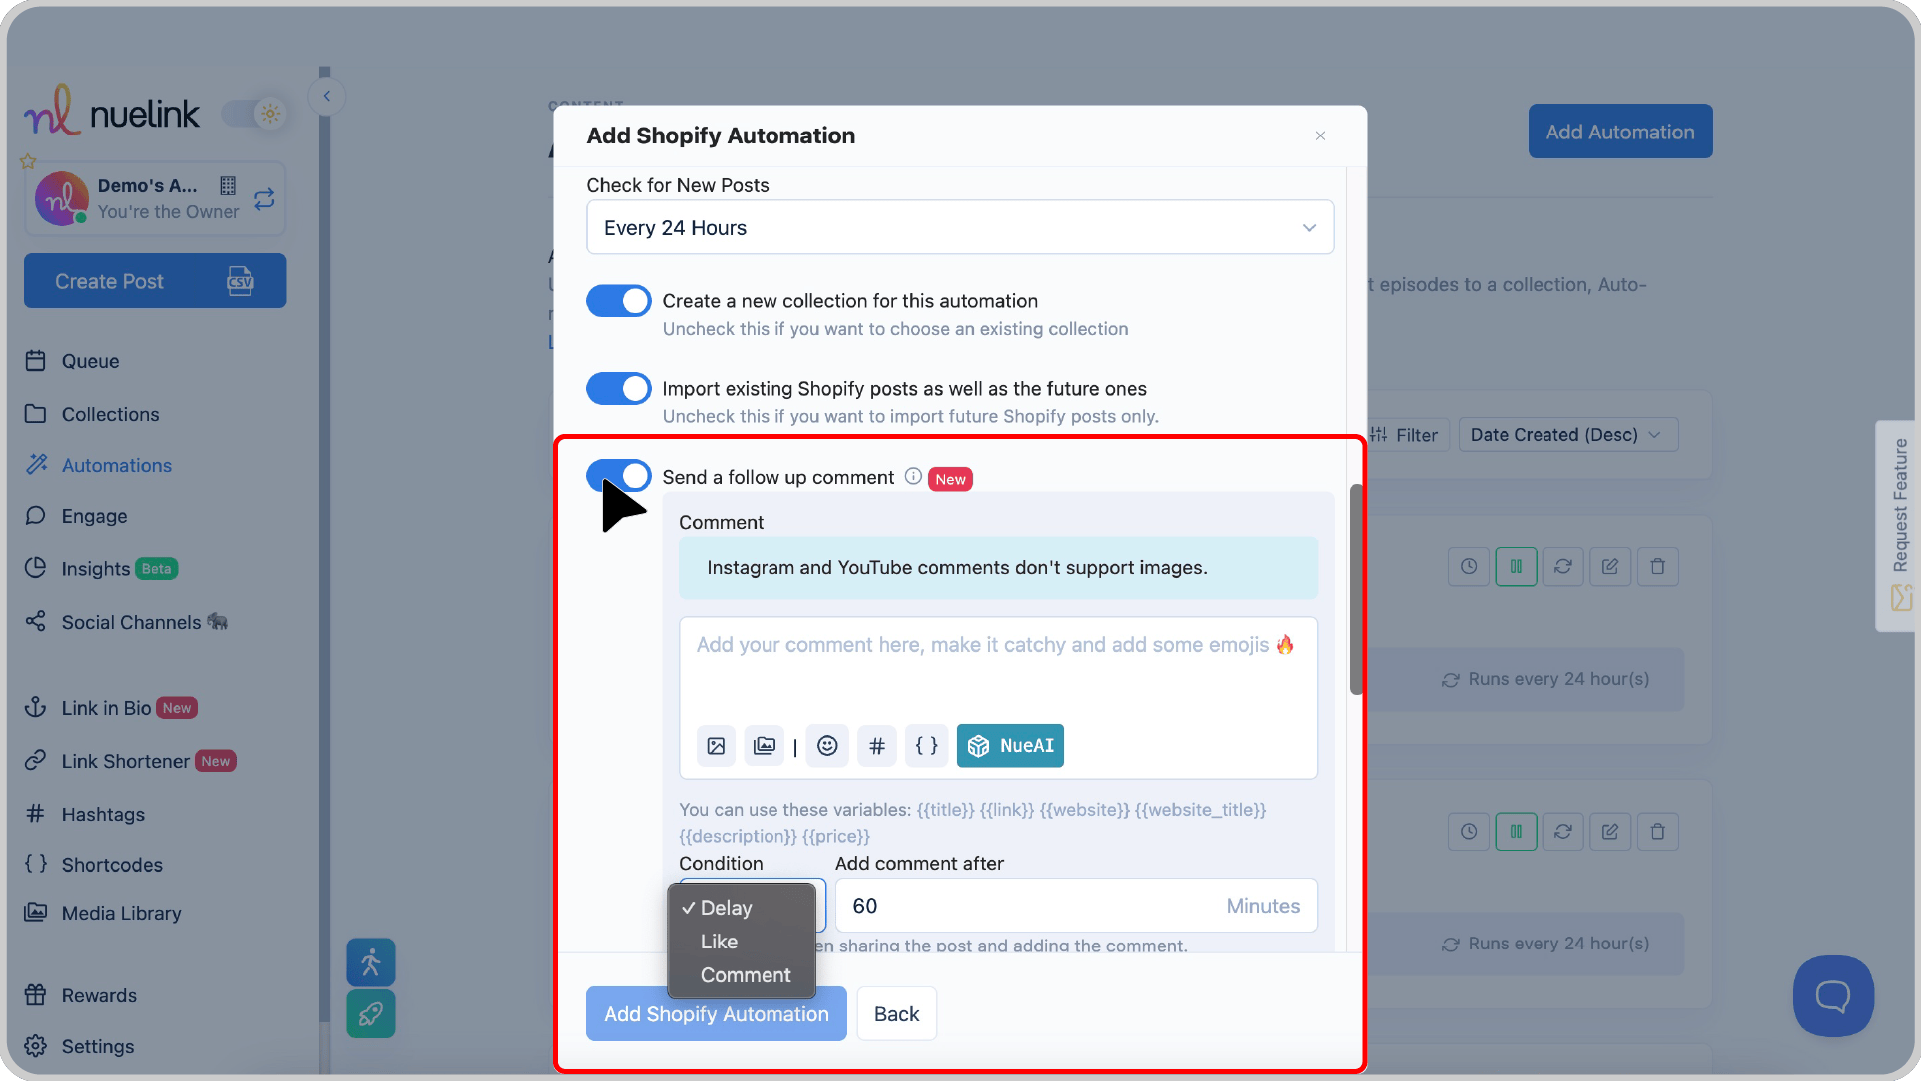
Step 9: Set Up Automatic Follow-Up Comments
Boost engagement by enabling automatic follow-up comments!
- Create a catchy follow-up message with emojis and variables like {{title}}, {{link}}, and others.
- Set the timing (e.g., post a comment 60 minutes after the original post).
- Or trigger comments based on likes/comments (e.g., post a comment 5 minutes after the original post hitting 15 likes).
Step 10: Filter Your Shopify Products with Smart Conditions
Want to only share specific products? Use Smart Conditions!
- Include: Share only products with certain keywords (e.g., "handmade", "organic").
- Exclude: Avoid posting products with certain words (e.g., "sold out", "backorder").
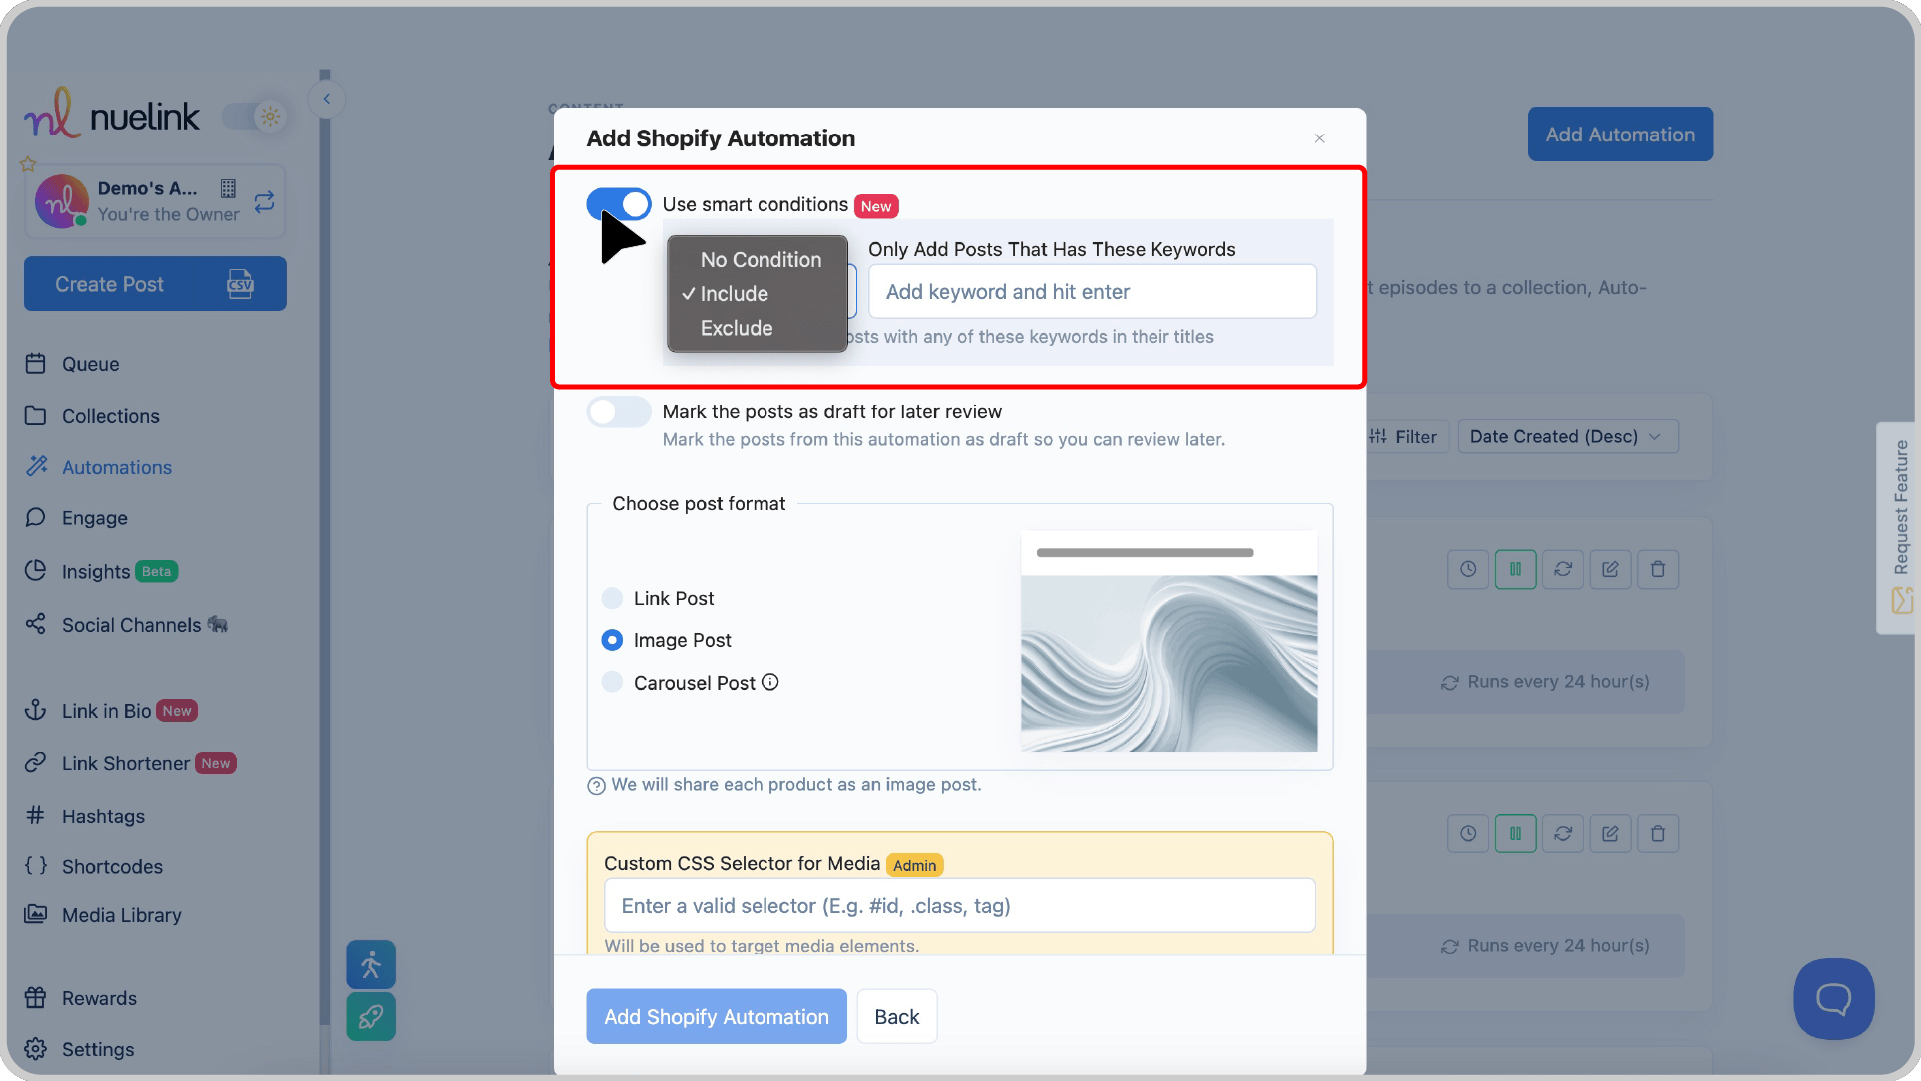
💡 Example: If you only want to share "new arrivals," add "new" under Include—only Shopify listings with "new" in the title will be posted.
That’s it! Your Shopify automation is almost ready! Now, go to your collection (named after your store), select your social channels, set your time slots, and adjust a few settings to finalize everything.
Prefer a step-by-step video guide? [Watch this tutorial!] 👇