
We’ve said it before, and we’ll say it again…
Pinterest is a sleeping giant.
Especially if you’re running an e-commerce brand.
It’s not just for inspo boards, it’s a traffic machine.
And the best part?
You don’t even have to post manually.
Let’s talk about how to schedule your Pins in advance and let Pinterest work for you.
Pinterest Carousel Specifications (2025)
Content Type
- Photos: JPEG, PNG
- Videos: MP4, MOV, M4V
File Size Limits
- Photos: Up to 32MB per image
- Videos: Up to 2GB per video
Recommended Dimensions
- Standard Pins: 1000px by 1500px (2:3 aspect ratio)
- Square Pins: 1000px by 1000px (1:1 aspect ratio)
Number of Cards in Carousel
Minimum of 2 and maximum of 5 media items per carousel (photos and/or videos combined)
Video Length
Videos must be between 4 seconds and 15 minutes long
Titles & Descriptions
Title Limit: Up to 100 characters per card
Description Limit: Up to 500 characters per card
⚠️ Note: The Pinterest carousel specifications listed here are accurate as of March 2025. Pinterest may update its platform, so be sure to check for any changes if you're reading this at a later date
Can You Schedule Pinterest Pins in Advance?
Yes, you can schedule Pinterest Pins in advance.
Pinterest’s native scheduling tool allows you to plan both standard and carousel pins (Idea Pins) ahead of time directly within the platform.
However, this native scheduling tool comes with a lot of limitations.
⚠️ Limitations of Pinterest’s Native Scheduling Tool
- You can schedule a Pin only up to 30 days in advance.
- You can only schedule one Pin at a time.
- A maximum of 10 Pins can be scheduled for future publishing.
- Image or video content cannot be edited once the Pin is scheduled.
That's why it is advisable to use social media management tools like Nuelink, Buffer, or Hootsuite for more flexibility.
Benefits of Scheduling Pinterest Pins with Nuelink
1️⃣ Organized Collections
Group your Pins into collections and set posting times and other customization settings.
2️⃣ Canva Integration
Design your Pin in Canva and send it directly to Nuelink to be scheduled. No downloads needed.
3️⃣ Bulk Scheduling
Upload up to 100 Pins at once using a spreadsheet.
4️⃣ Board Selection
Choose the right Pinterest board for each Pin while scheduling.
5️⃣ Link & Text Control
Easily set titles, descriptions, and destination links.
6️⃣ Crossposting
Set up a Pinterest crossposting automation to post your Pins in other social media channels like Instagram and TikTok automatically.
How to Schedule a Pinterest Pin (Using Nuelink)
Step 1: Sign Up for Nuelink
Start by creating your free Nuelink account.
You’ll get a 14-day trial to schedule content across Pinterest and 12 other social media platforms.
Get your 14-day free trial
Step 2: Connect Your Pinterest Account
Once you’re inside the dashboard, connect your Pinterest account.
This lets you schedule pins directly to your boards from Nuelink.
Need help connecting your Pinterest account?
• 📖 Read the step-by-step help article
• 🎥 Watch the quick YouTube video guide
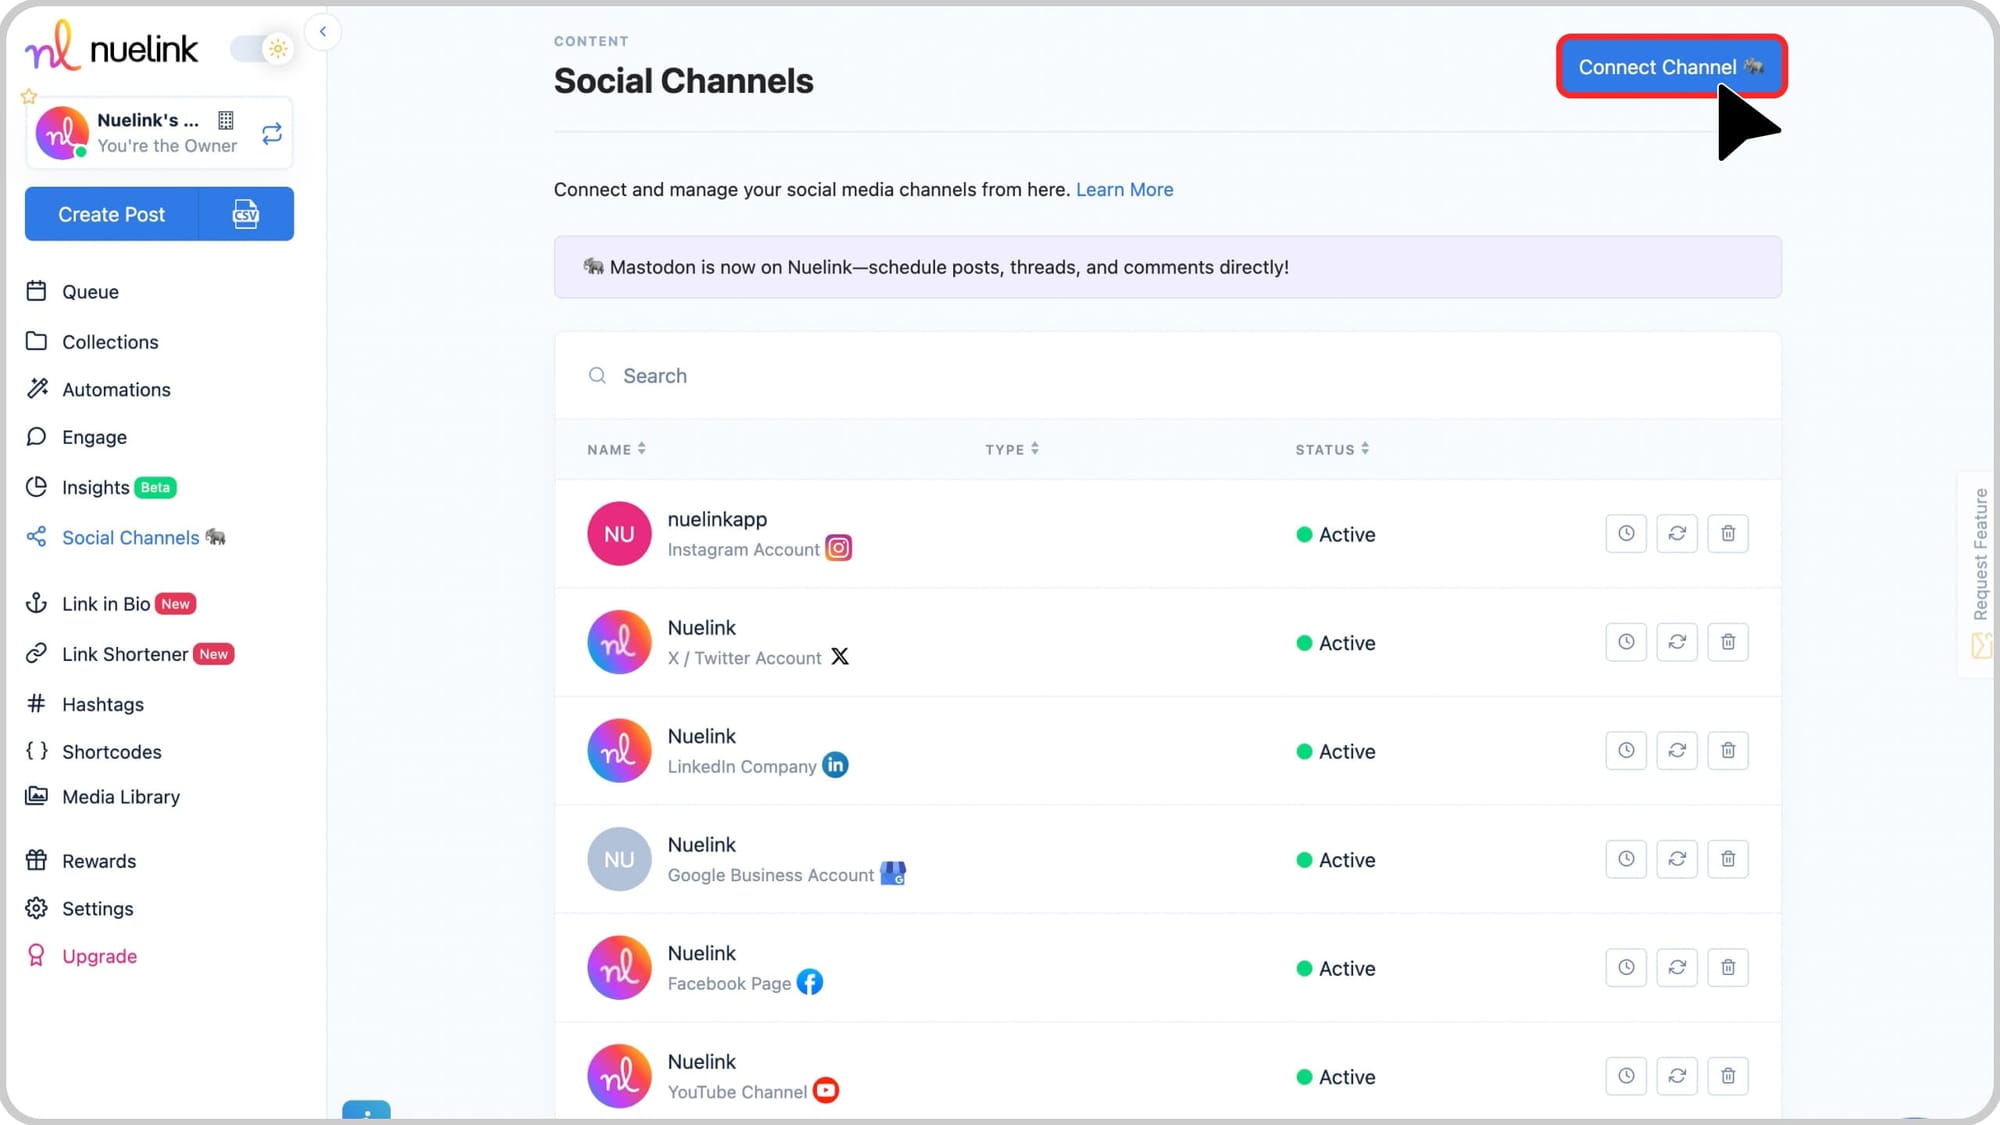
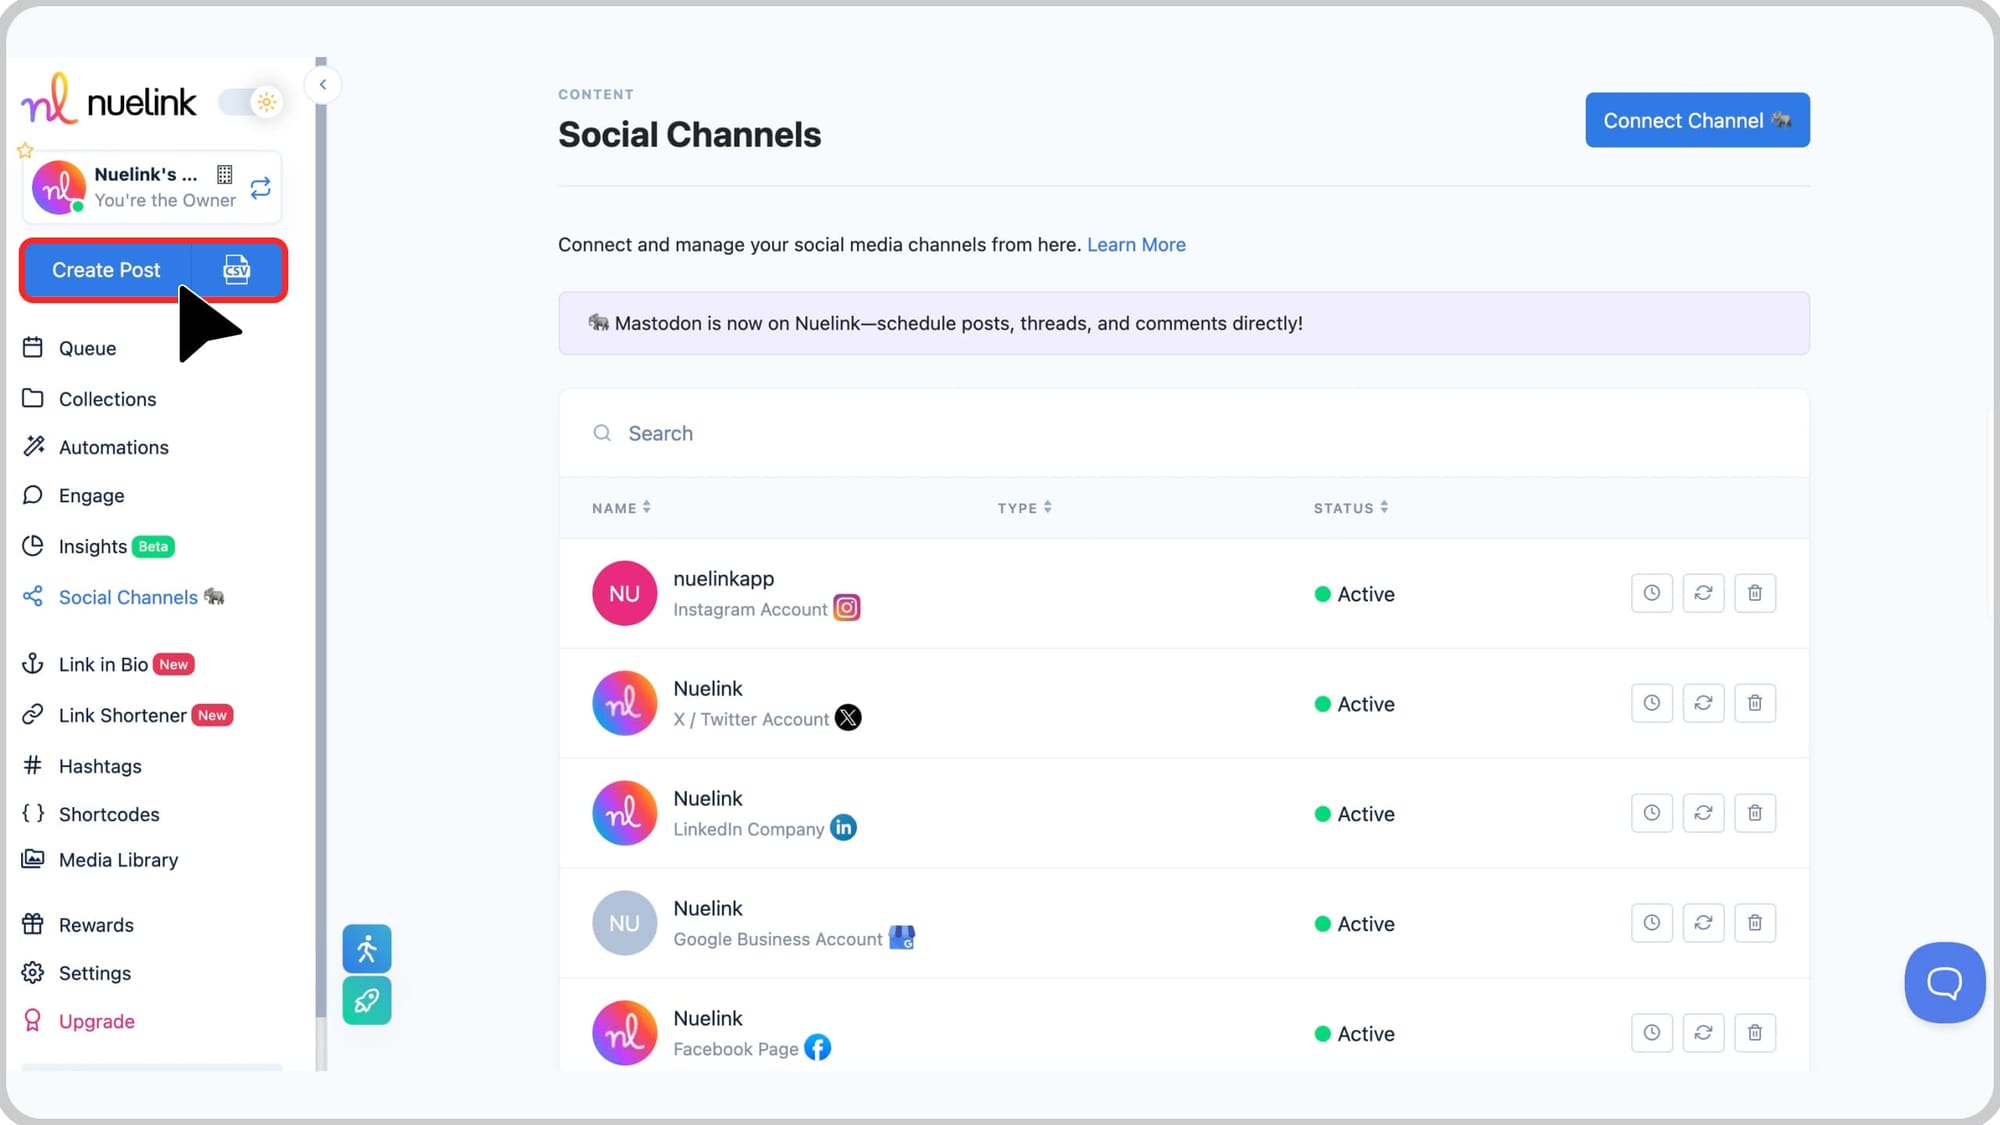
Step 3: Click on ‘Create Post’
In the left-hand sidebar, click ‘Create Post’ to begin drafting your Pinterest content.
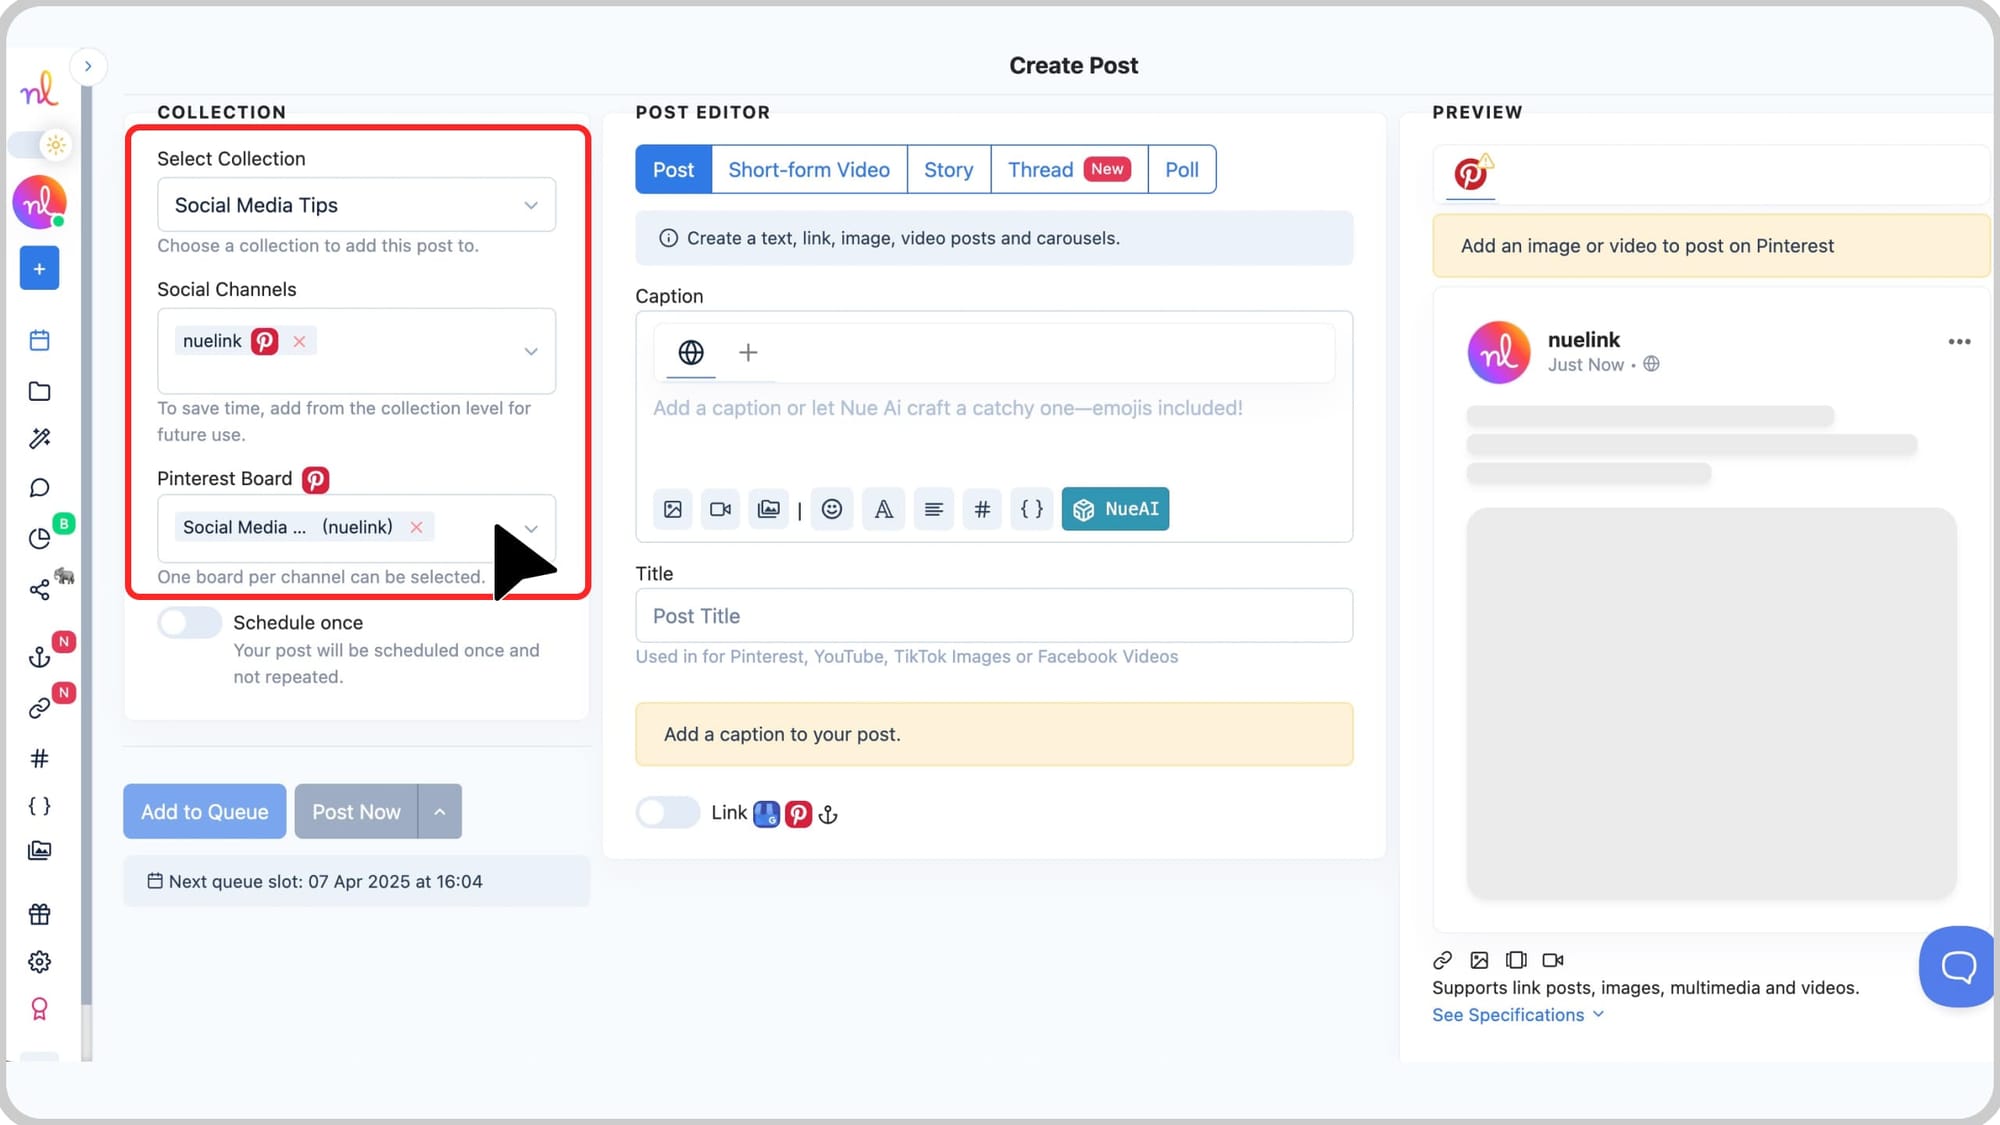
Step 4: Choose a Collection and Channel
Use the Collection dropdown to organize your post into a content category (e.g., “Pinterest Campaigns”).
Then, in the Social Channels section, select your connected Pinterest account.
Step 5: Select a Pinterest Board
Choose the Pinterest board where your Pin should be published.
You can only select one board per channel.
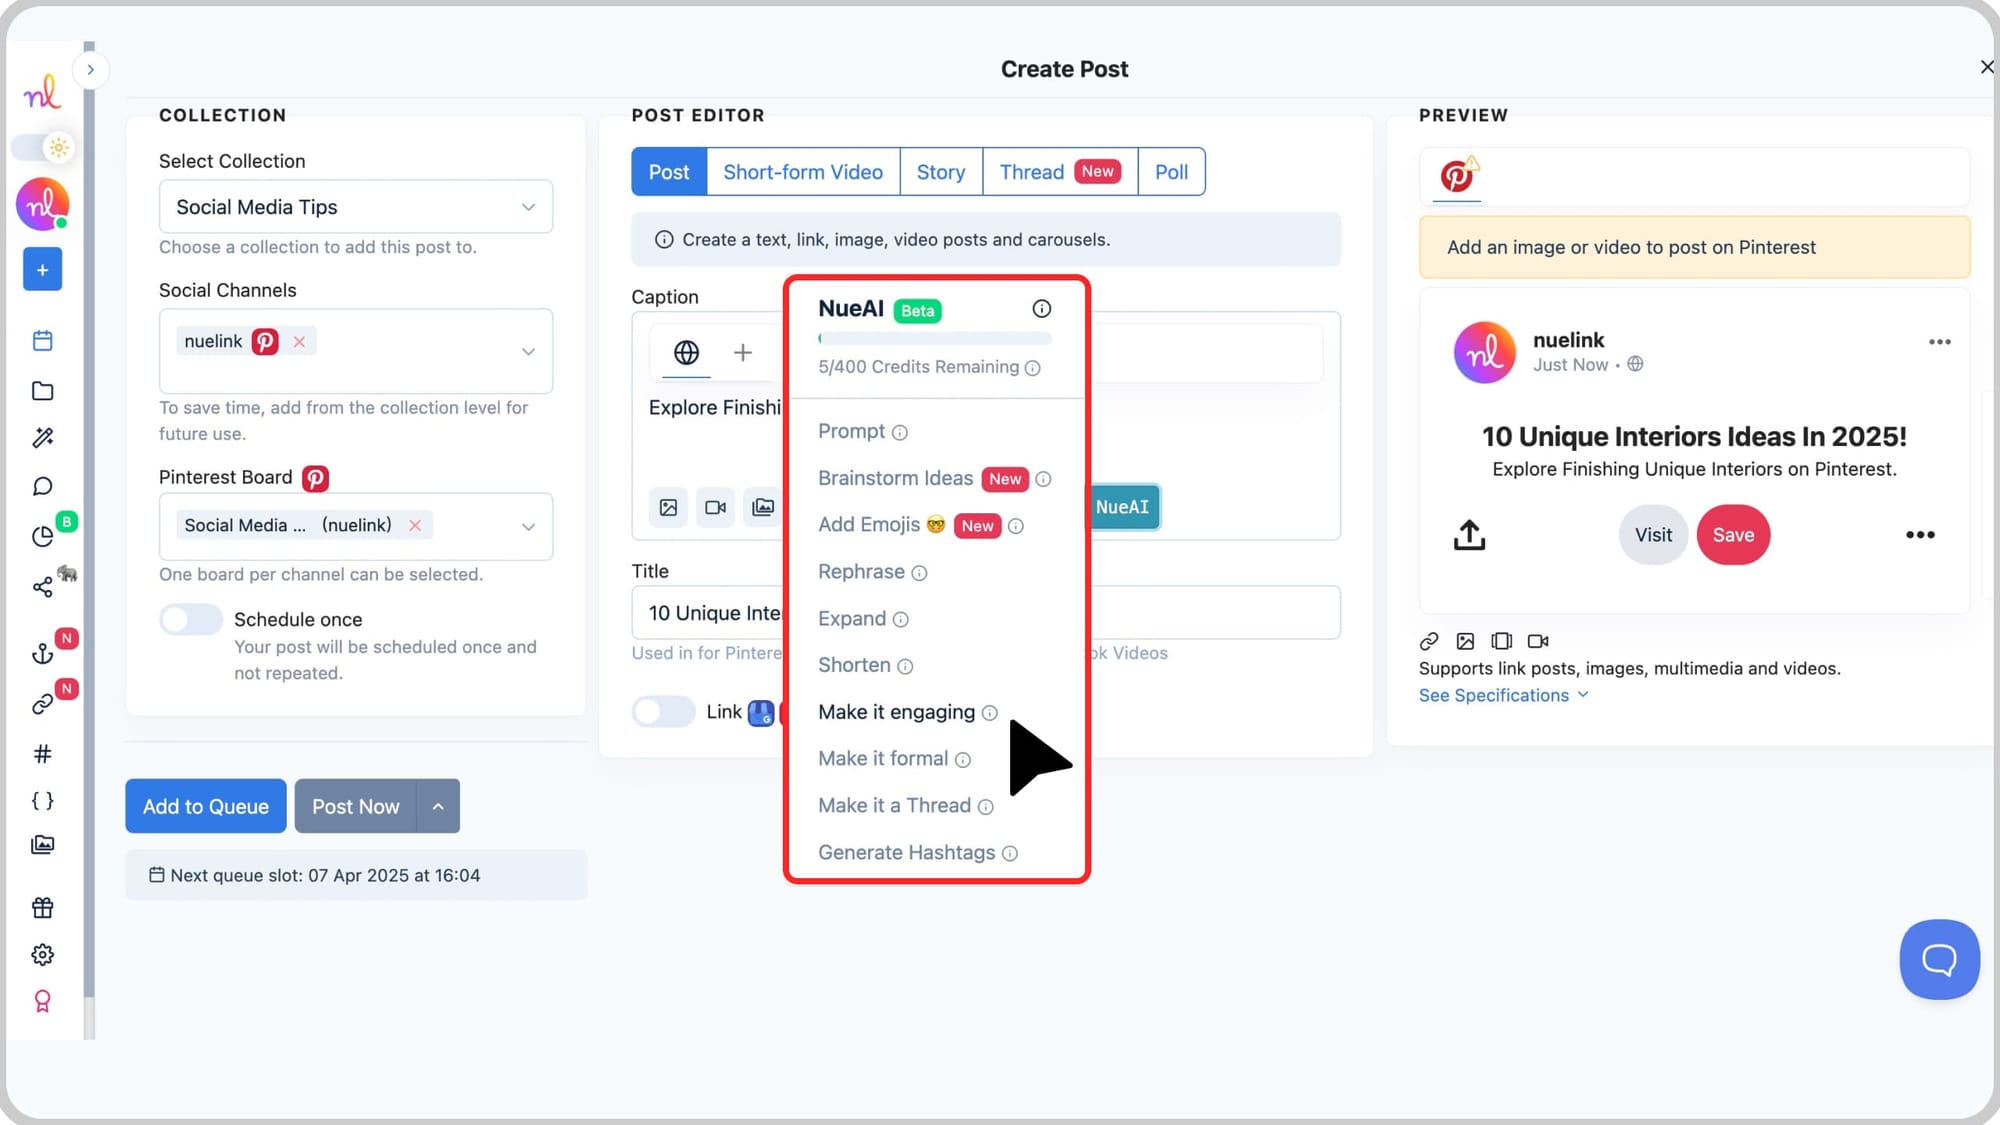
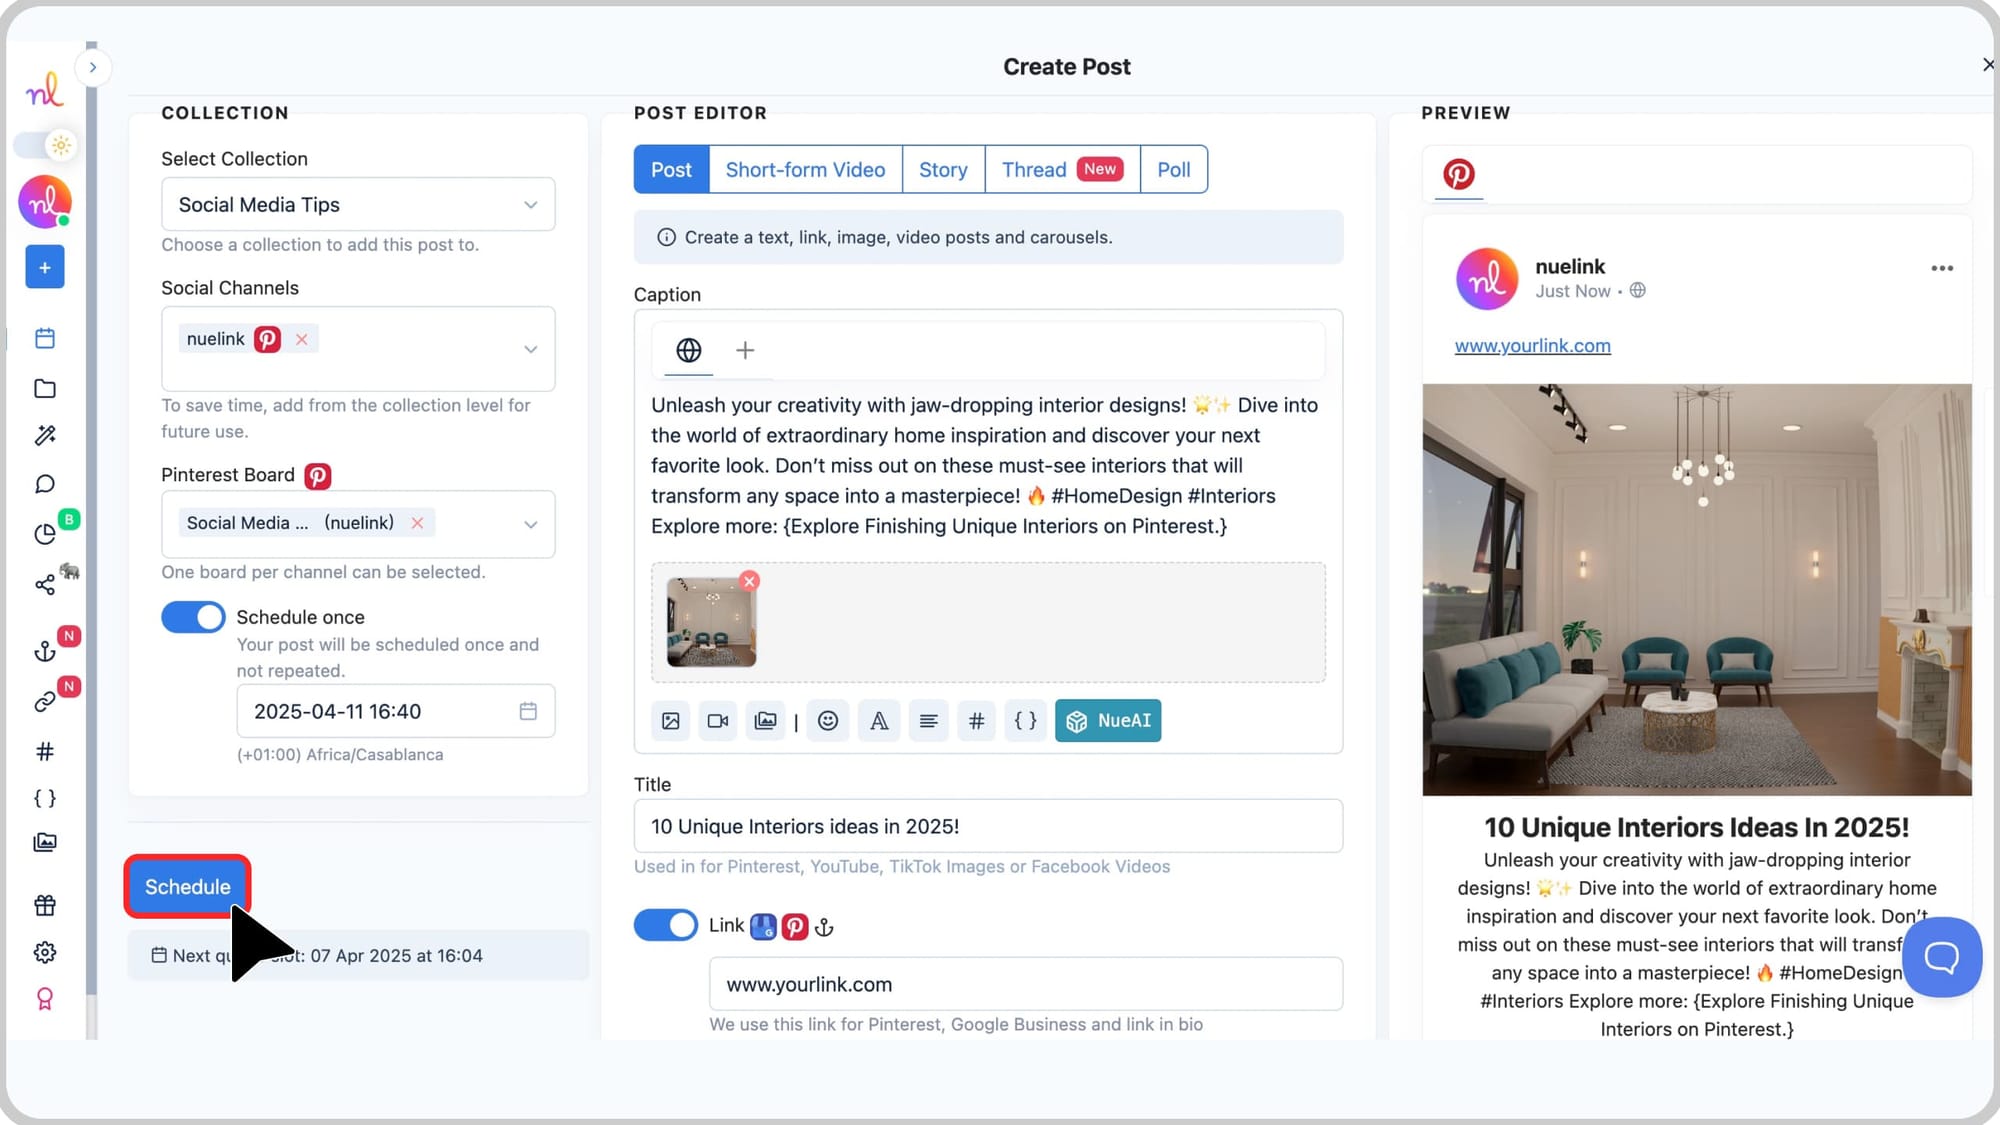
Step 6: Write Your Post Title & Caption
Enter a Title and a caption for your Pin, which will be shown across Pinterest.
If you need help writing the caption or title, you can use NueAI.
Simply type a short prompt, click the ‘NueAI’ button, and it will auto-generate content for you.
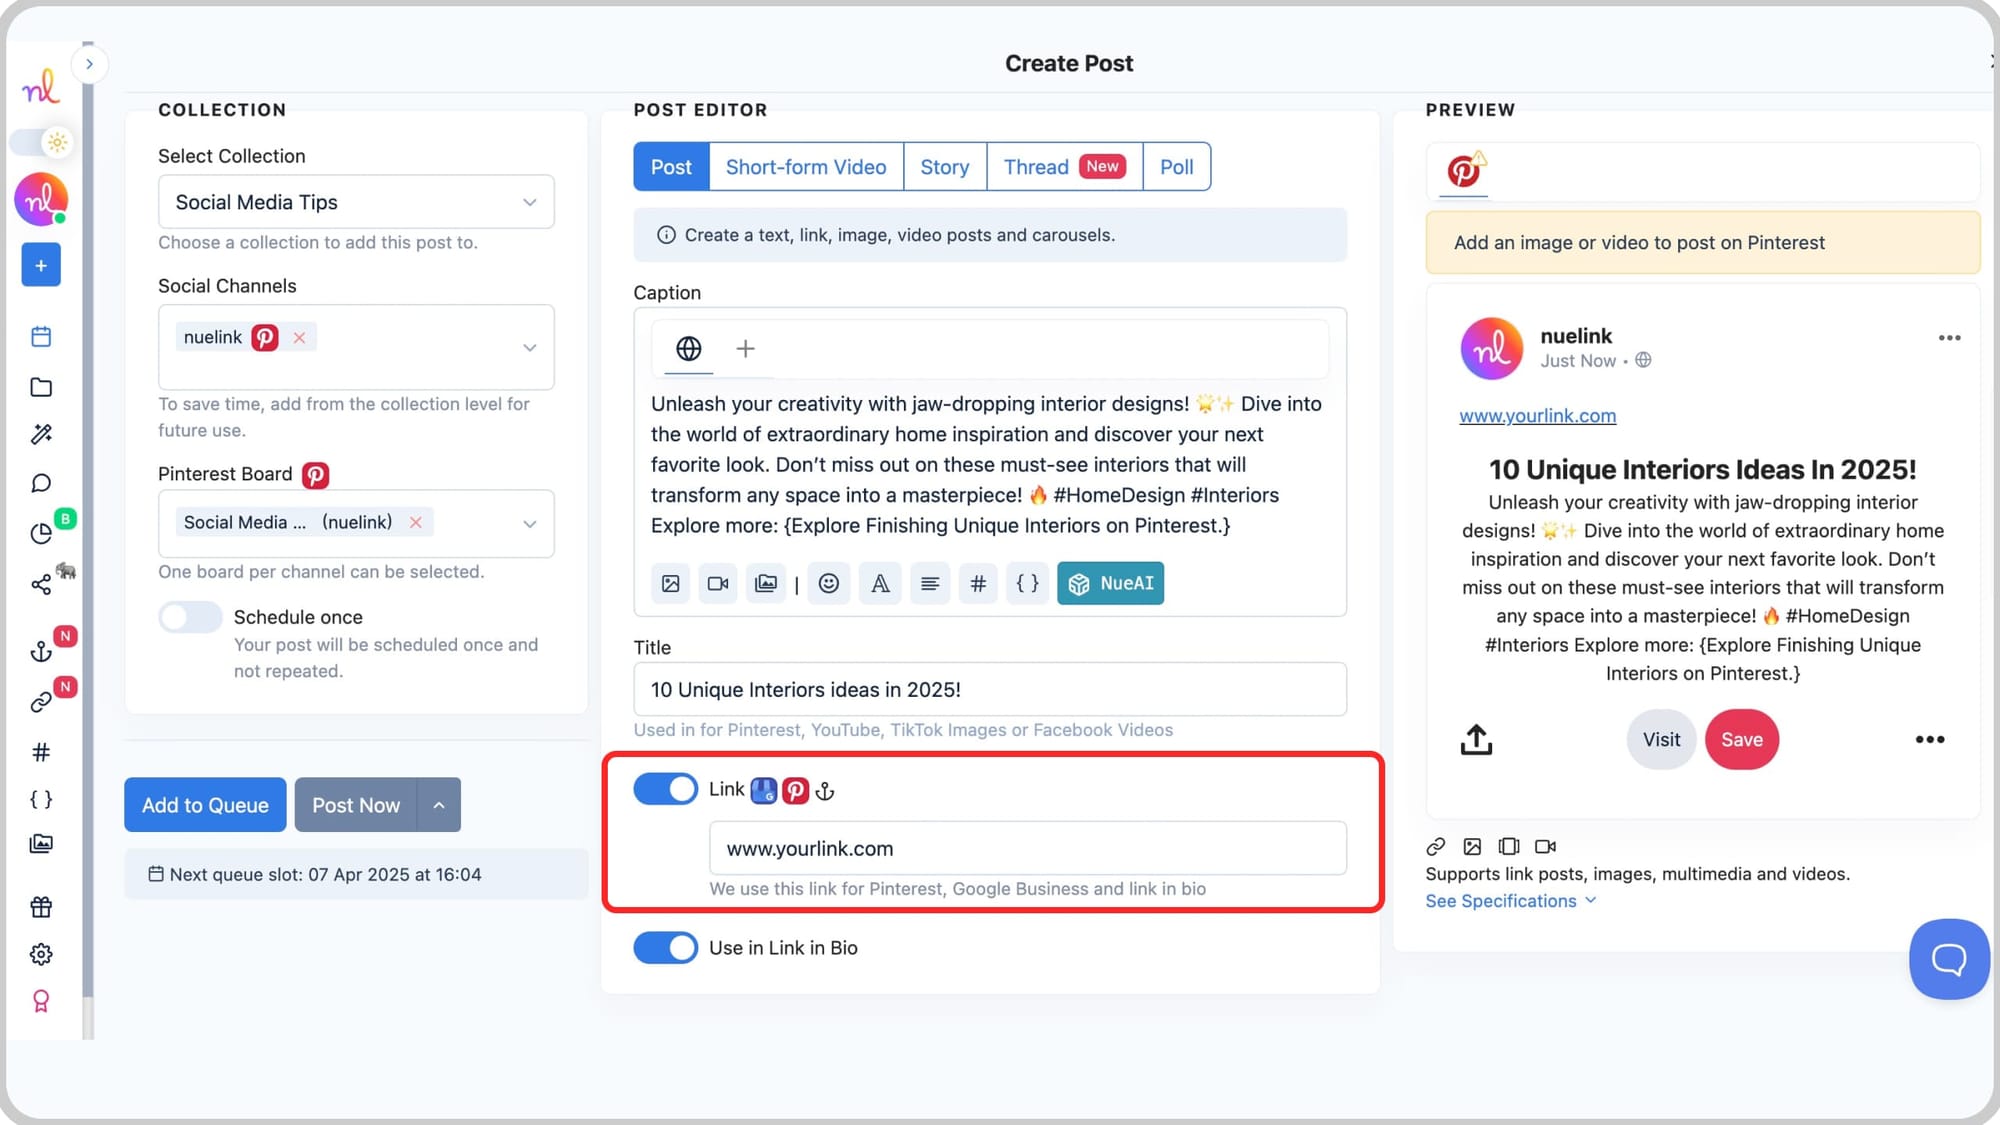
Step 7: Add a Destination Link
Click on the Link option and paste the URL you want people to visit when they click your Pin.
This is commonly used for product pages, blog posts, or sign-up links.
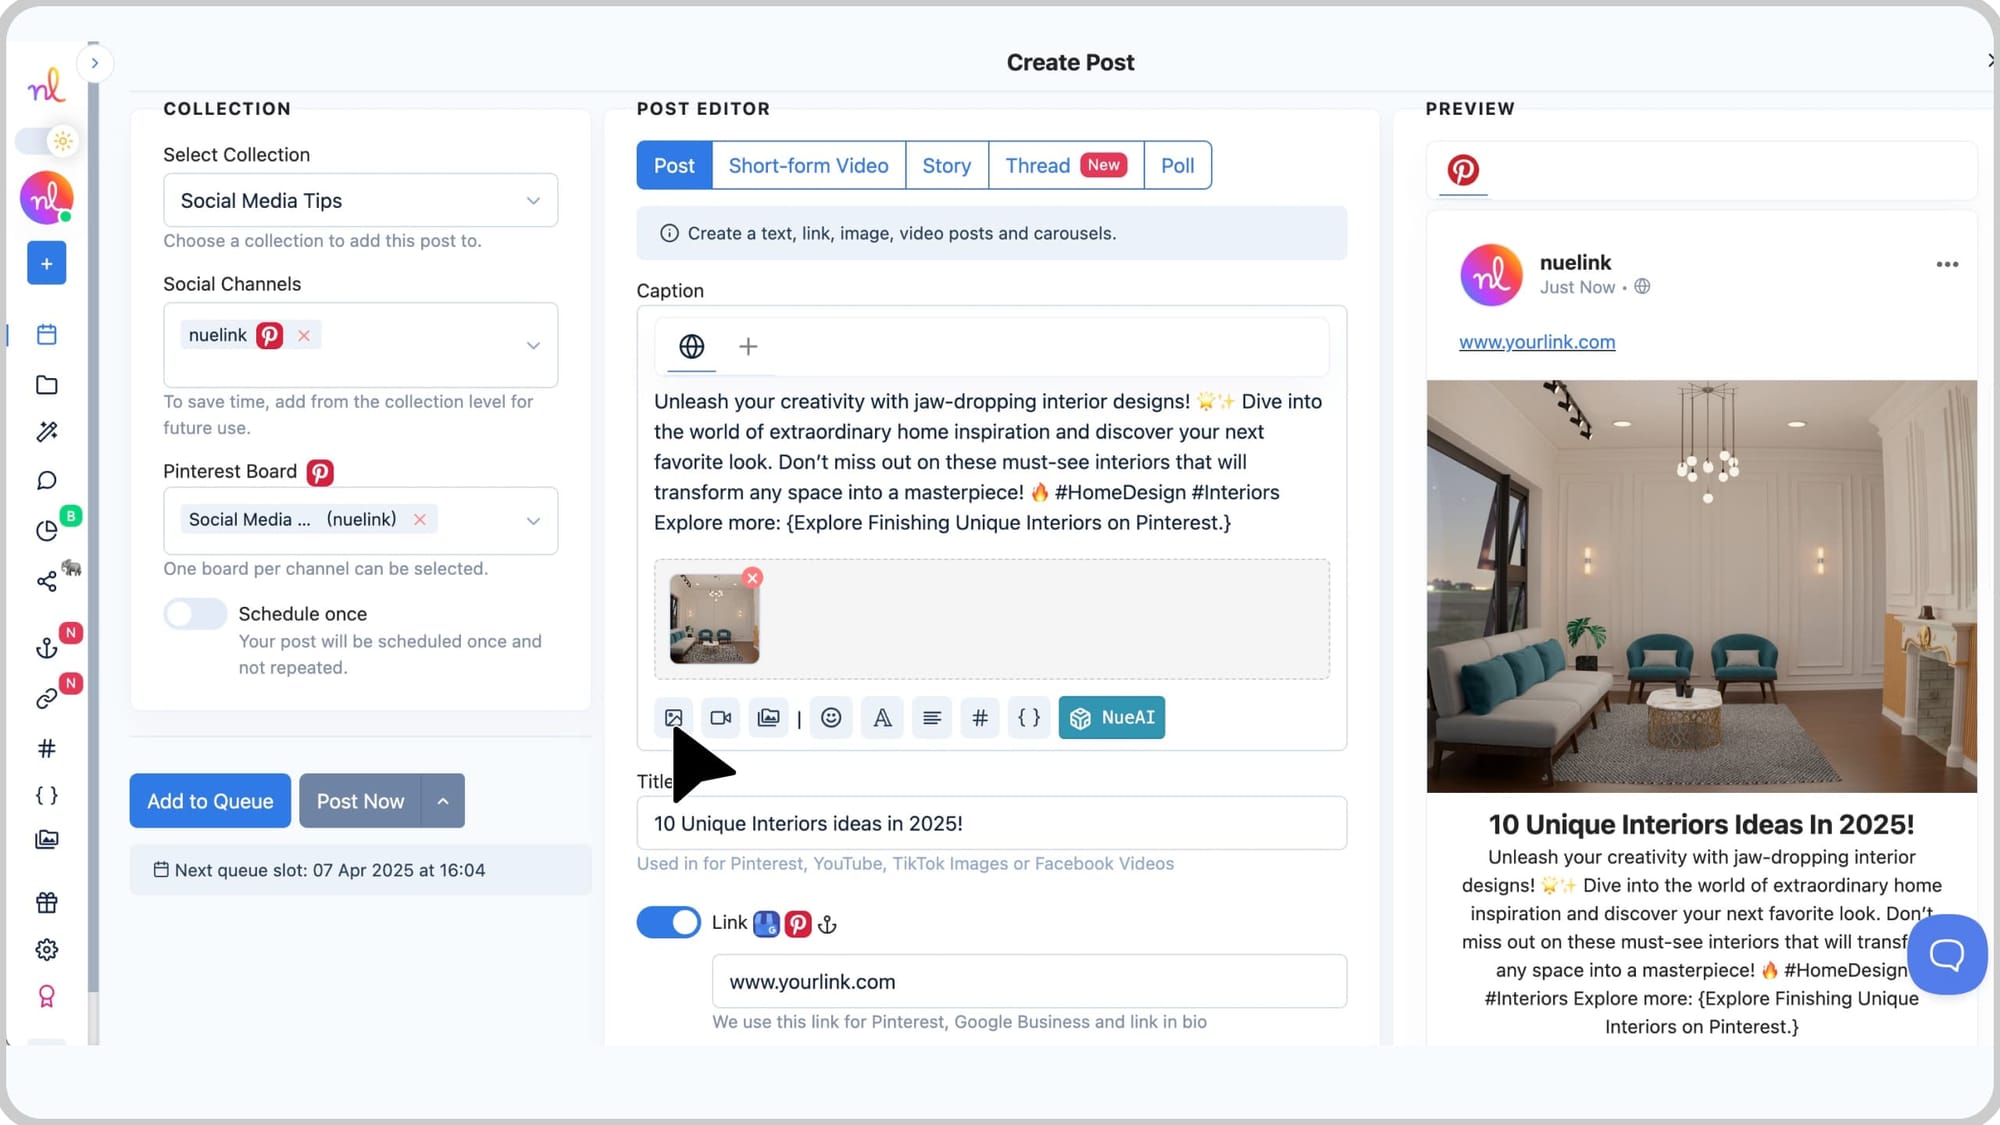
Step 8: Upload Your Image or Video
Click the media section to upload your Pin content.
For best results, use Pinterest’s recommended dimensions (e.g., 1000×1500px for standard Pins).
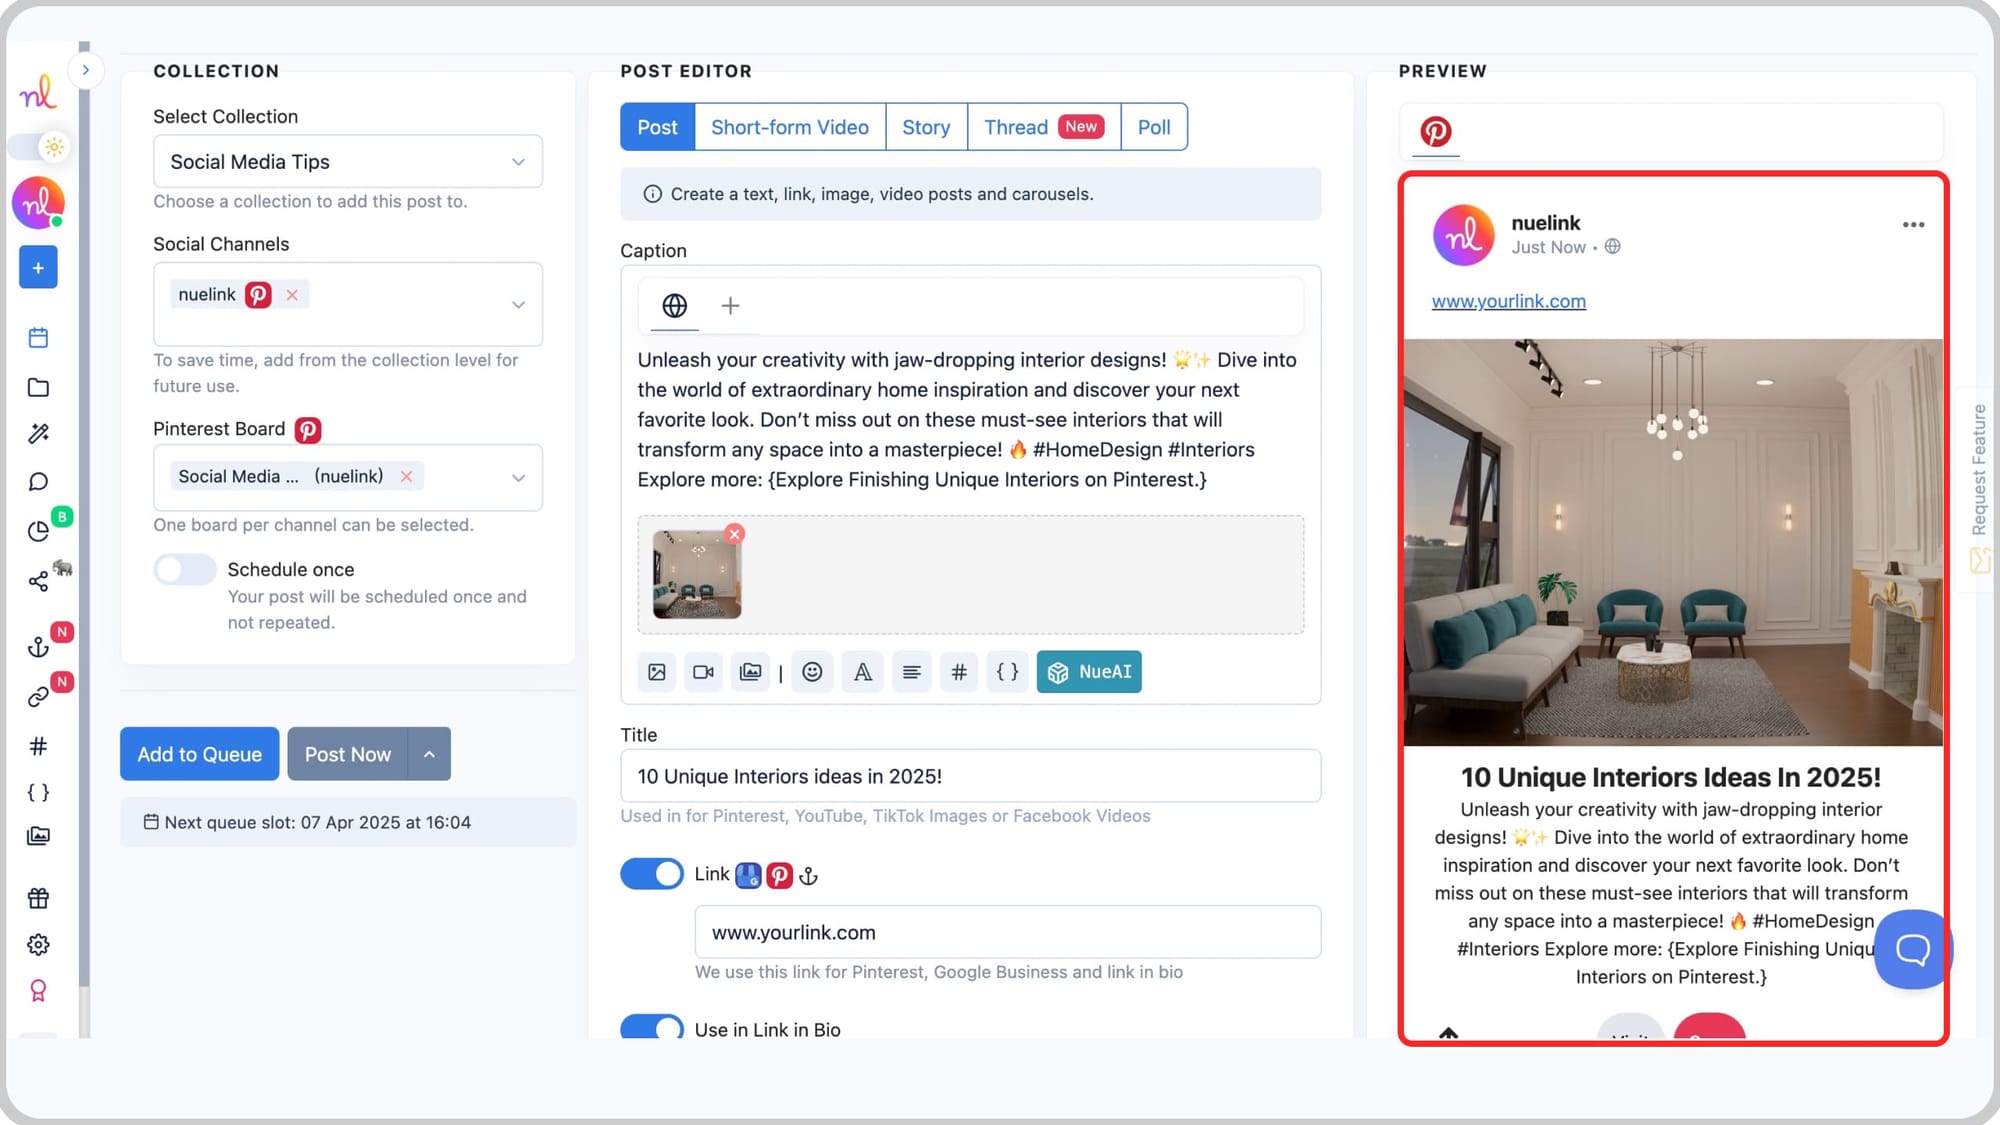
Step 10: Preview Your Pin
On the right-hand side of the editor, you’ll see a live preview of how your Pin will appear.
Review it to ensure everything looks polished.
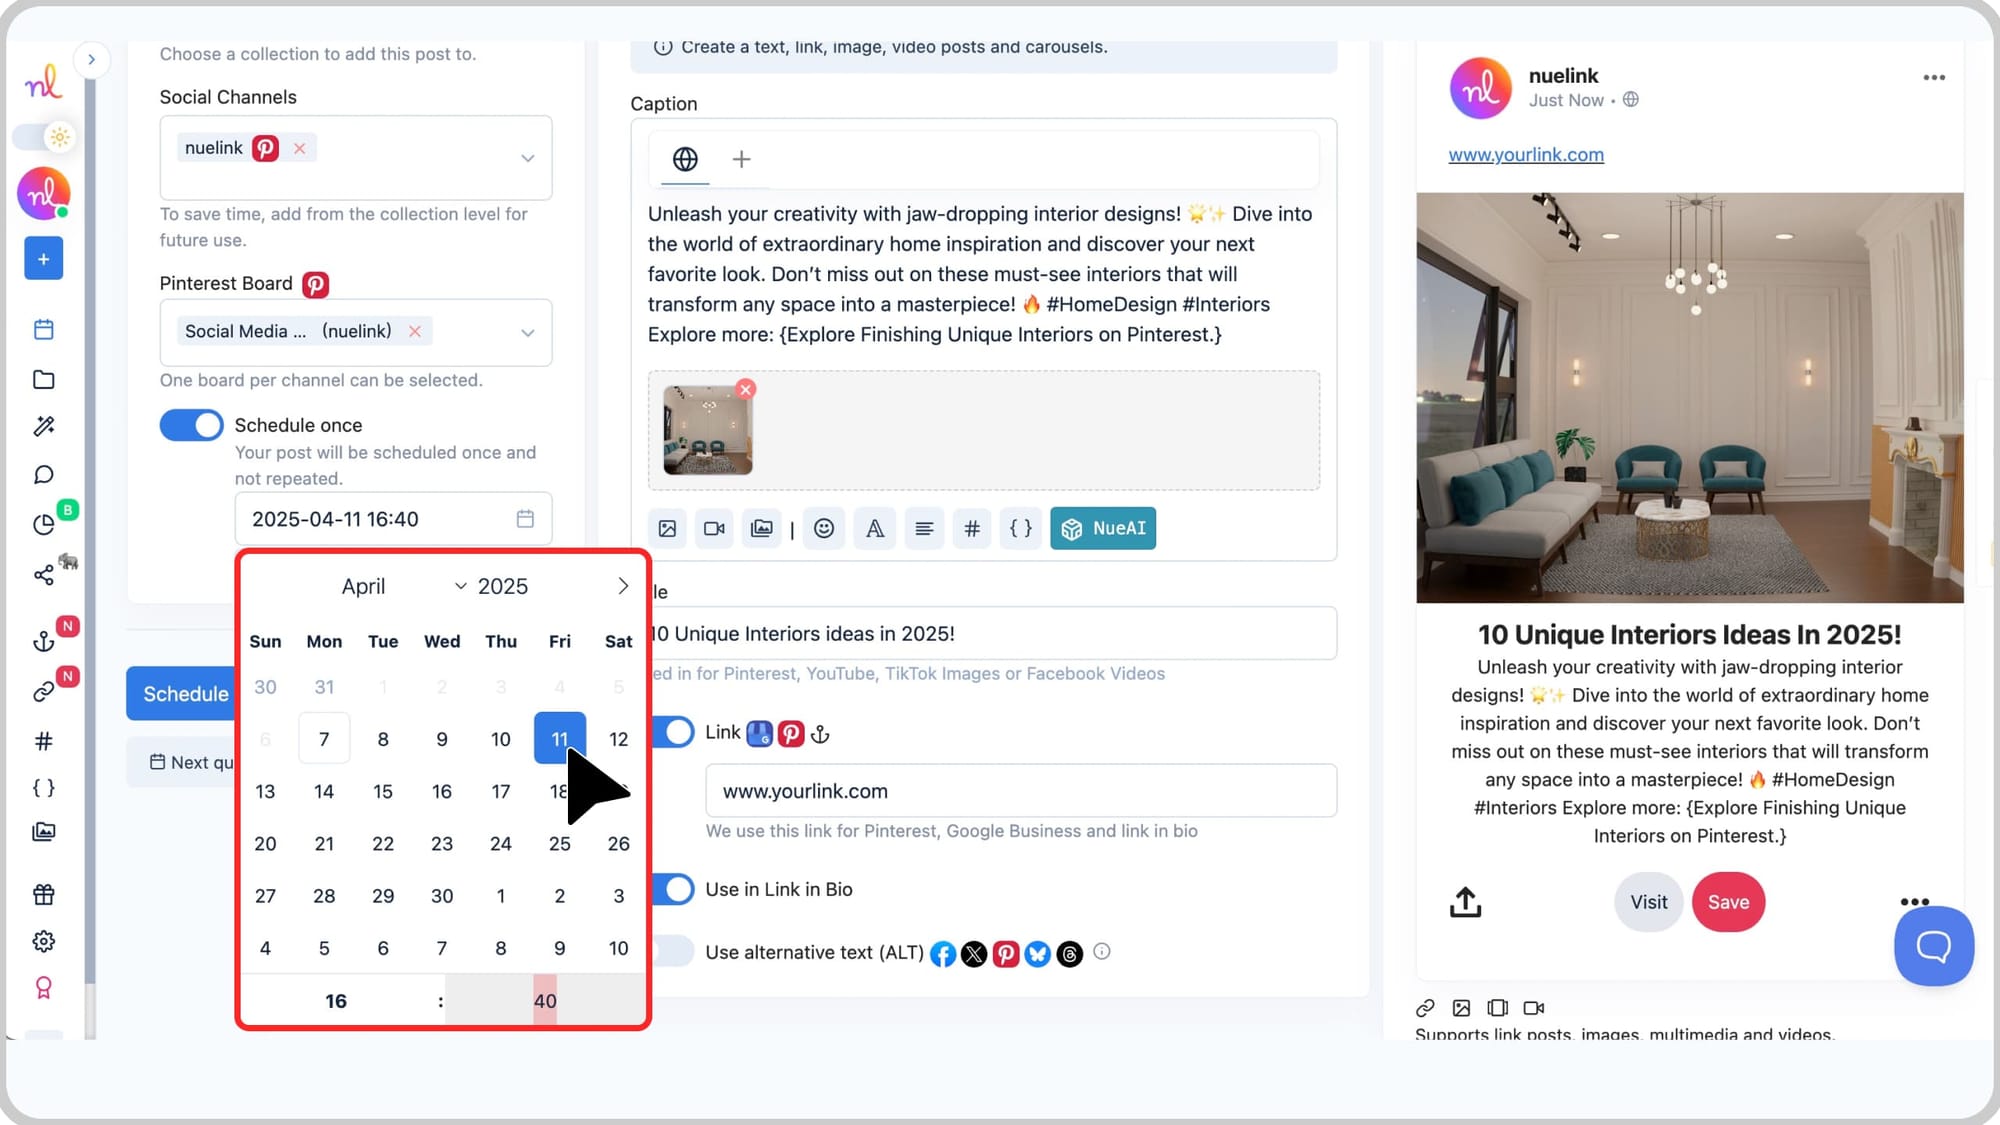
Step 11: Schedule Your Pin
Enable the ‘Schedule Once’ option, then choose the date and time when you want your Pin to go live.
Use the calendar and time picker to set it precisely.
Step 12: Click ‘Schedule’
Once everything looks good, hit the ‘Schedule’ button and you're done!
🎉 Your Pinterest Pin is now officially scheduled and ready to go live automatically!


