
Few actions wield as much power as a well-phrased retweet.
A retweet, in its simplest form, is the digital equivalent of sharing, a gesture that amplifies voices, sparks conversations, and connects communities across the globe.
In this blog post, we will discover the many advantages of retweeting and how you can automate this very useful tool.
What Does It Mean to Retweet on Twitter?
A retweet is when you reshare an existing tweet so it appears again on your profile and in your followers’ feeds.
It’s a way to give that tweet a second chance to perform better or to reach a new audience, without creating a new one.
When you retweet:
- The tweet is shown again to your audience, as if it were just posted.
- It helps the content reach more people, especially those who missed it the first time.
- The original likes, comments, and views stay the same.
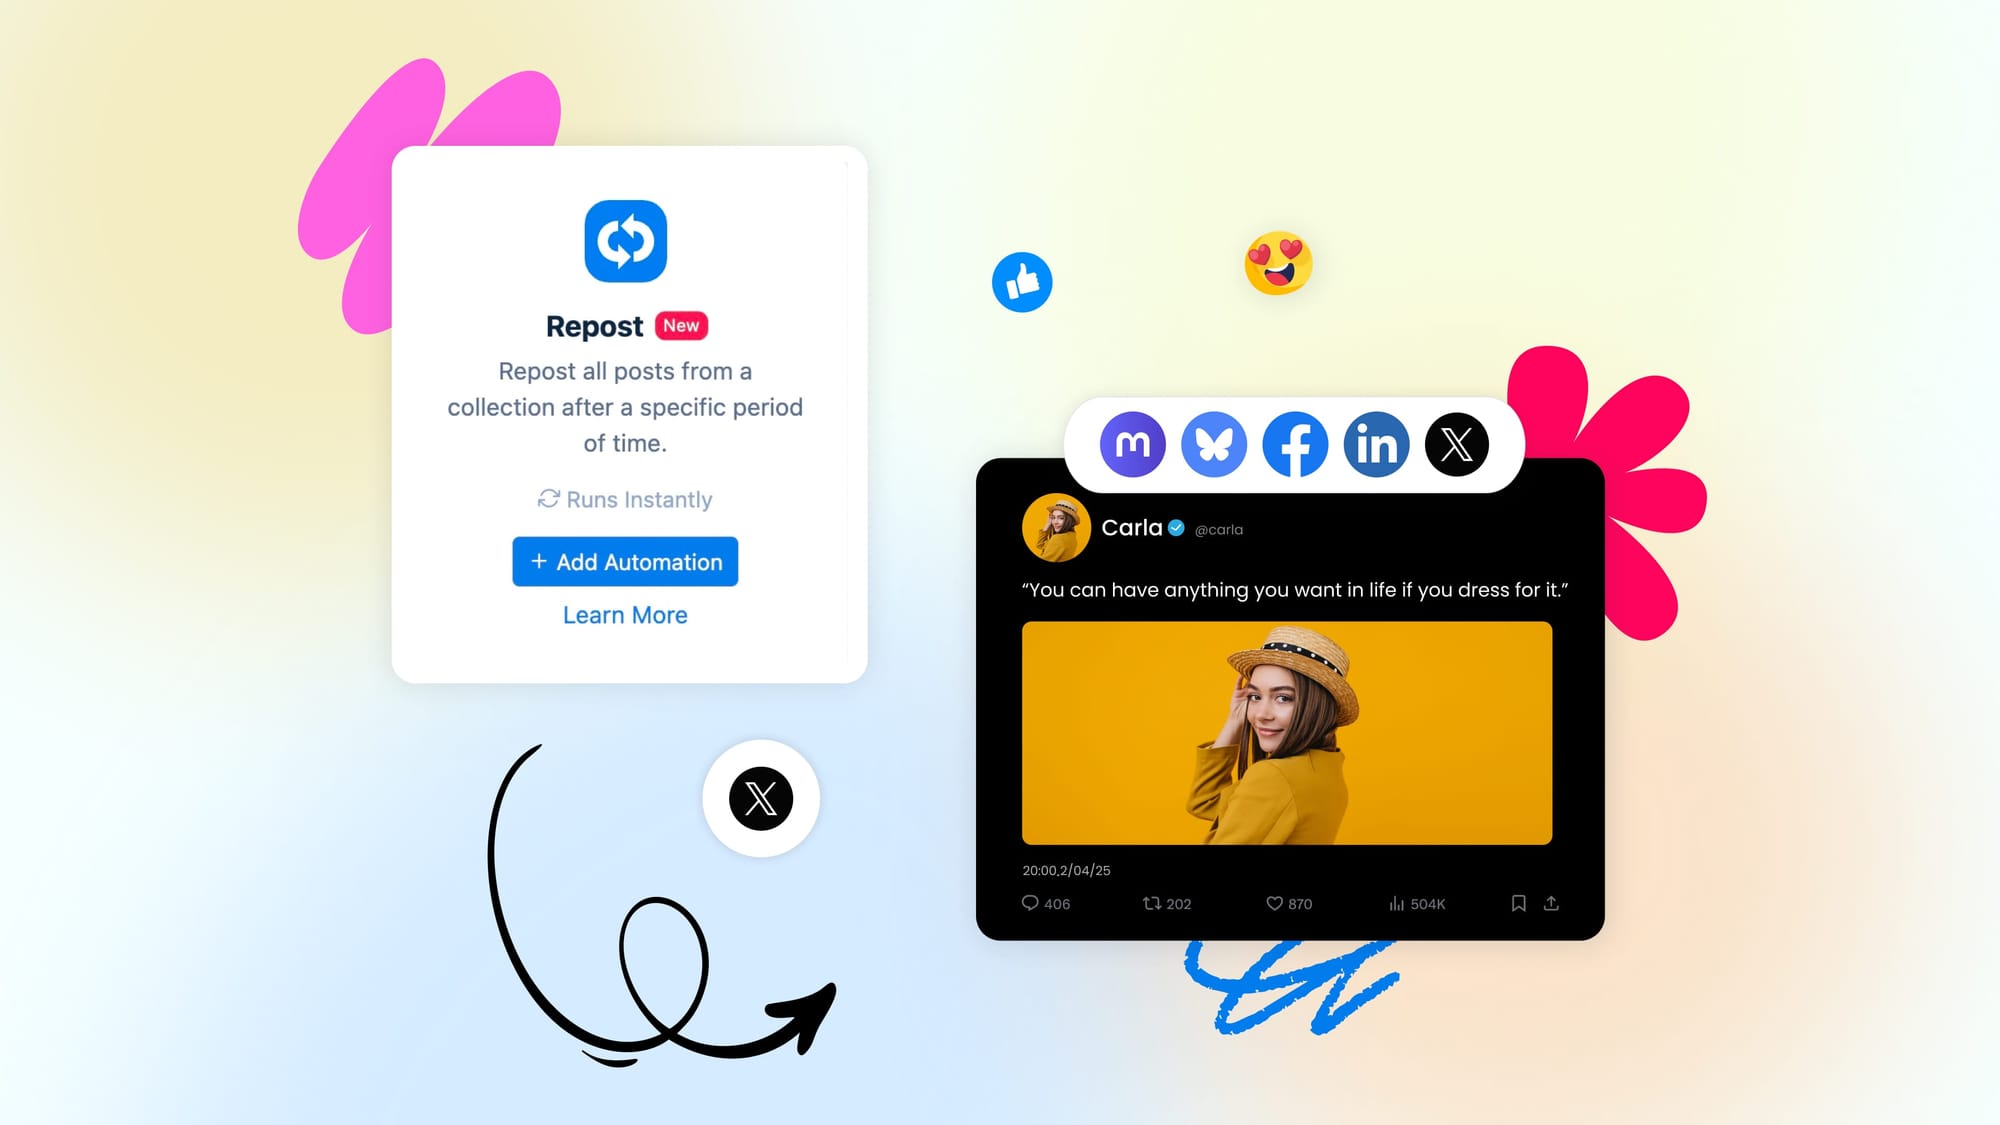
What is Retweet Automation or Auto Retweet?
Retweet Automation, also known as Auto Retweet, is a way to automatically reshare a tweet after it’s published, without doing it manually.
Auto-retweeting can be accomplished using a social media automation tool like Nuelink, PhantomBuster, or Circleboom.
Let's say you have a Twitter account where you share 5 pieces of news every day. Instead of going back to retweet them yourself, a tool like Nuelink does it for you based on settings you choose.
For example, you can:
- Automatically retweet a post after 3, 6, or 24 hours
- Add a custom message above the retweet
- Set the retweet to disappear after 48 hours to keep your feed tidy.
Why Do We Need to Retweet?
- Tweets have a very short lifespan. Most people miss them the first time.
- Retweeting gives your content a second chance to be seen.
- Helps reach followers in different time zones.
- Reinforces key messages or promotions without creating new content.
- Keeps your feed active even during slow content weeks.
- Great for resurfacing evergreen tweets that are still valuable.
- Subtly signals that your account is consistent and engaged.
Why Automate the Retweet Process?
- Saves time. No need to manually track and repost tweets.
- Ensures tweets get reshared at the right time, even if you're busy.
- Keeps your brand visible while you’re offline or sleeping.
- Helps you maintain a regular posting rhythm without the effort.
- Avoids missed opportunities to boost well-performing tweets.
- Reduces mental clutter. Automation handles the repetition for you.
- Allows for smart extras like auto-removal after 48 hours to keep your feed clean.
How to Set Up Auto-Retweet in Nuelink
Step 1: Open a Nuelink Account
Start by signing up for Nuelink’s 14-day free trial. This lets you automate the process of retweeting in just a few clicks.
👉 Claim your 14-day free trial now
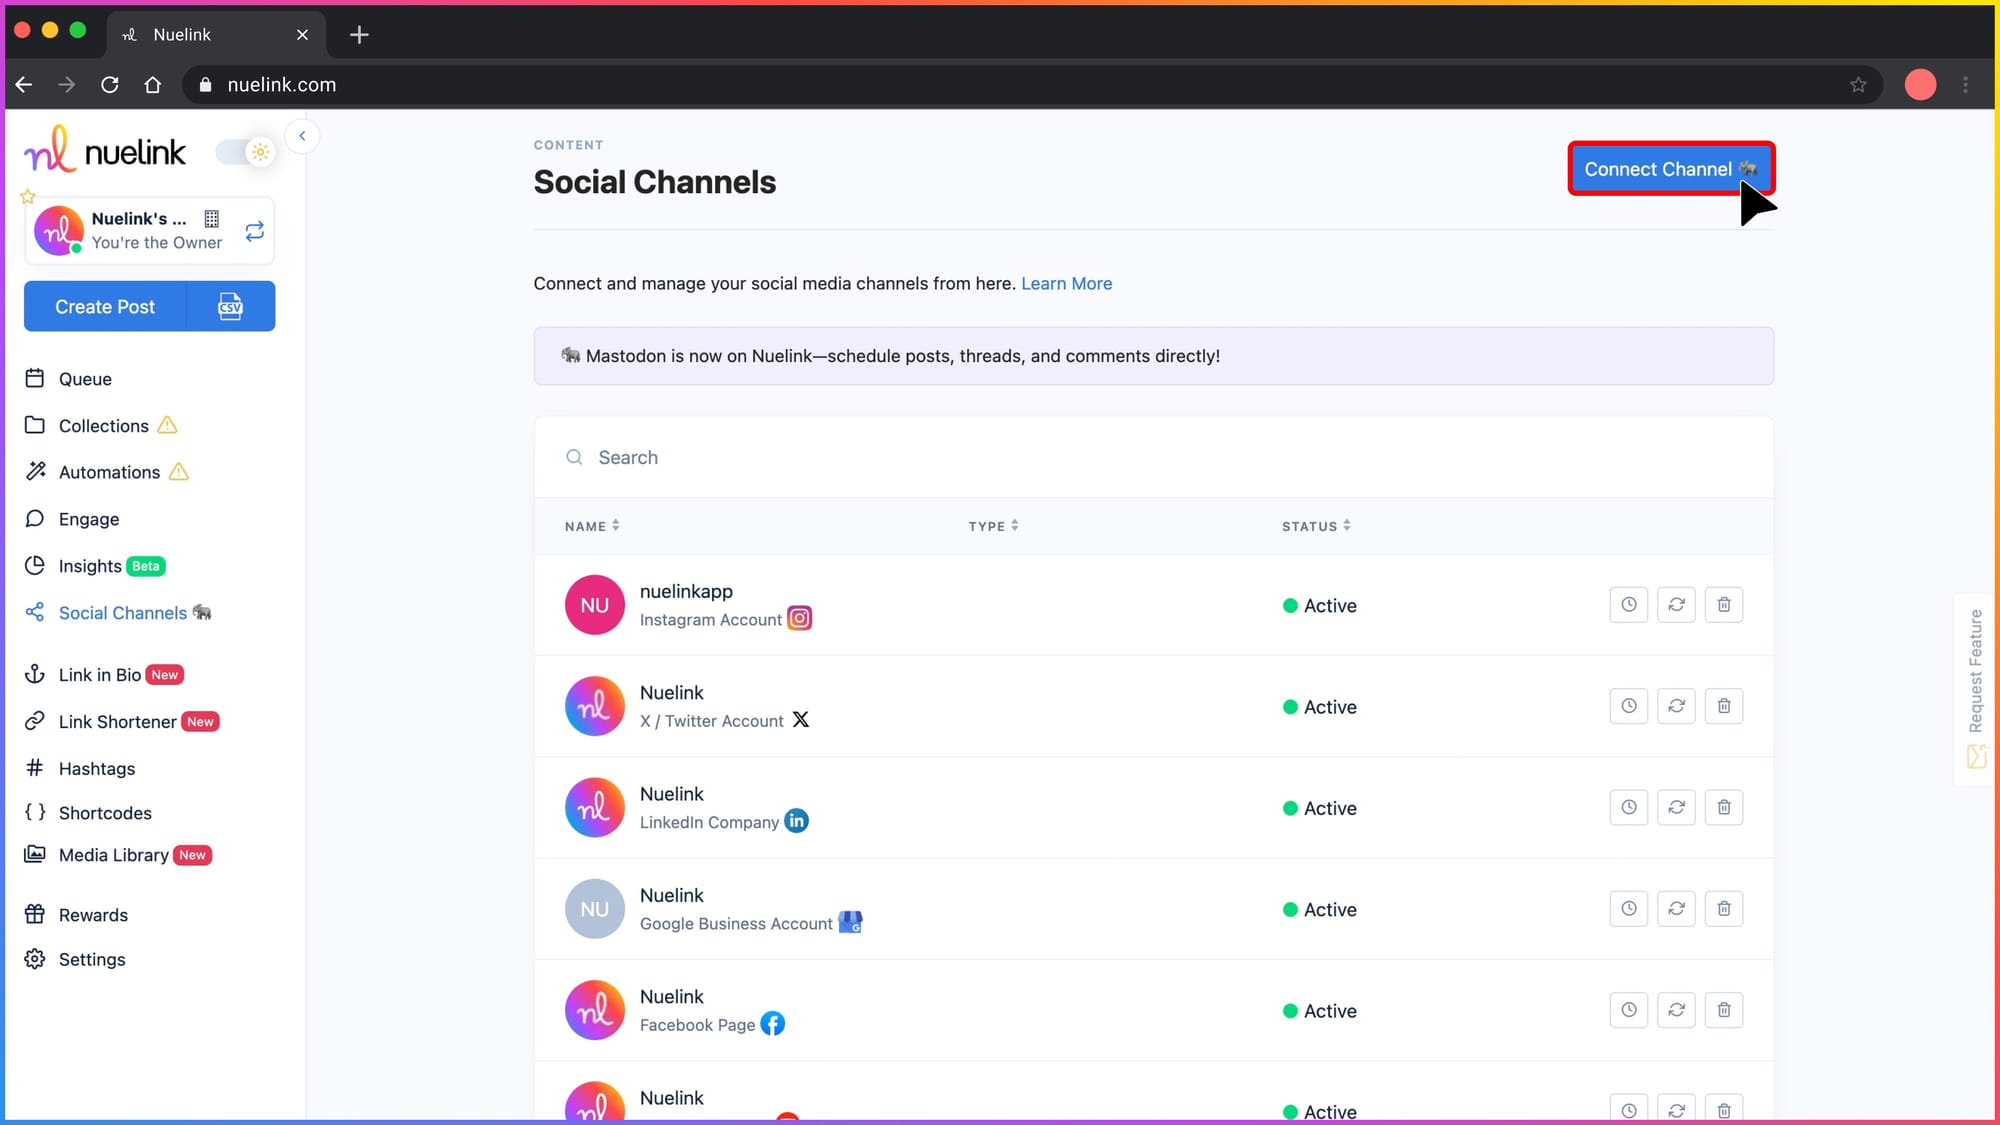
Step 2: Connect Your Twitter Account with Nuelink
Once you're inside your Nuelink dashboard, head over to the "Social Channels" section and connect your Twitter (X) account.
💡 You can connect as many Twitter accounts as you need, as long as it fits within your current Nuelink plan.
Need help? Check these out:
- ▶️ How to Connect Your Twitter Account – YouTube Video Guide.
- 📖 How to Connect Twitter to Nuelink – Help Article.
This connection is what allows Nuelink to auto-post, schedule, or repost content directly to your Twitter timeline.
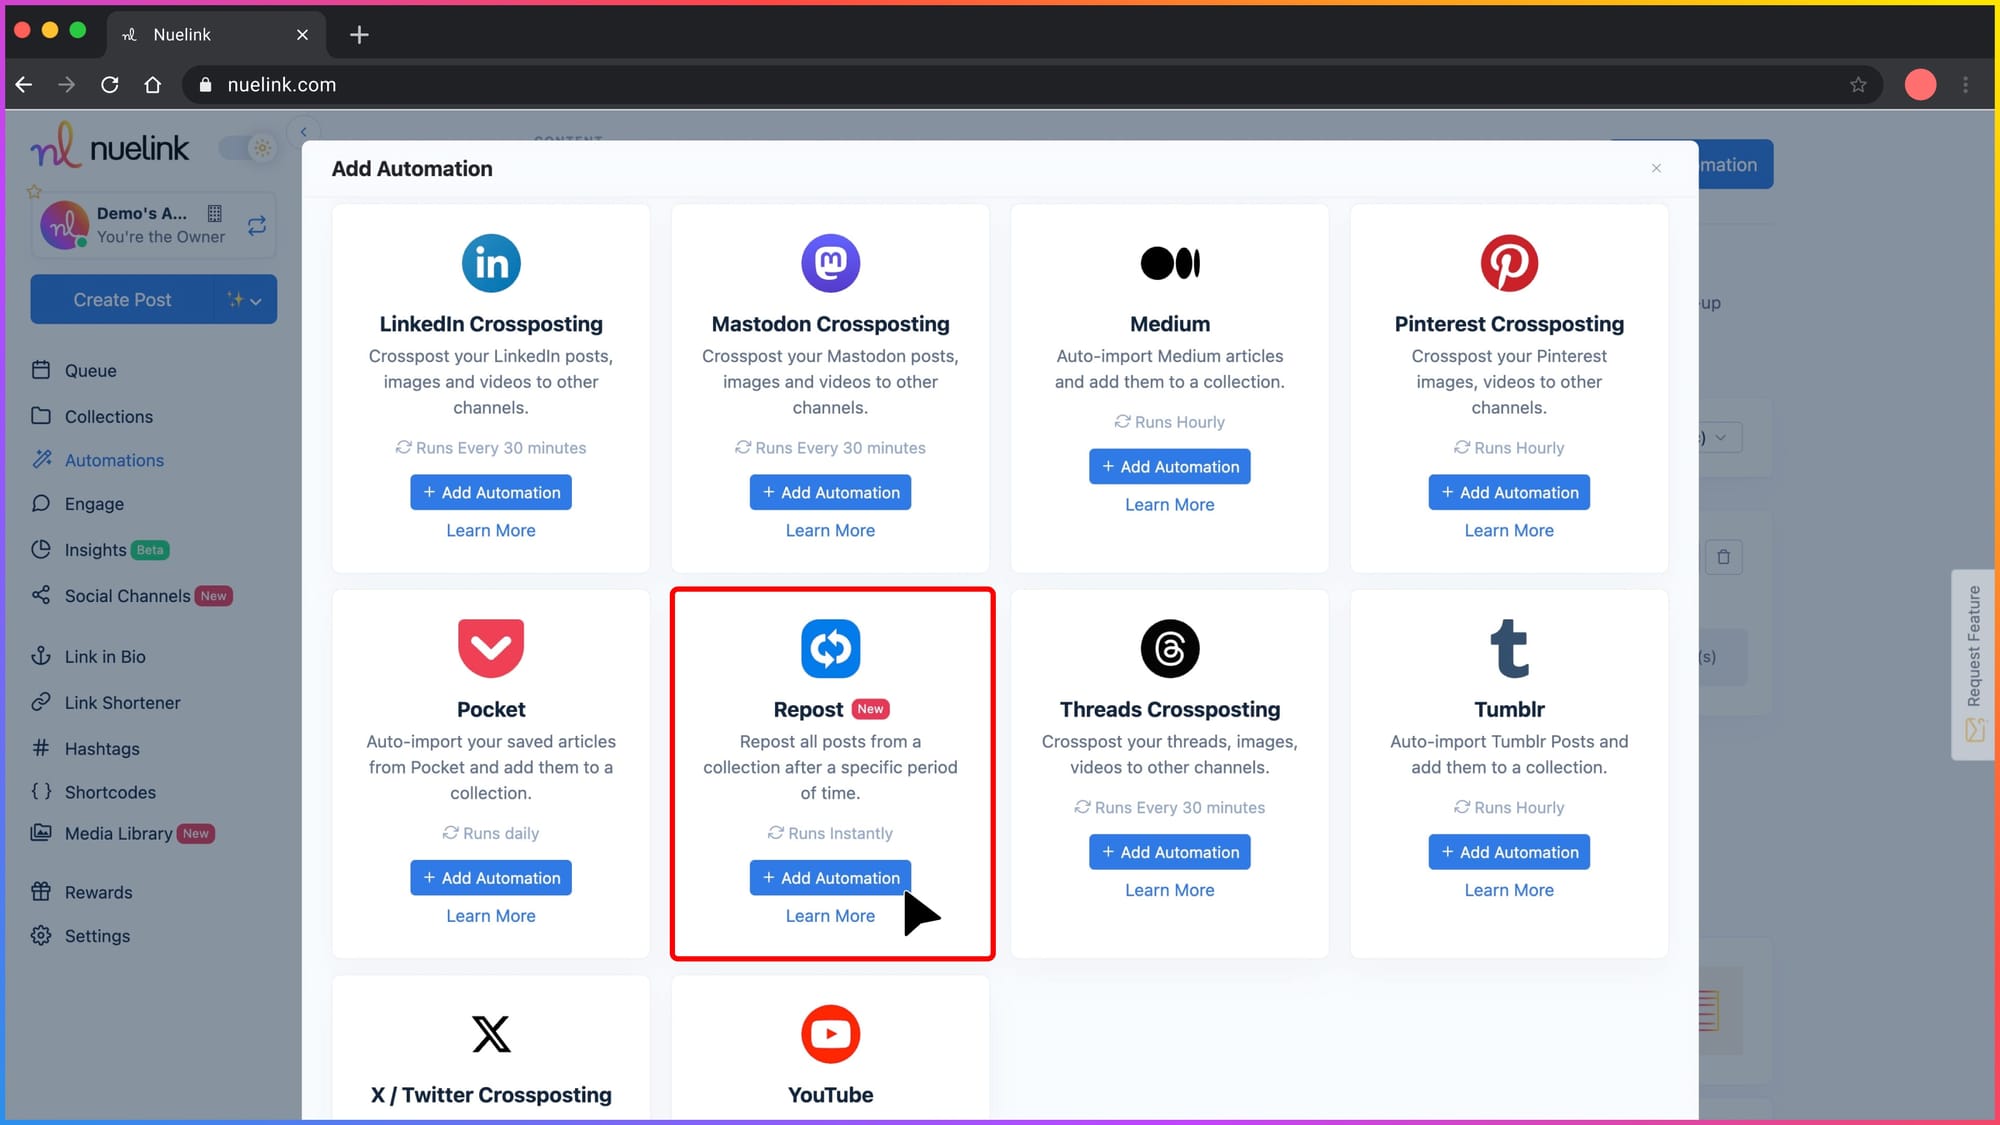
Step 3: Create an Auto Retweet Automation
1️⃣ In the left-hand menu, go to Automations > Add Automation
2️⃣ Click on Social, then select Repost
Note: In Nuelink, “Repost” = Auto Retweet for Twitter.
So don’t worry. You're in the right place!
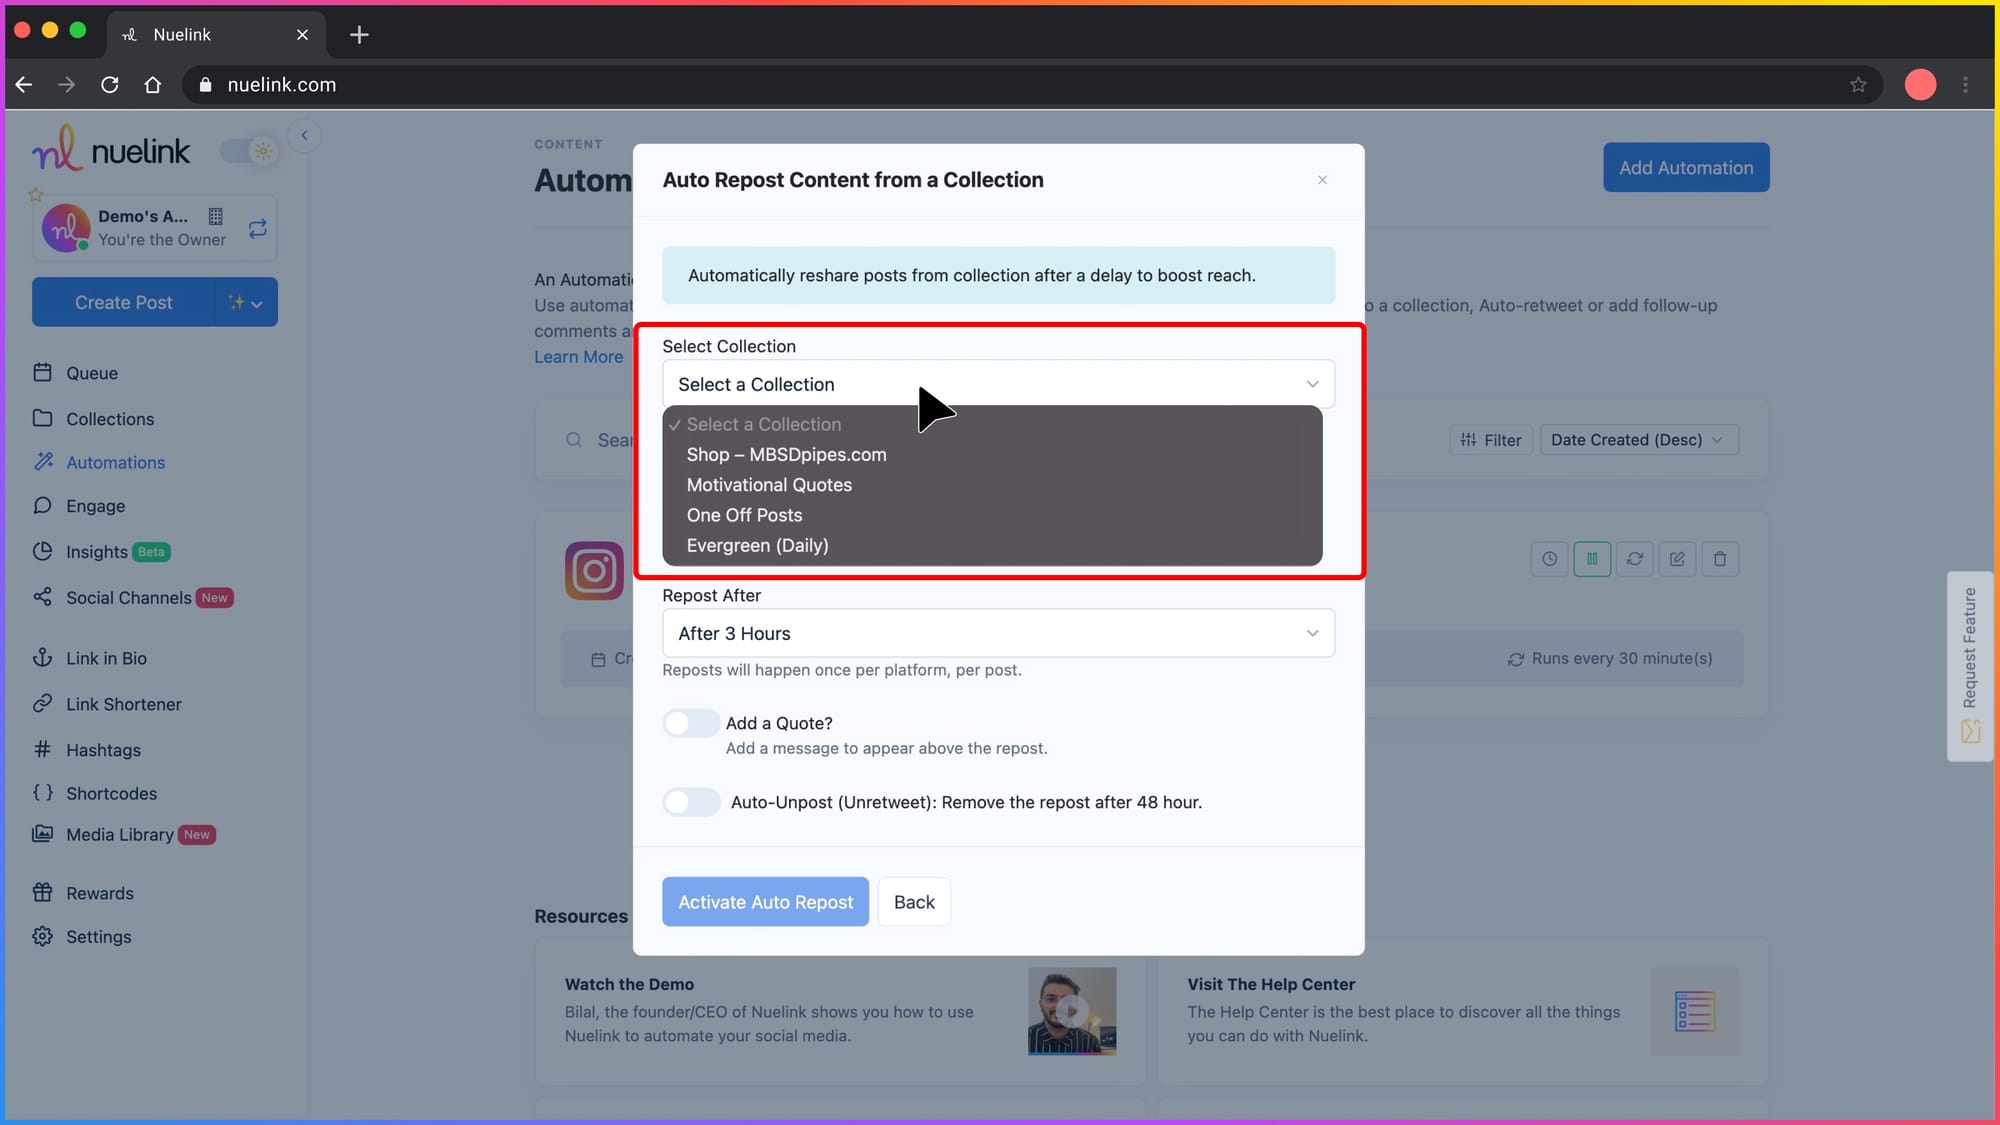
Step 4.1: Select a Collection
From the dropdown menu labeled “Select a Collection,” choose the group of posts you want Nuelink to auto-retweet from.
This collection holds the content you’ve already scheduled or published.
📝 Only one collection can be selected per automation.
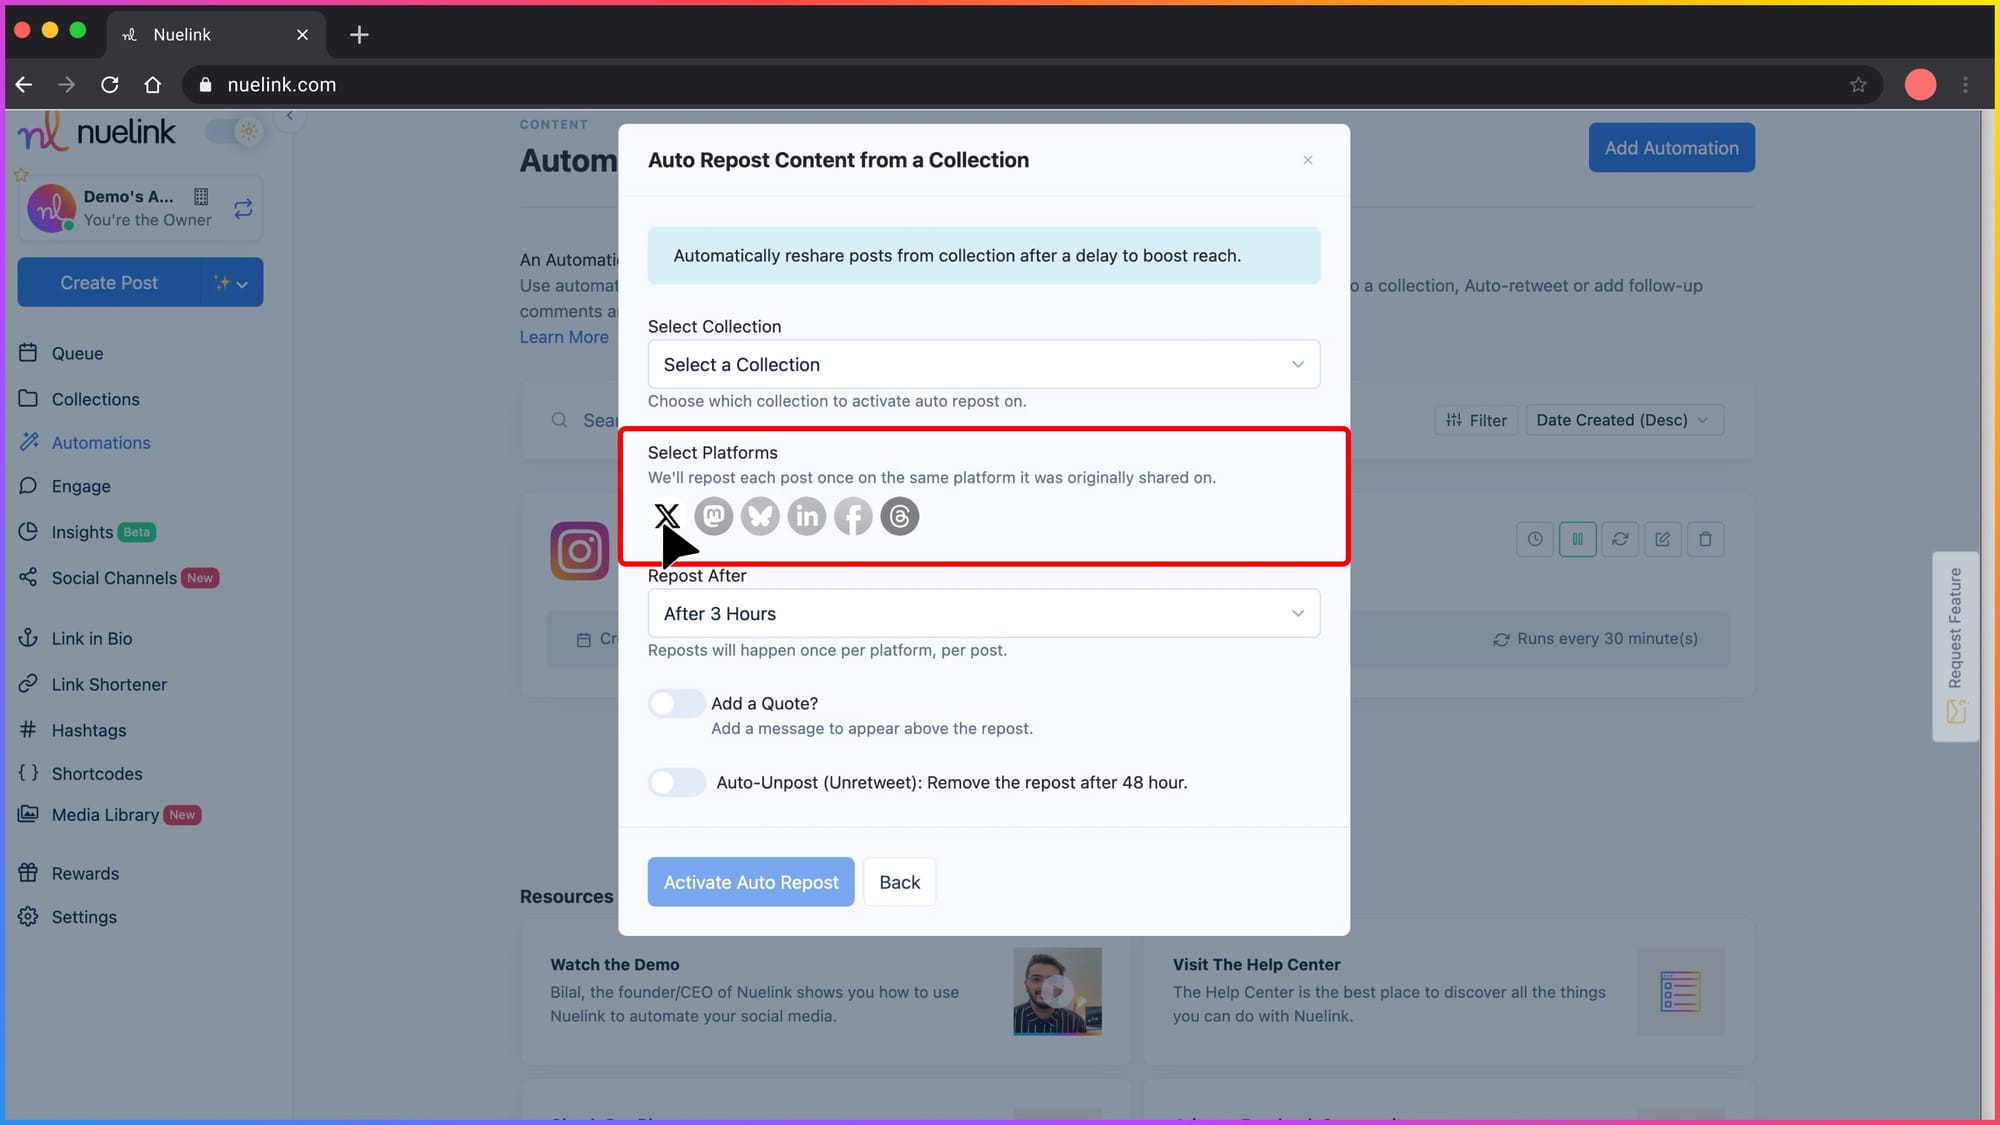
Step 4.2: Select the Platform
Click on the Twitter (X) icon to activate auto reposting for that platform.
Only the platforms you’ve connected will appear in color and be clickable — the rest will stay greyed out.
💡 If Twitter isn't clickable, go back and connect it in your Social Channels settings first.
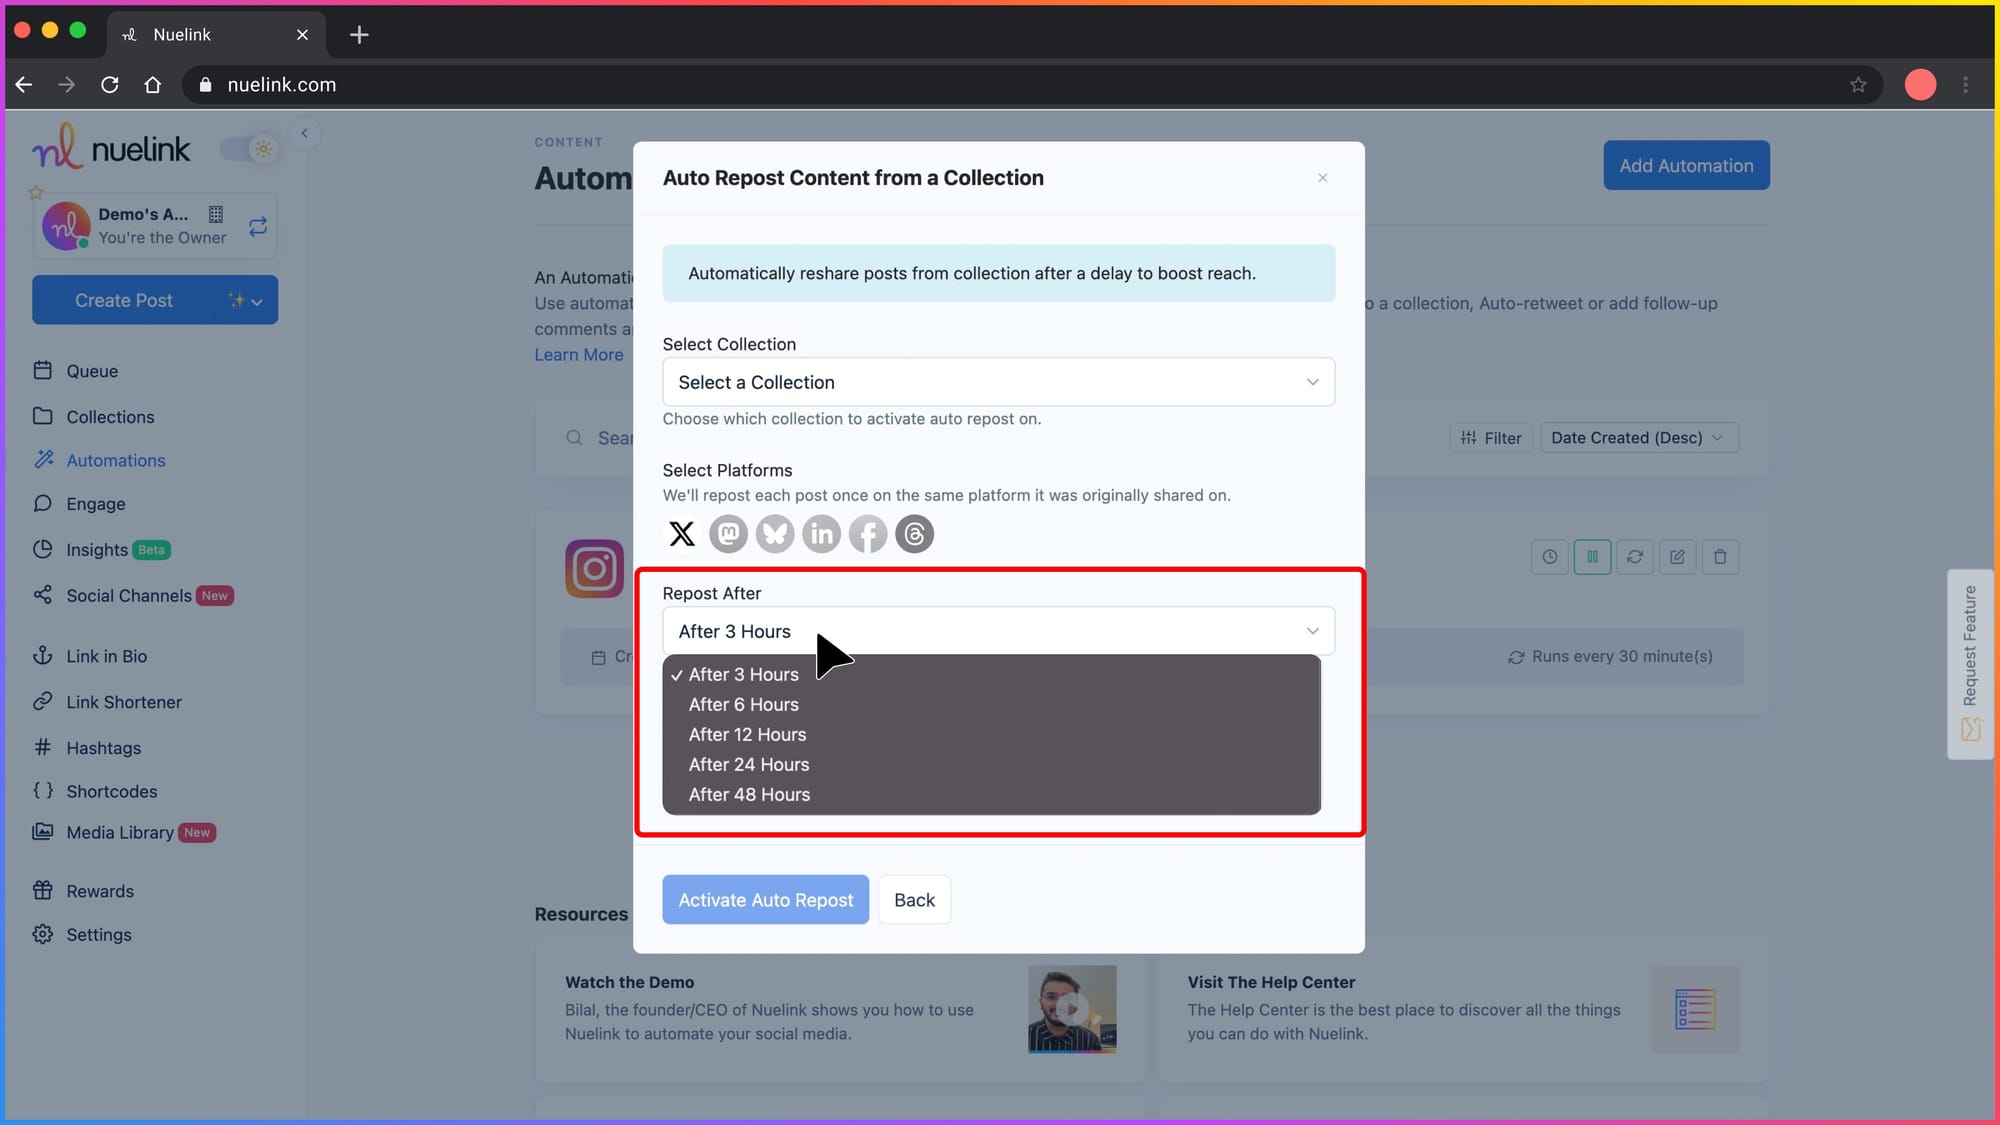
Step 5: Set the Repost Delay
Choose how long Nuelink should wait before retweeting content.
Example: “After 3 Hours” means the post will be reshared 3 hours after it goes live.
You can select:
- ⏱️ After 3 Hours
- ⏱️ After 6 Hours
- ⏱️ After 12 Hours
- ⏱️ After 24 Hours
- ⏱️ After 48 Hours
Select a delay that aligns with your audience’s activity patterns.
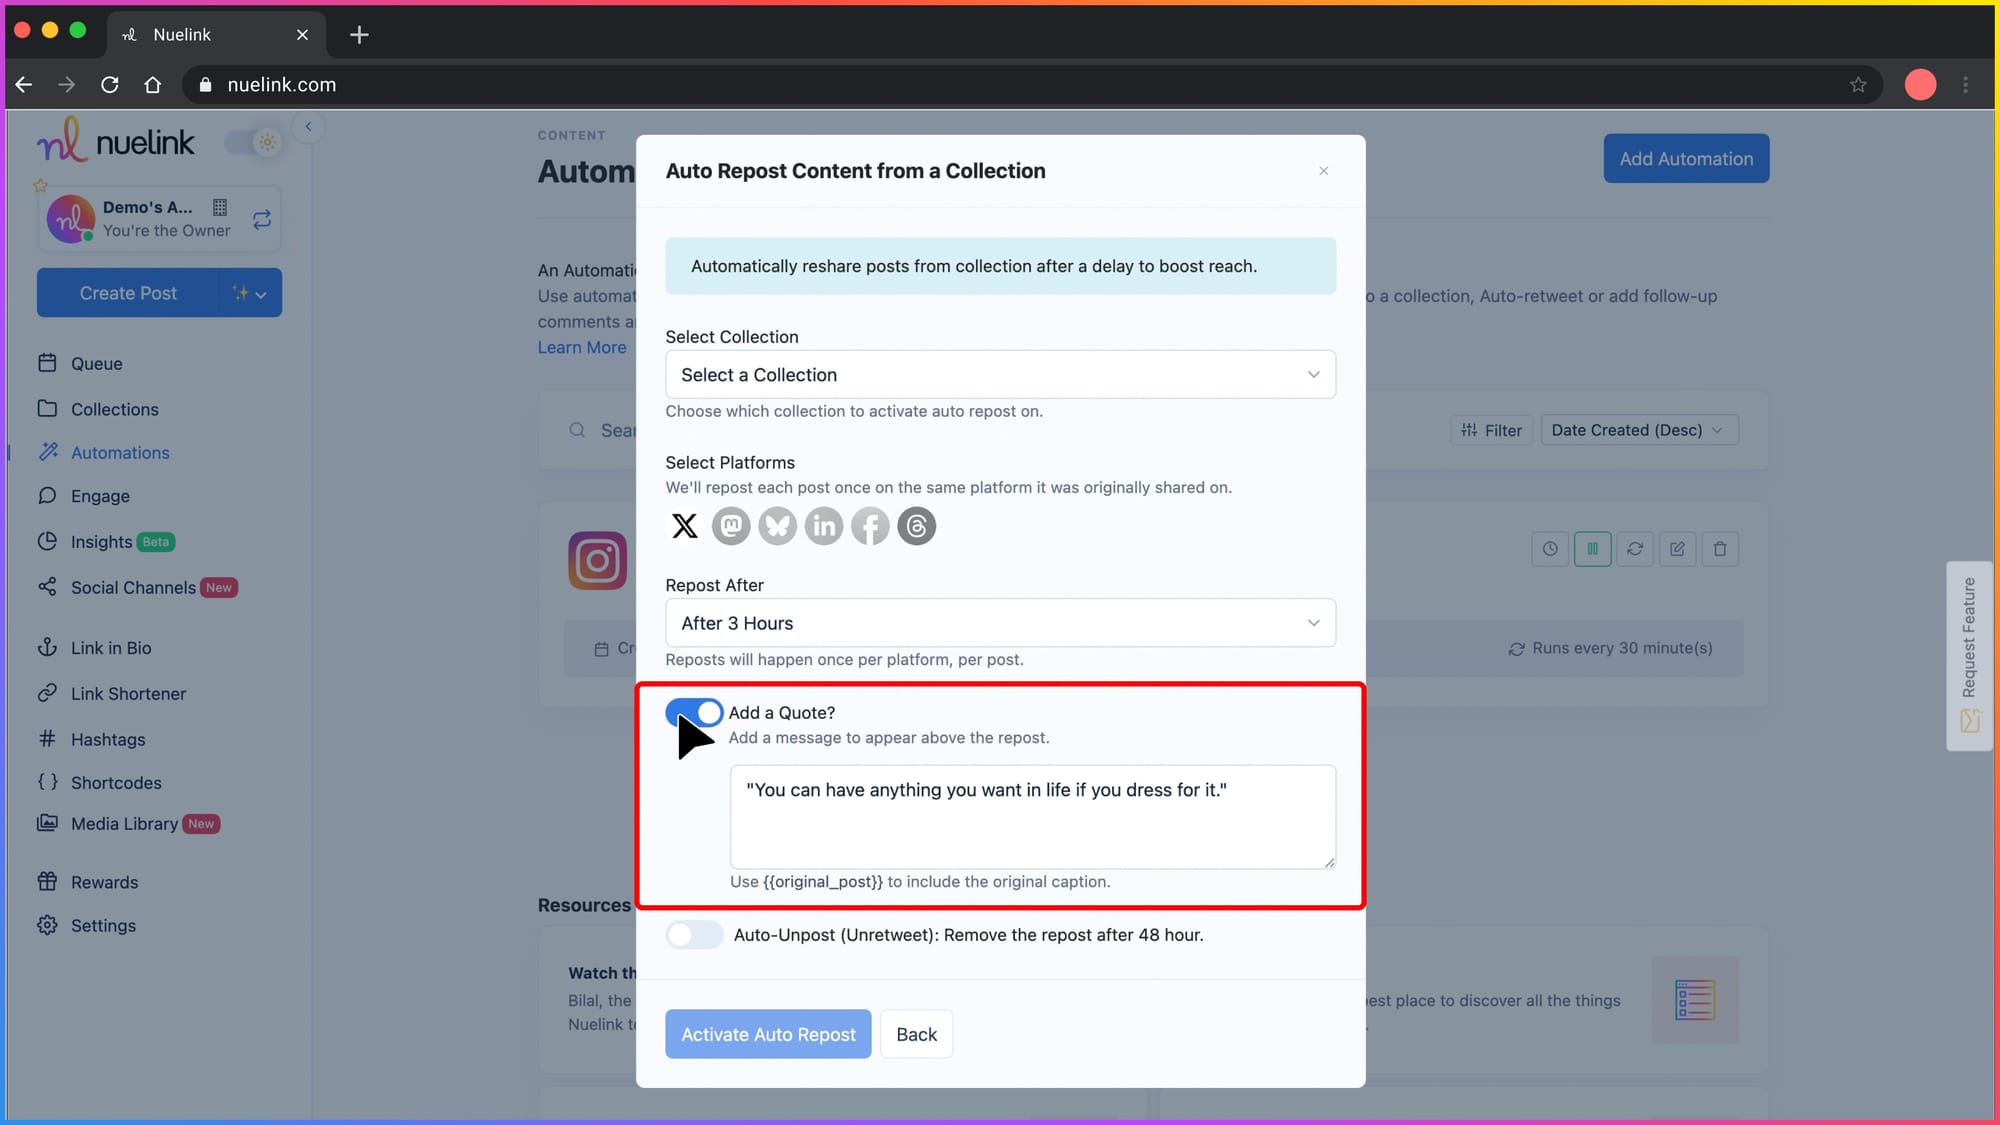
Step 6: Add a Custom Quote (Optional)
If you want a message to appear above the repost, switch on “Add a Quote” and write your message.
You can use {{original_post}} to insert the original content.
Example: “Missed this? {{original_post}}”
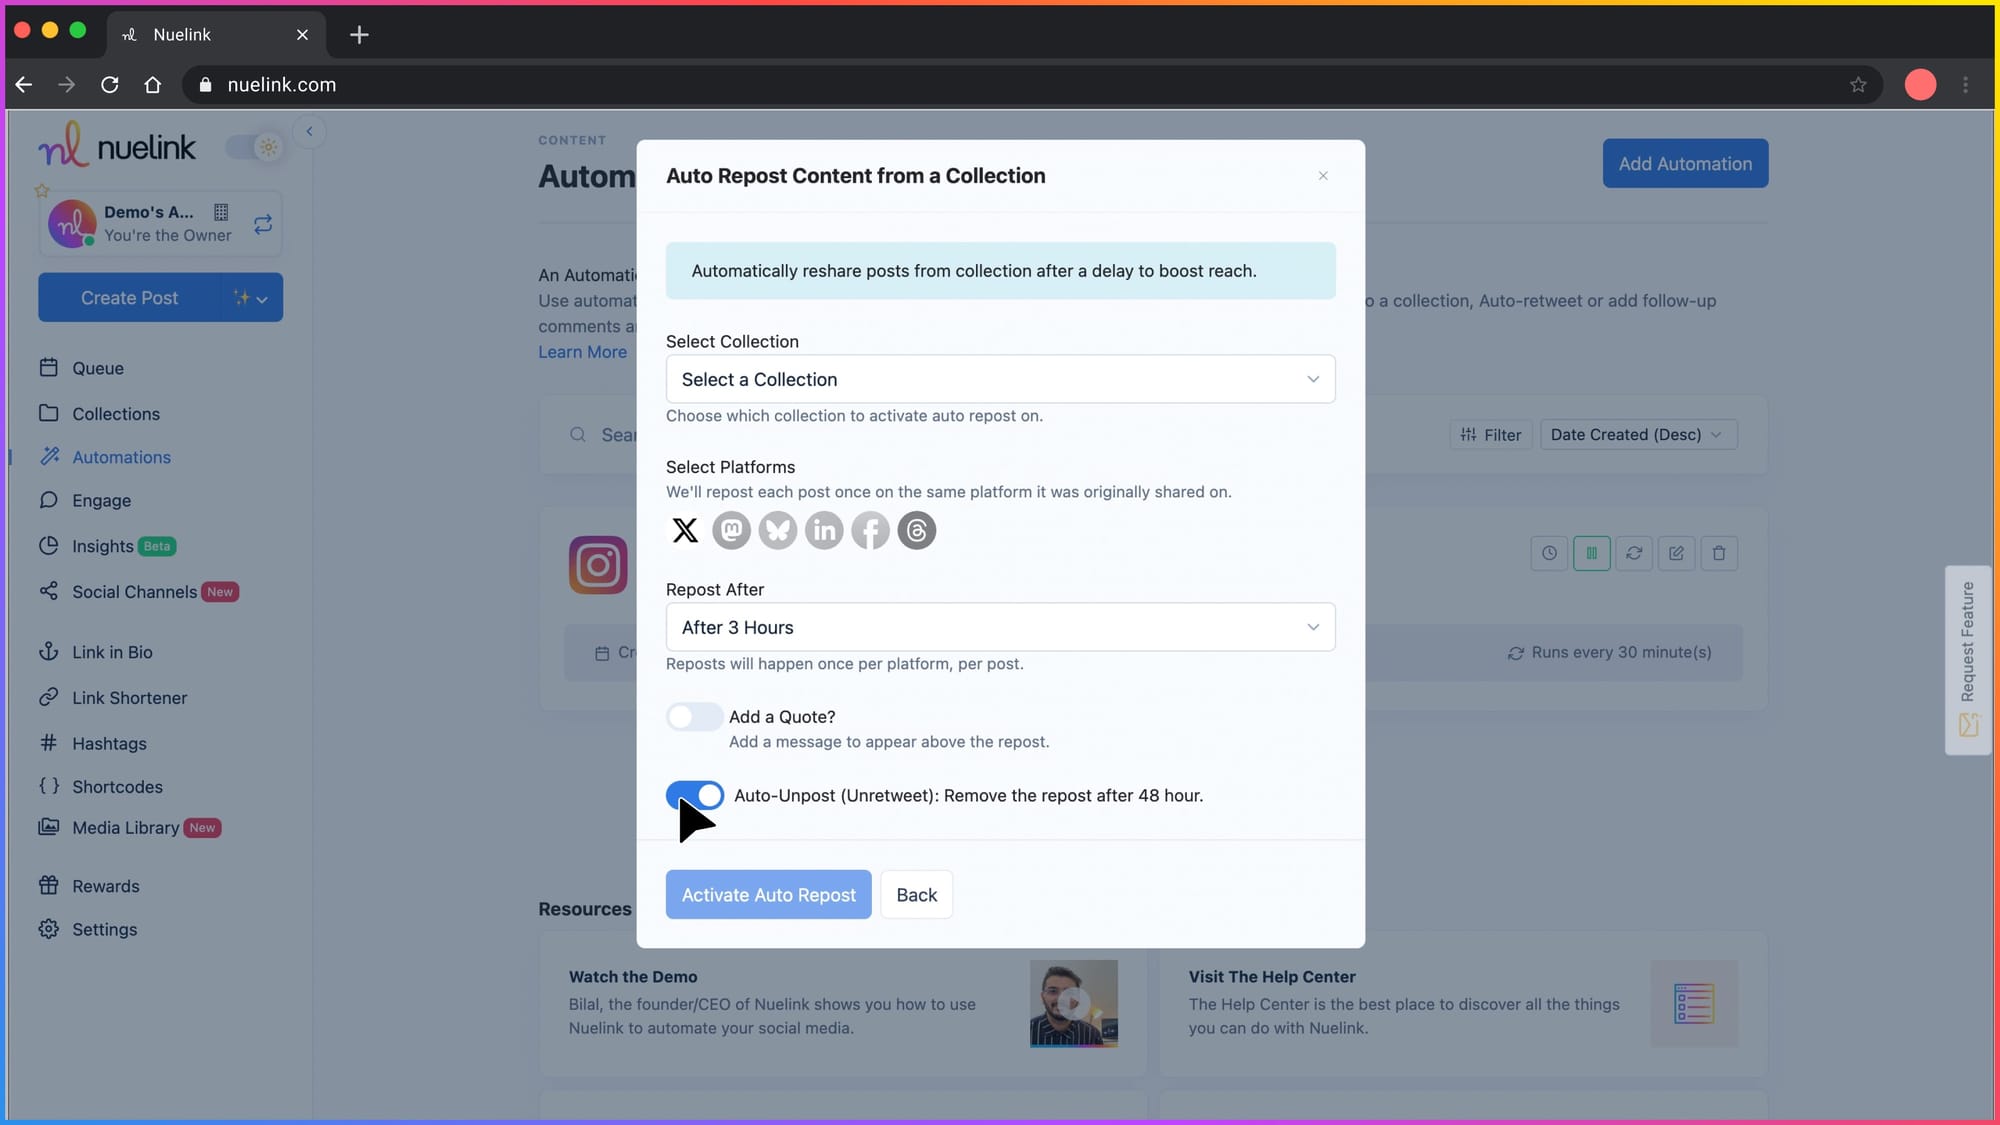
Step 7: Enable Auto-Unpost (Optional)
Turn this on if you want the retweet to disappear automatically after 48 hours.
Great for keeping your feed clean.
Step 8: Click “Activate Auto Repost.”
Once everything looks good, click on the active auto repost to turn on the automation.
Once your original tweet is published, Nuelink will:
- Wait 6 hours (or whatever delay you selected),
- Add your custom message above the retweet.
- Automatically retweet the post to boost its reach,
- And then, remove the retweet after 48 hours to keep your feed clean.
All of this happens automatically. No manual work needed


